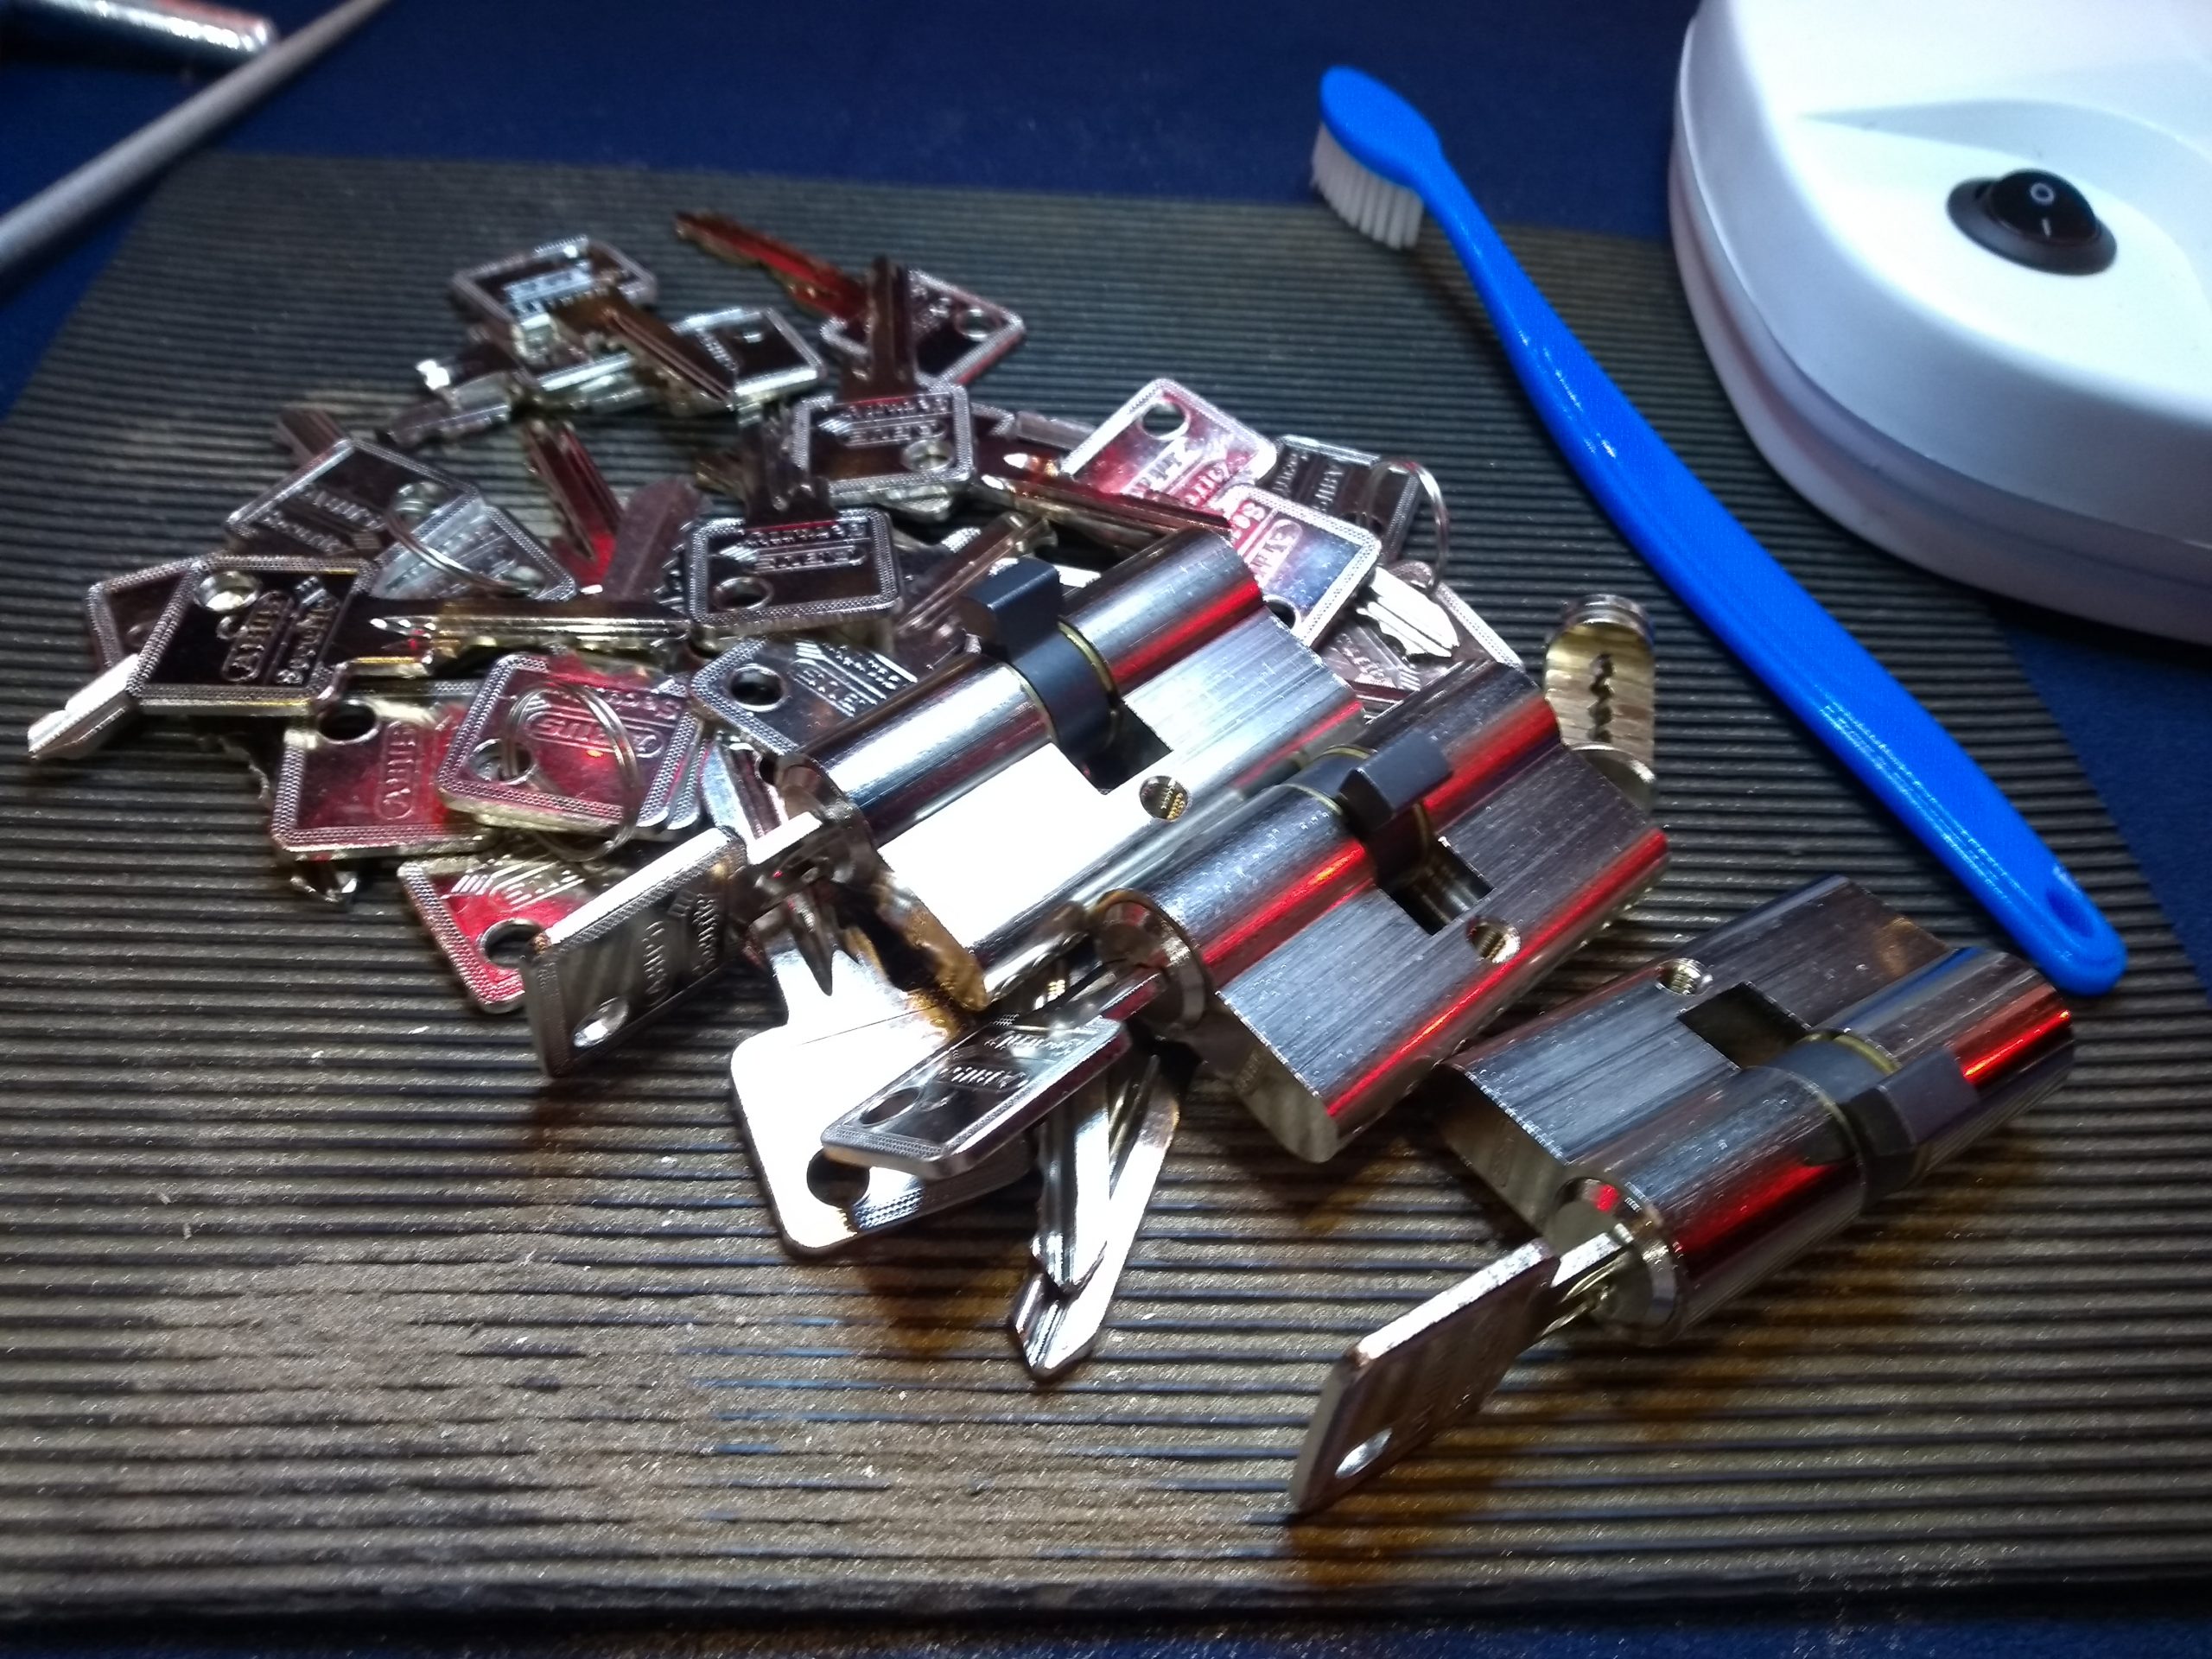
In a previous blog post, I’ve written about Qikom’s cutaways. Whereas, this post is a tangent on why we would like to see more cutaways made and the knowledge shared.
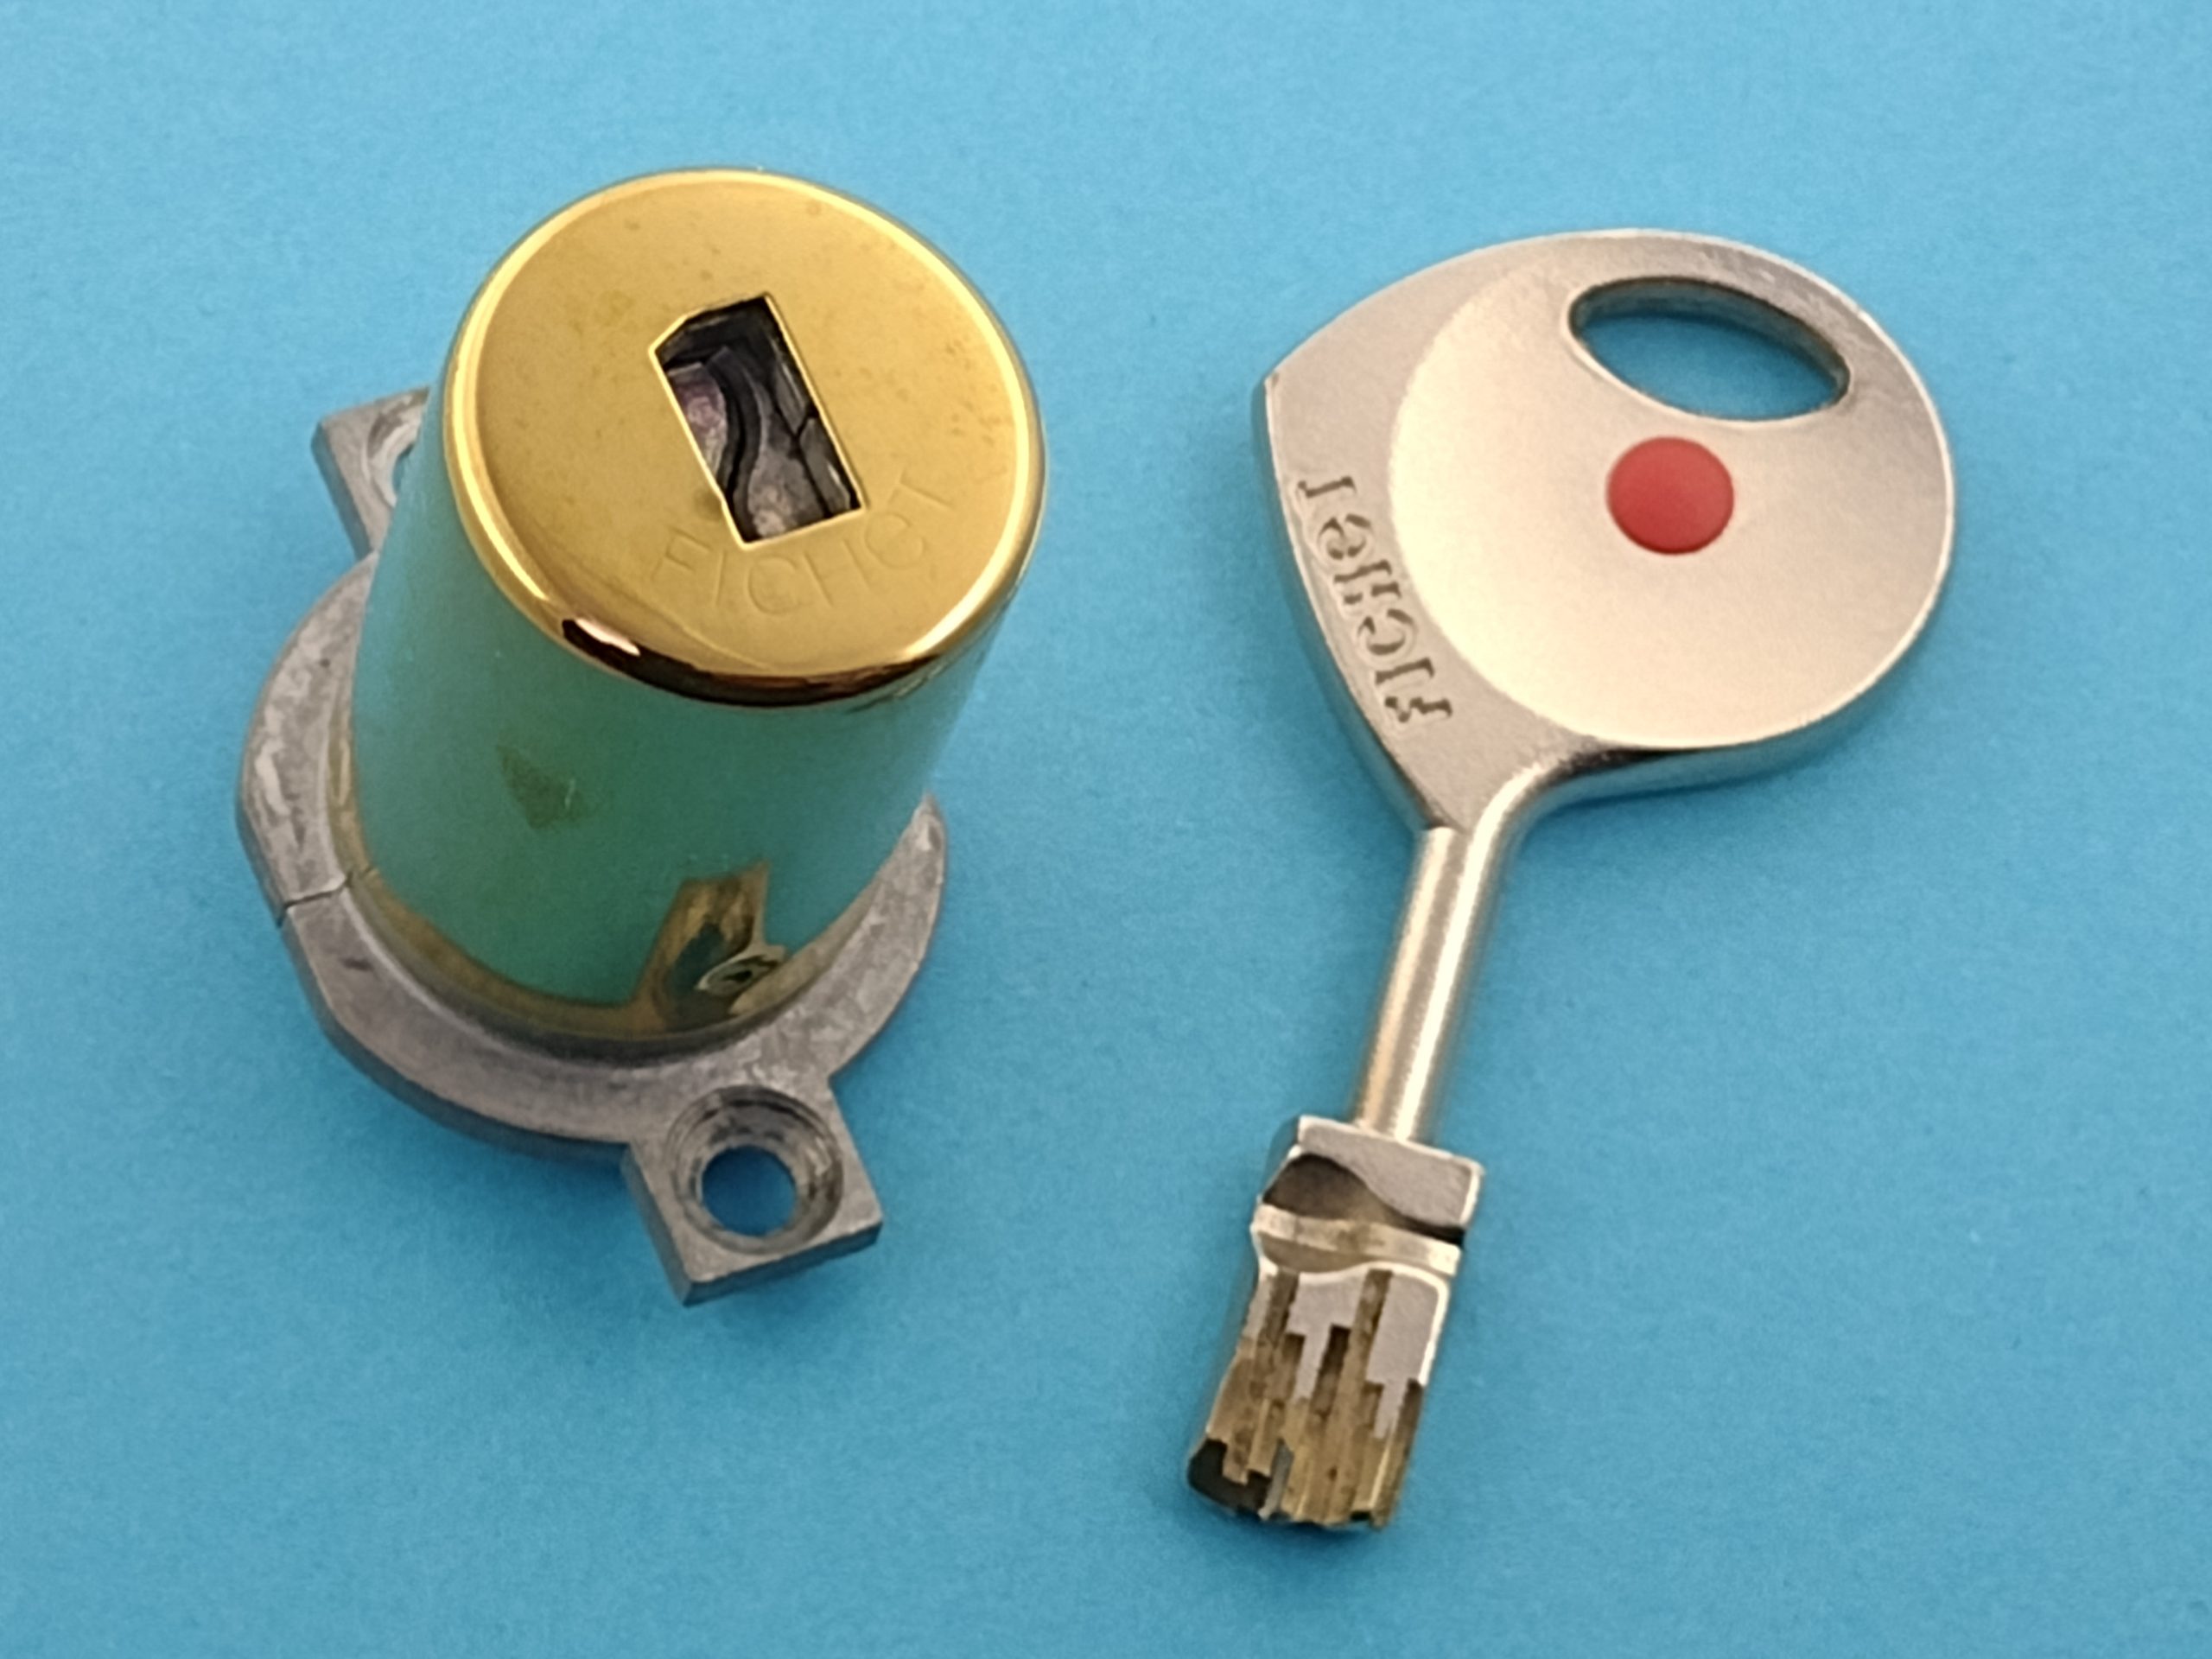
When we teach beginners, and show them a unique lock, often they can’t imagine what happens in the lock. As all they can see is the outside. To illustrate this, let’s play a short game with a Fichet 787. The key looks quite interesting, as it has half a dozen cutouts on each side. It’s not symmetrical, and can only be inserted in the keyway in one direction. You feel a spring pushing against the key, but at rotation it seems to be like any other lock.
If you haven’t seen this lock before, take a moment to imagine what the internals are like.
Fichet 787. CC-BY-4.0 Jan-Willem, Toool Blackbag
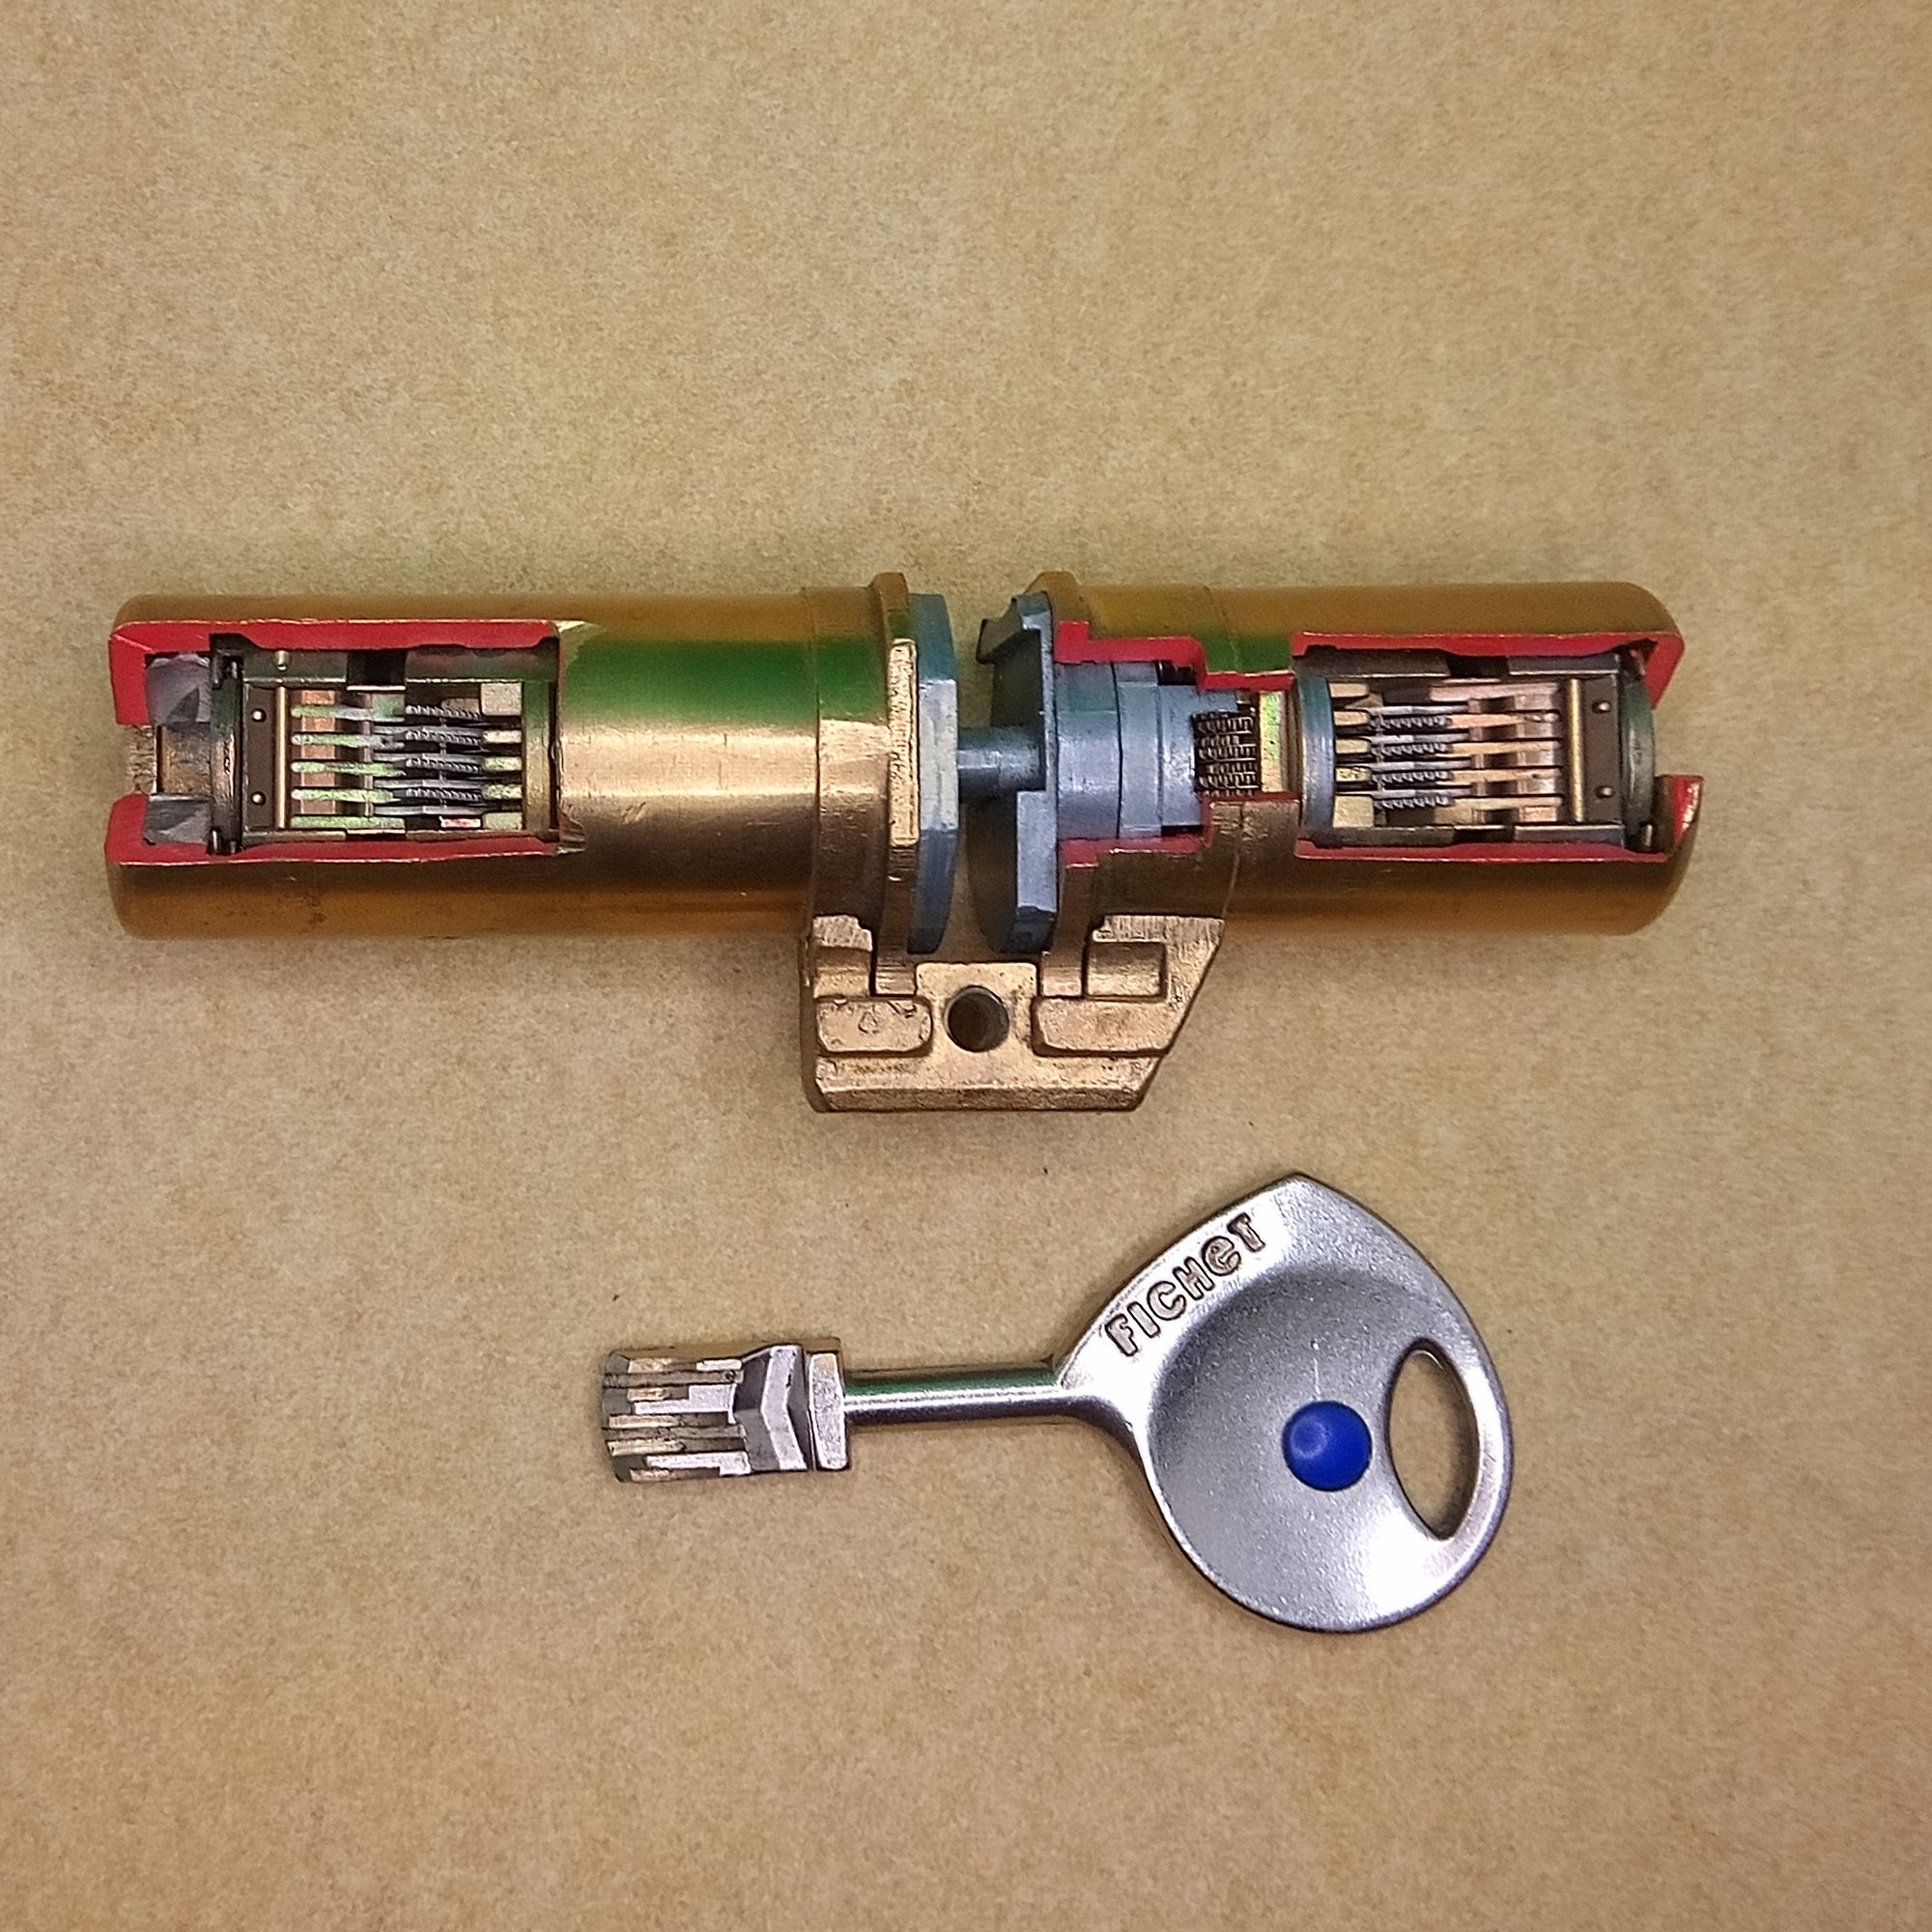
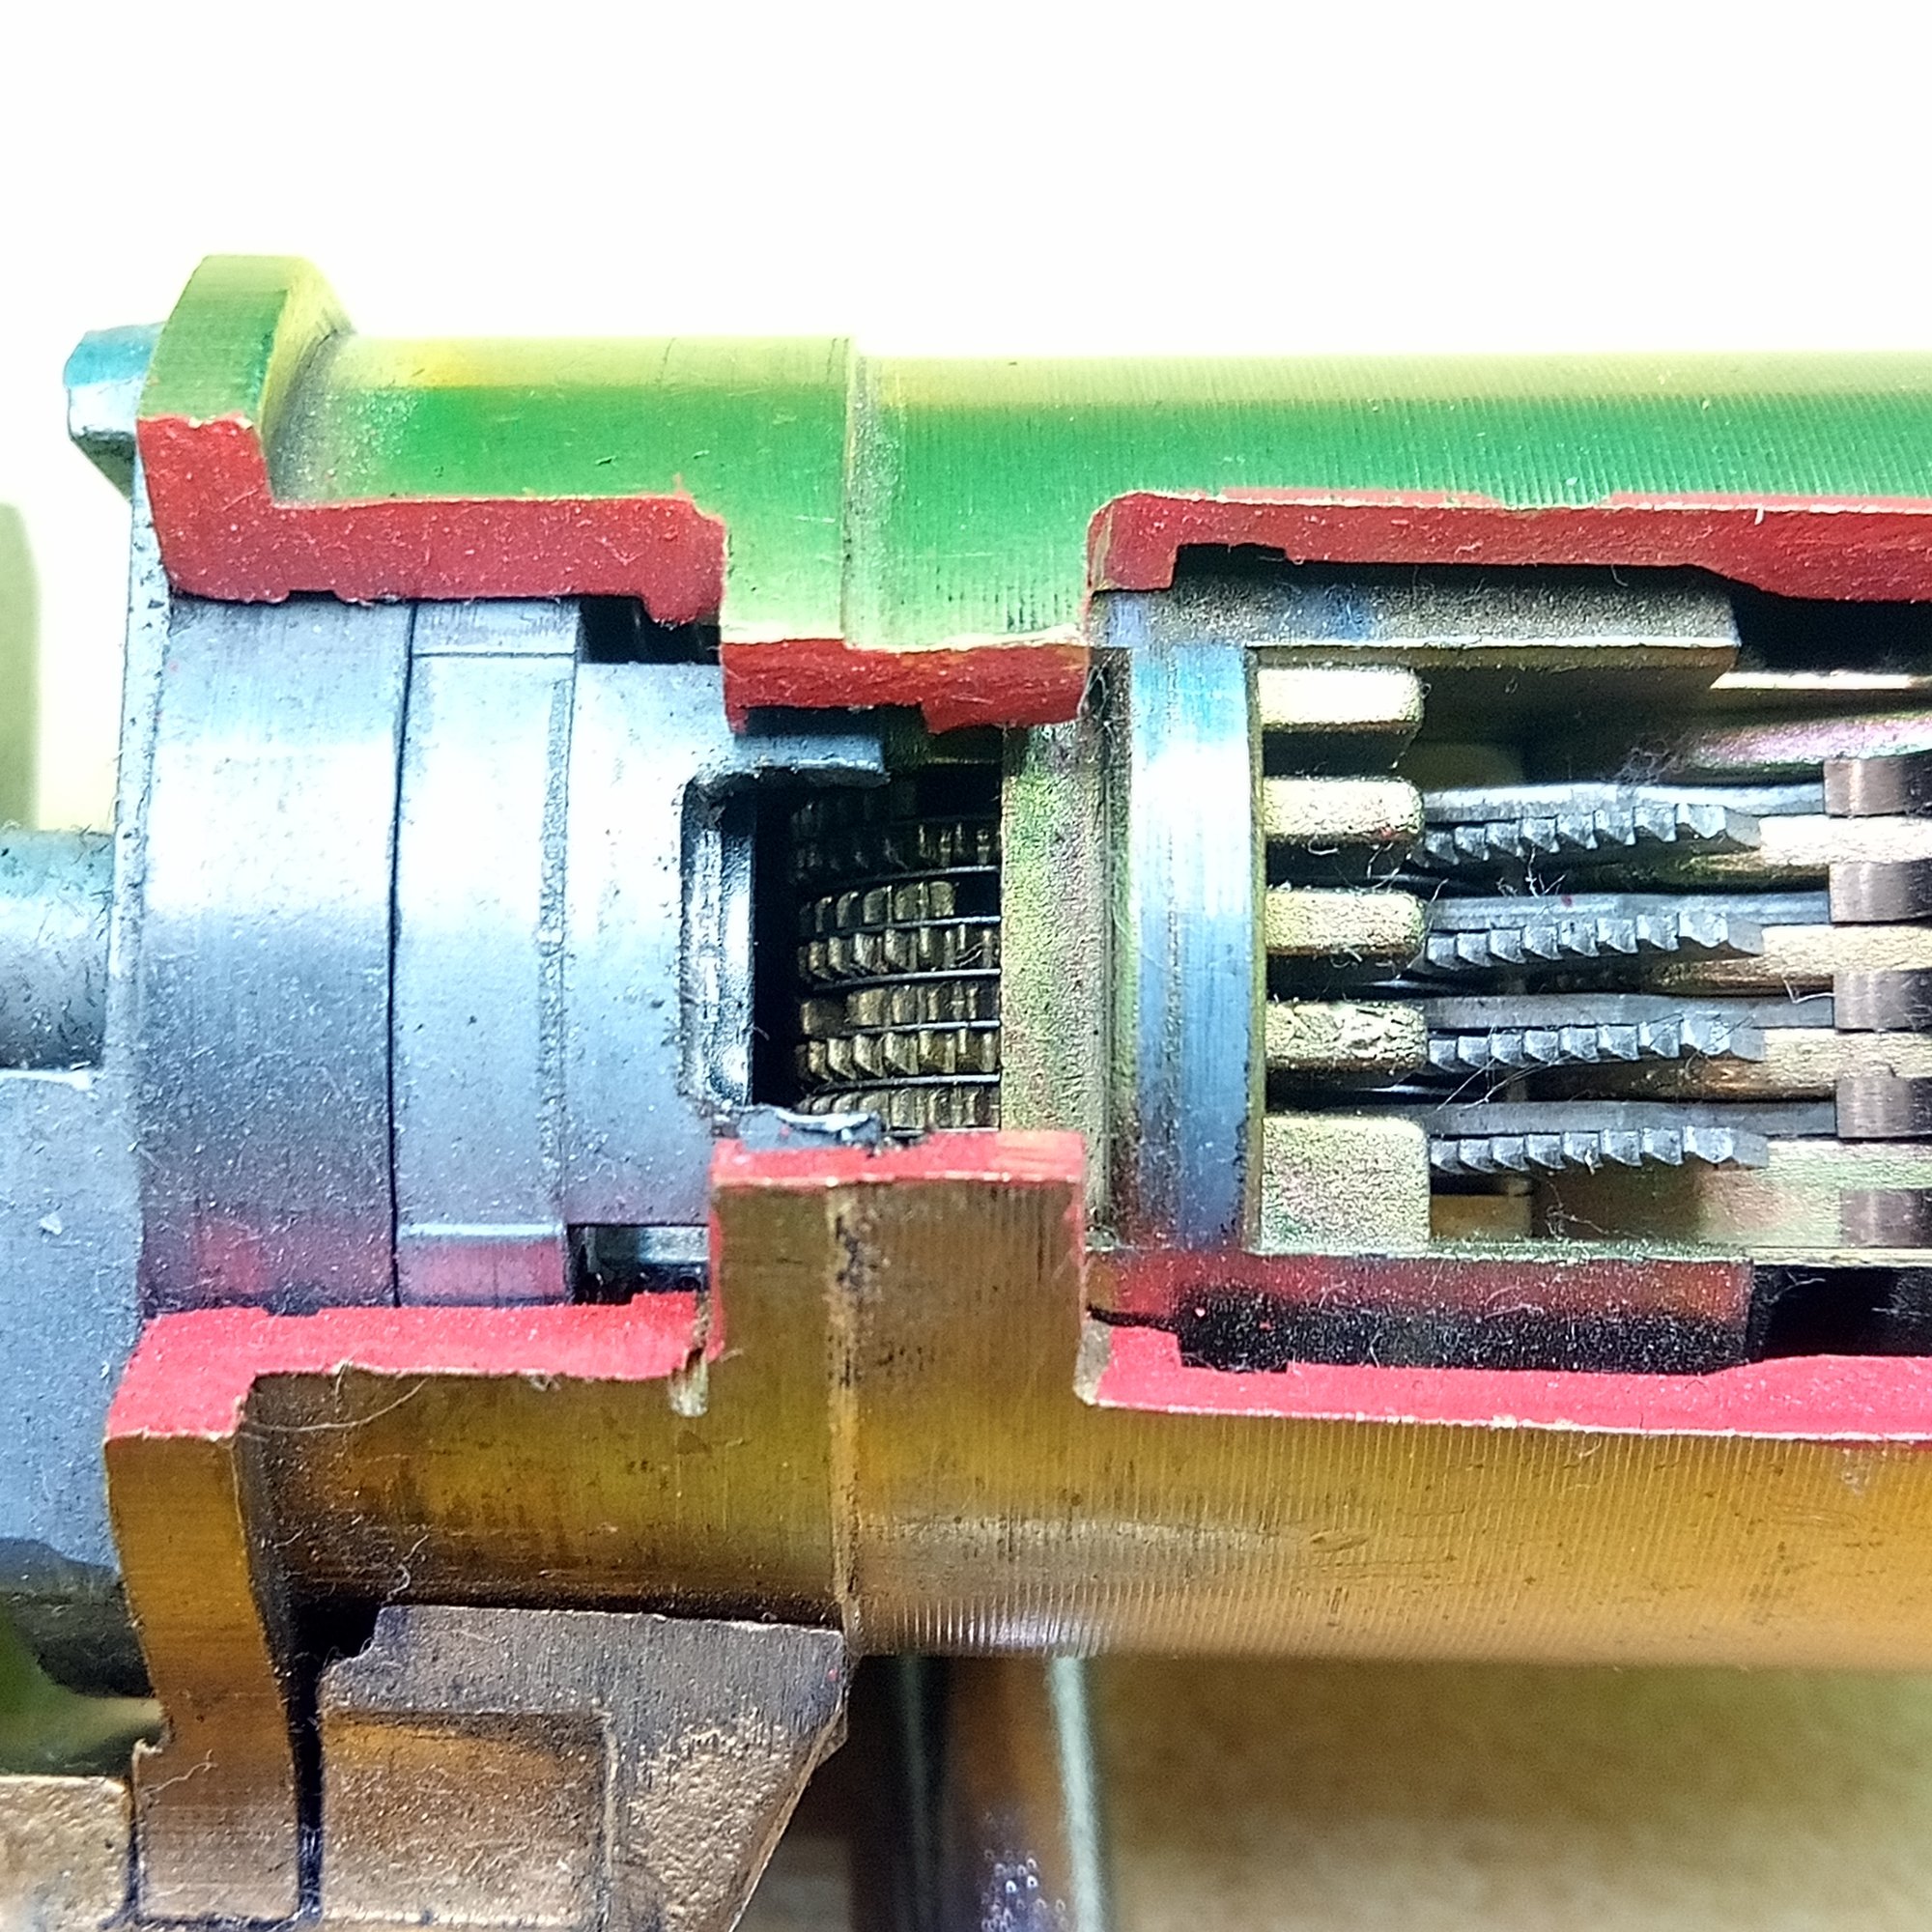
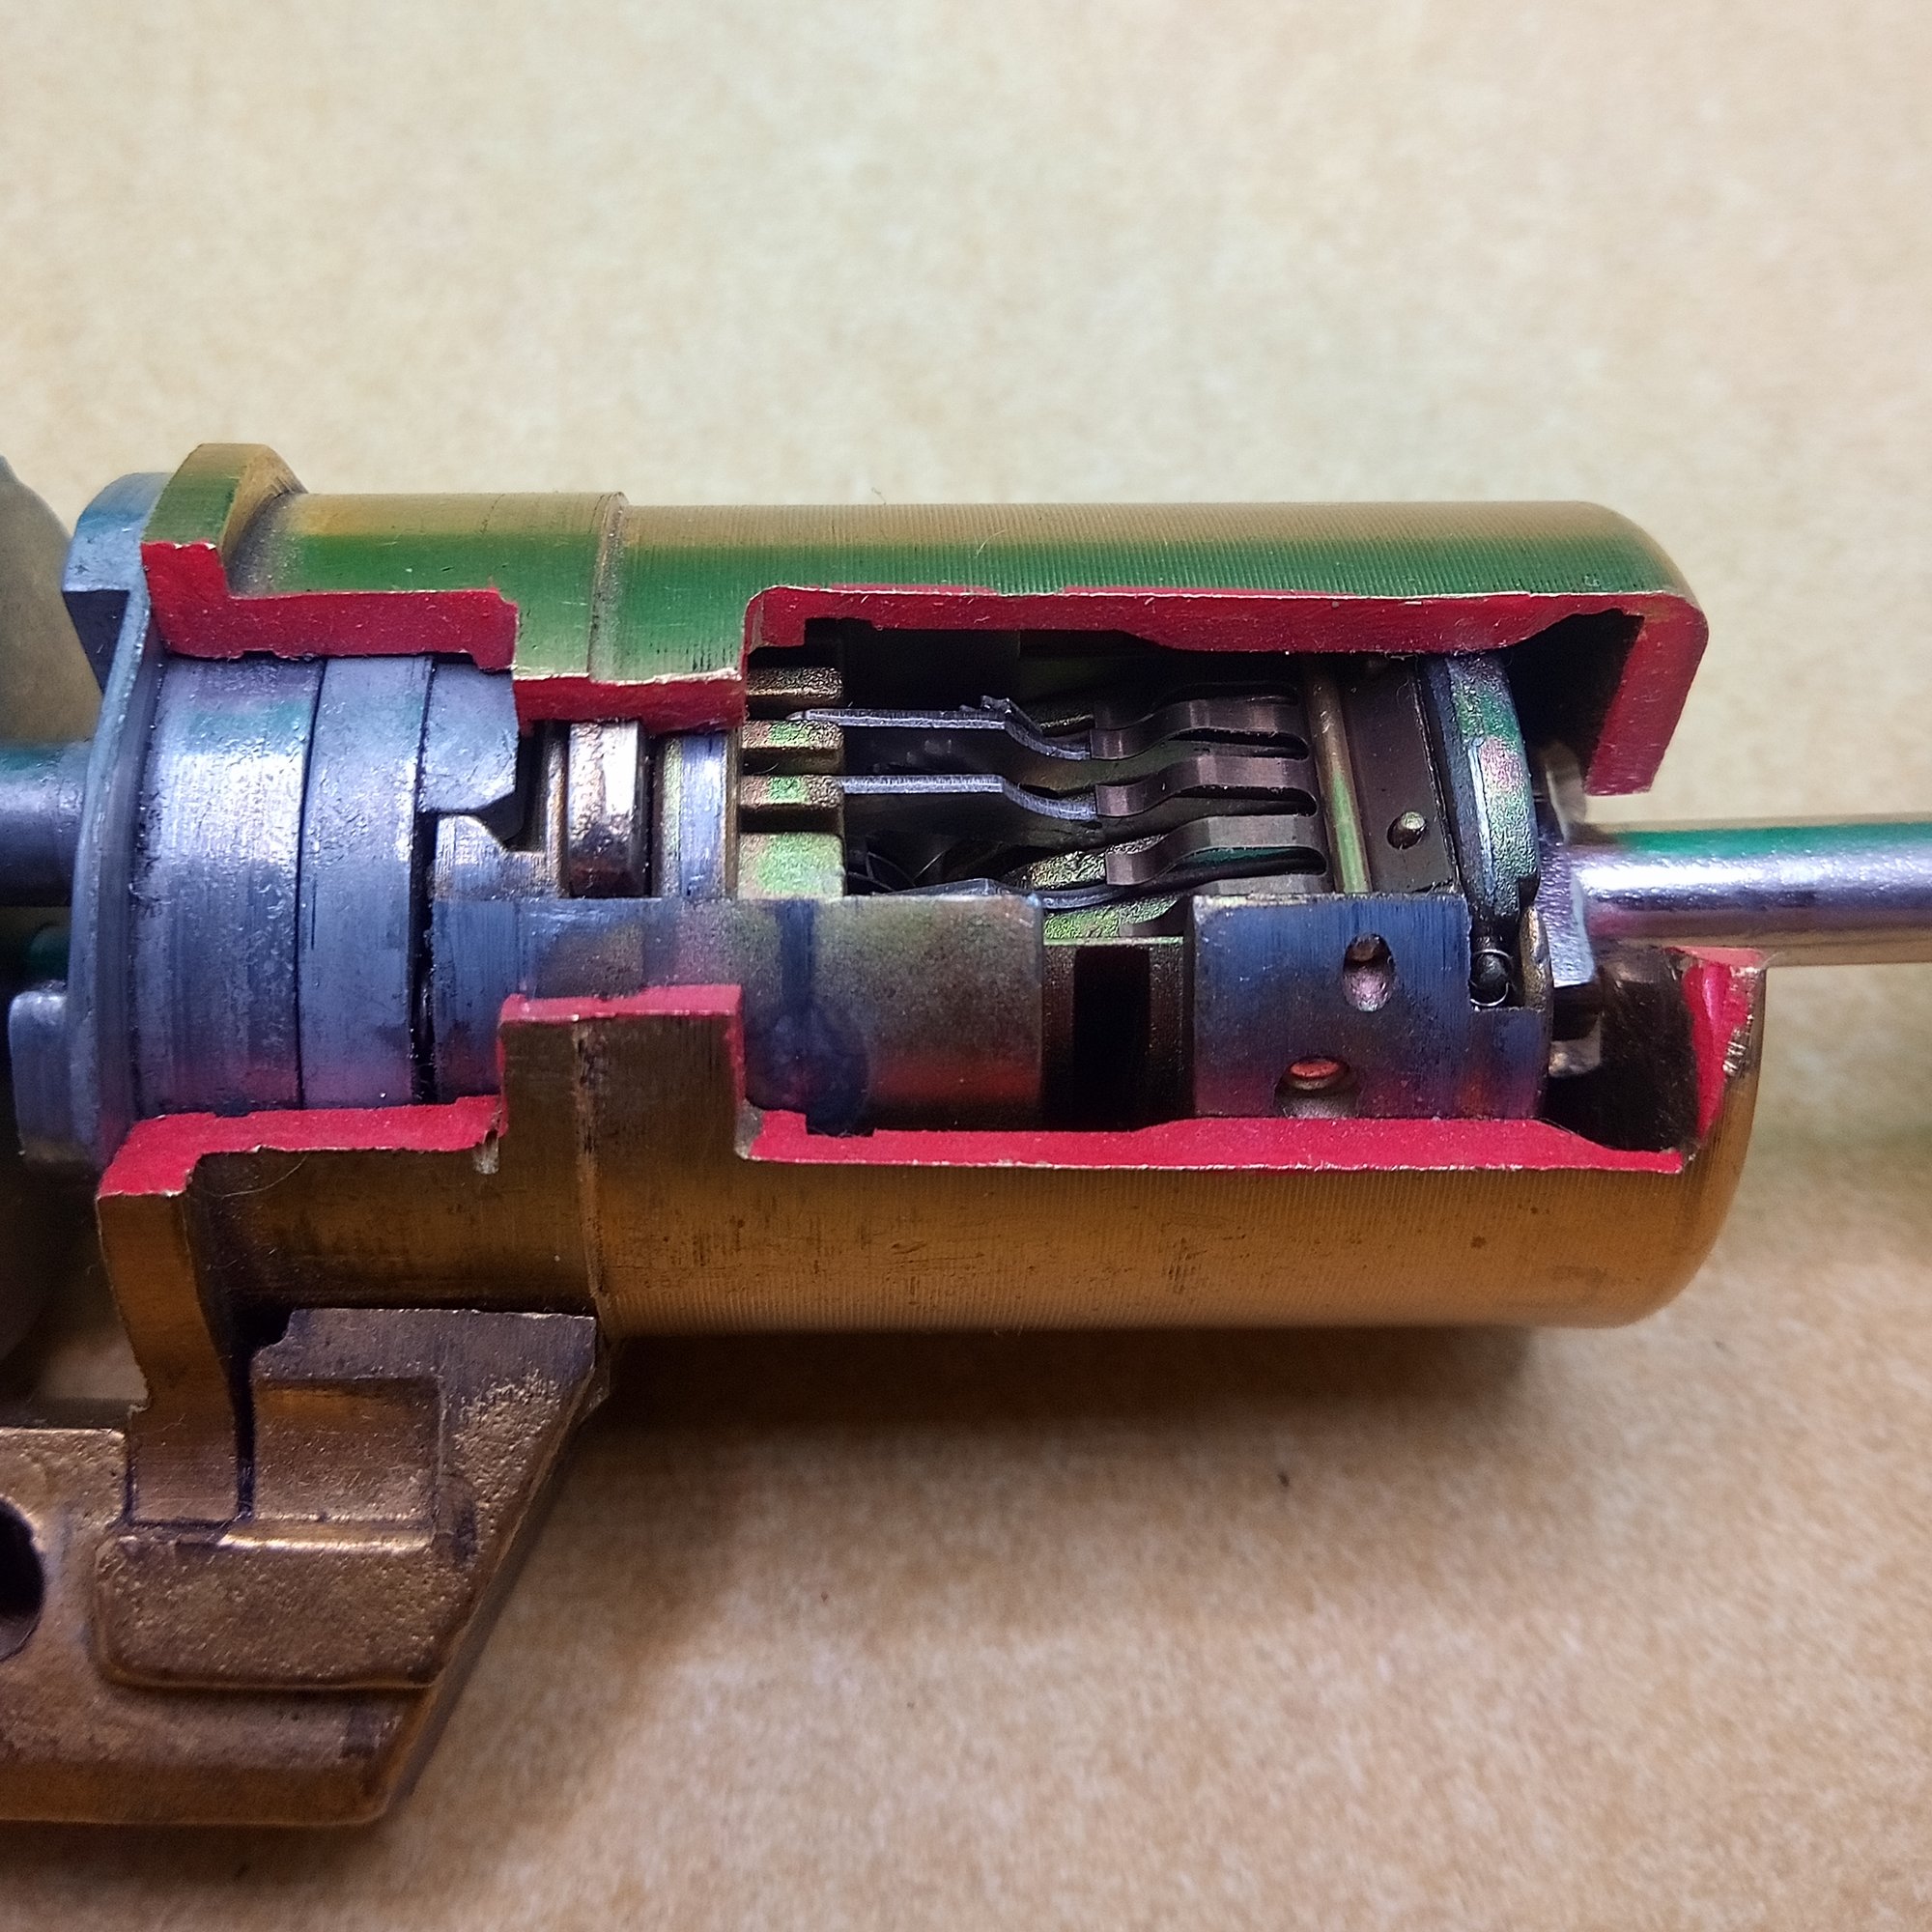
It’s quite obvious where I’m going with this. There can be almost anything inside the shiny cylinder. It will be very difficult to find the solution without taking it a part, or looking at a diagram. The cutaway, like the one from Qikom below, shows the internals from the lock. Reducing the guess work over a picture of the parts.
Qikom Fichet 787 Cutaway CC BY-NC-SA 4.0Qikom Fichet 787 Cutaway; The interaction between the lever pack and the gears. CC BY-NC-SA 4.0Qikom Fichet 787 Cutaway; The lock is open. CC BY-NC-SA 4.0
Is it anything like you imagined it to be?
What does the 787 do? The Fichet 787, is a push lever lock. Where the push action allows the lateral movement of the levers to rotate a set of gears to the opening position. The sidebar is a passive element that checks if the gears are all aligned. With the correct key, the cylinder moves inwards, clears a blocking element, and is able to rotate. At the same time, the key is trapped by two half circle disks.
It is quite possible you have seen this lock before, as it has been around for decades. I’ve learned about the lock in 2018, and recently expanded the knowledge at the Association des Crocheteurs de France lock conference in December 2022. I’ve learned the dovetail, which connects the cam to the core, is a fairly recent addition that prevents a (partially) destructive attack, for example.
French locks are my favorite weird lock designs, where Fichet is king. The ingenuity is admirable, with many clever ways to solve the same problem…
In an effort to quantify the locksport world, I’m taking my measuring tools to locksport in an attempt to learn the details. For example, how much torque is required to pick a lock. With this knowledge, we can build better lockpicks, and teach proper technique. In this blog, I’ve set out to compare the hardness of key blanks for impressioning.
As I’m not a machinist, nor do I have access to fancy hardness measuring equipment, I’ve found the cheapest method I could use at home. There are many methods, and many systems, to measure the hardness of metal. One difficulty was to get familiar with the lingo and to find a measurement tool that works for key like metals, thin, soft, etc.
The most common method of cheap hardness testing is to use Rockwell hardness testing files from measuring hardness of knifes. Usually in the range of C40 to C65 in increments of five. I’ve found similar methods online for testing the hardness of lead with pencils. Where HB hardness pencil will be equivalent to a certain percentage lead in tin. To my knowledge, none such system exists for brass.
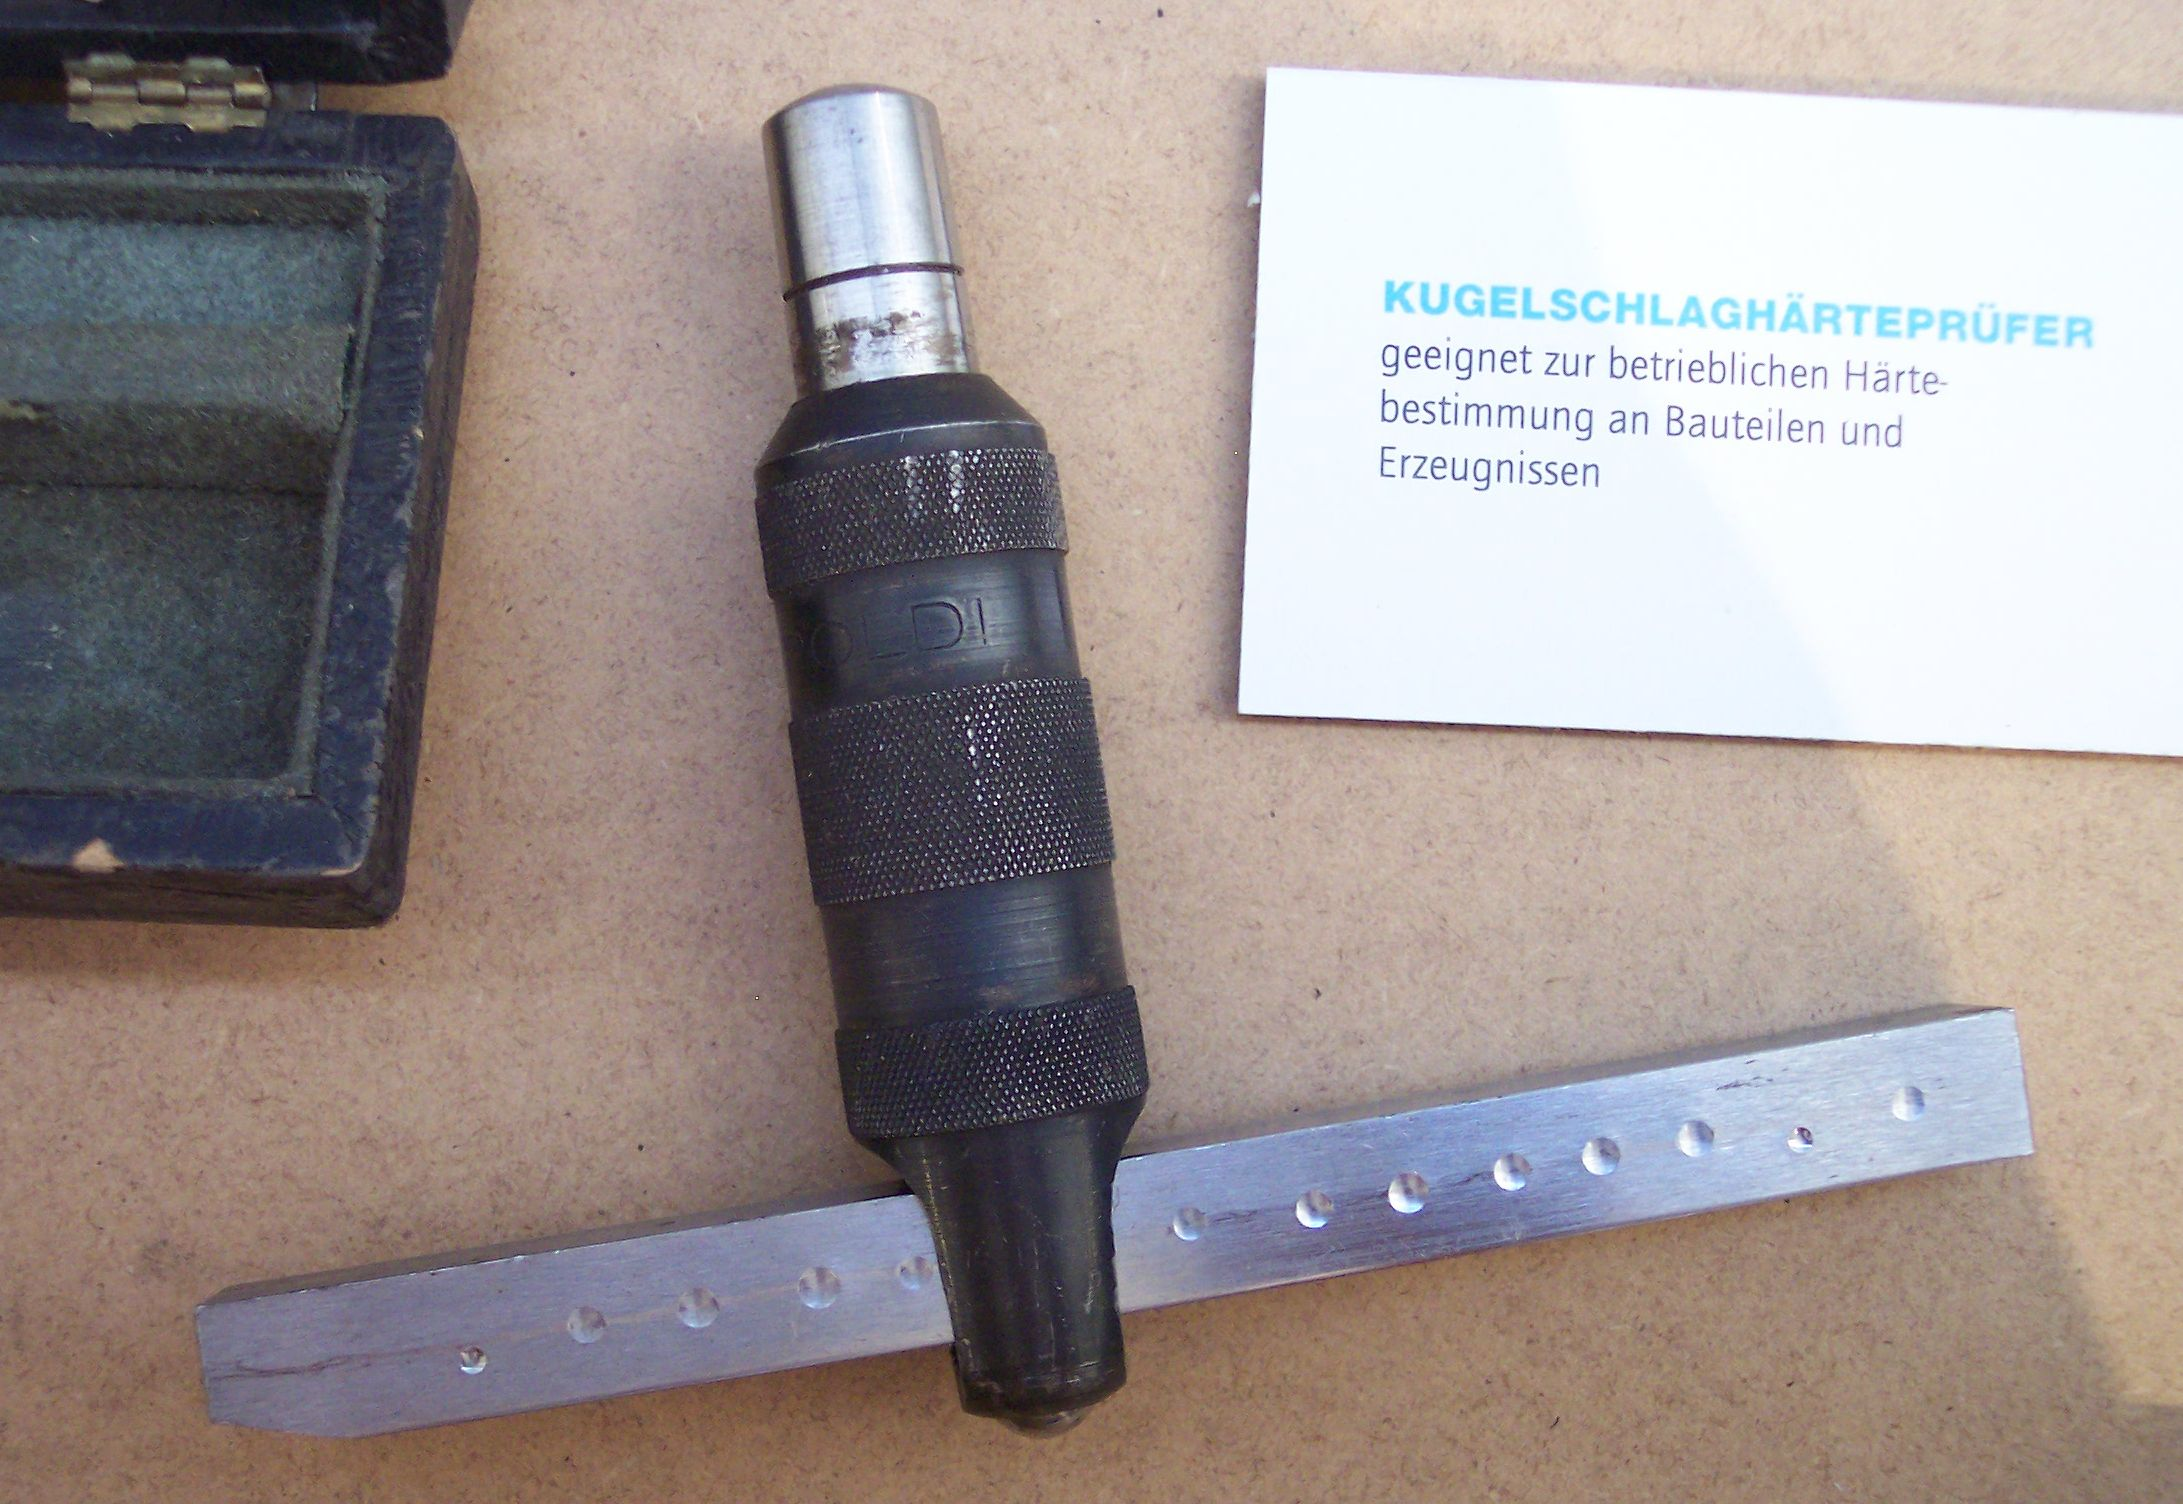
More expensive methods press a hardened piece of metal with a known force into the sample, and measuring the indentation. While most of these measuring jigs are too expensive, I’ve found one for cheap. That is the Poldihammer test, which is sold on eBay for around €100. The tool uses a captive ball bearing which presses both on a bar of known hardness and the sample. You just simply place it on the object and hit it with a hammer. The ball bearing presses with equal force into both metals object. Comparing the dents gives you the Brinell hardness.
My Poldihammer came with a small magnifier and scale. It’s not so easy to use, and the resolution is minimal. The kit also comes with convention tables, but they feel very approximate. My solution is to measure the indentation with a digital microscope and calculate the BHN from this formula from Wikipedia:
BHN = Brinell Hardness Number (kgf/mm2). P = applied load in kilogram-force (kgf) D = diameter of indenter (mm) d = diameter of indentation (mm)
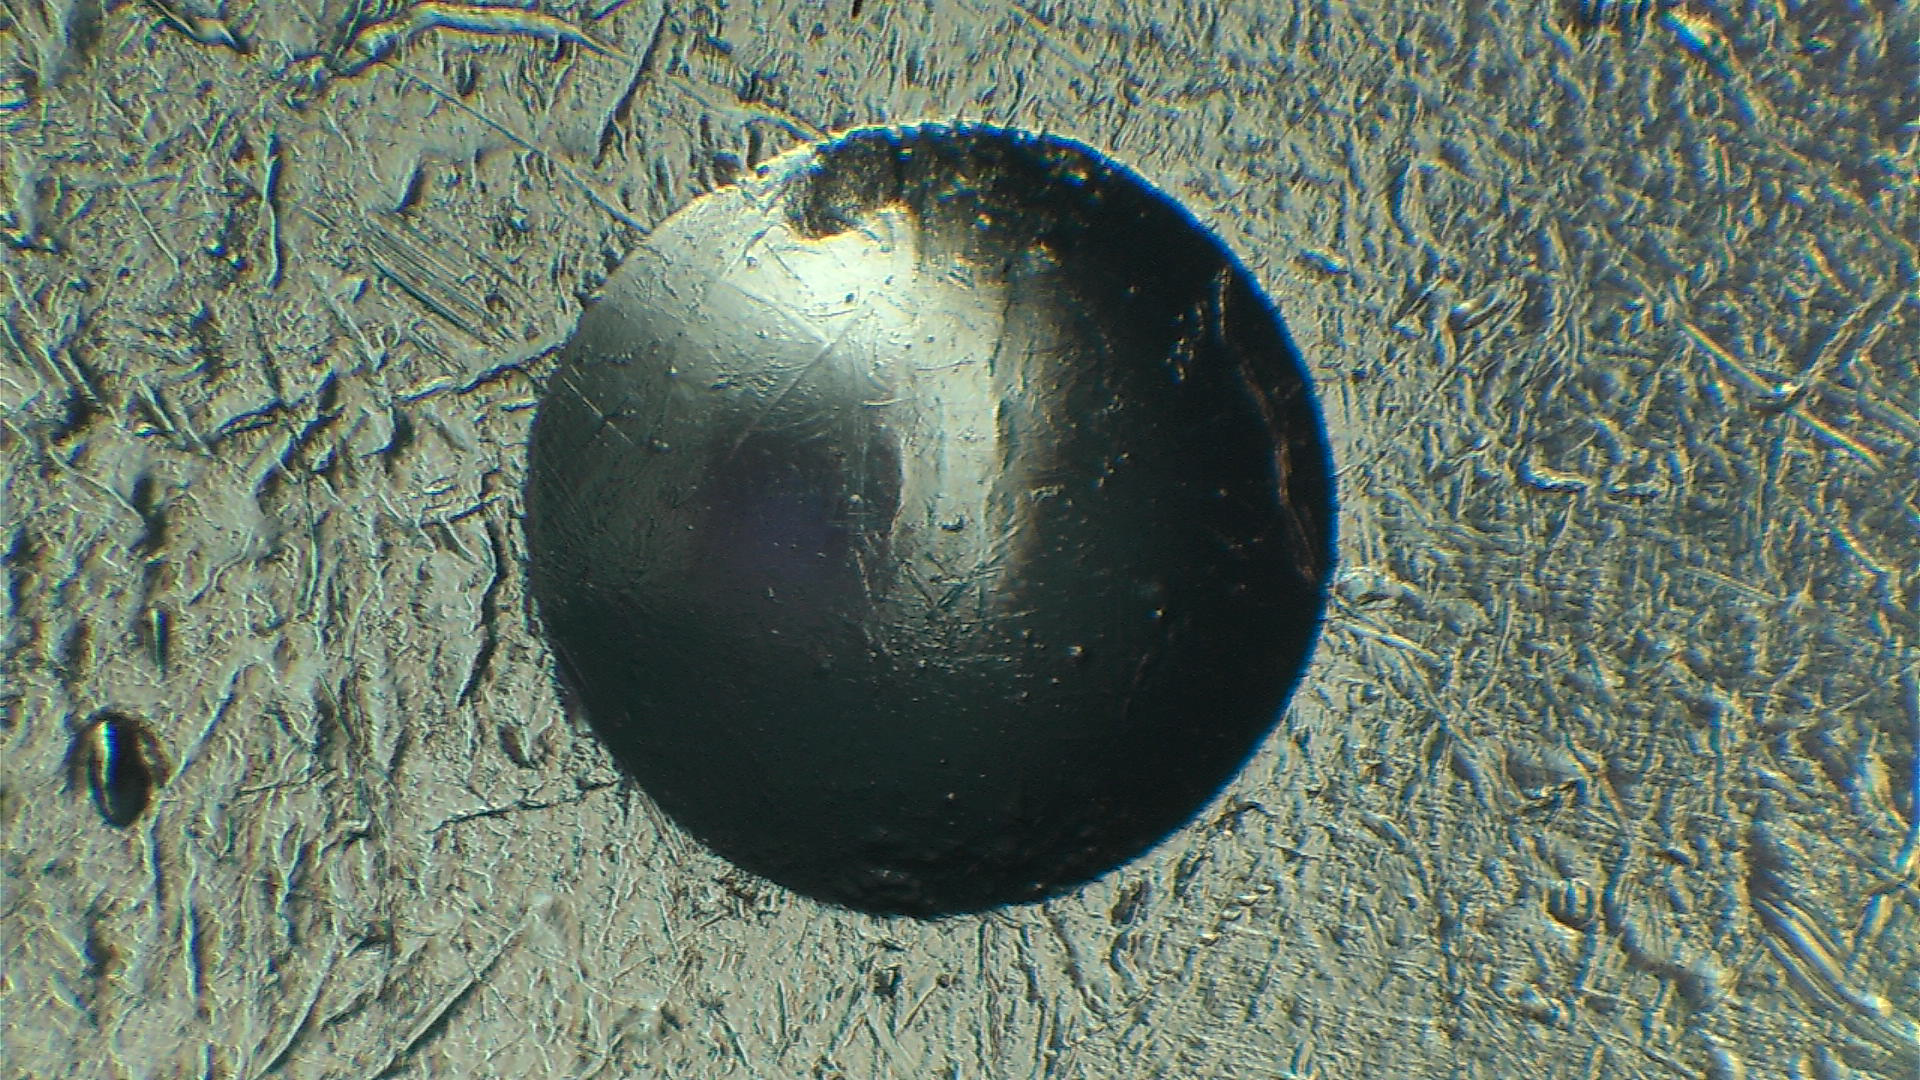
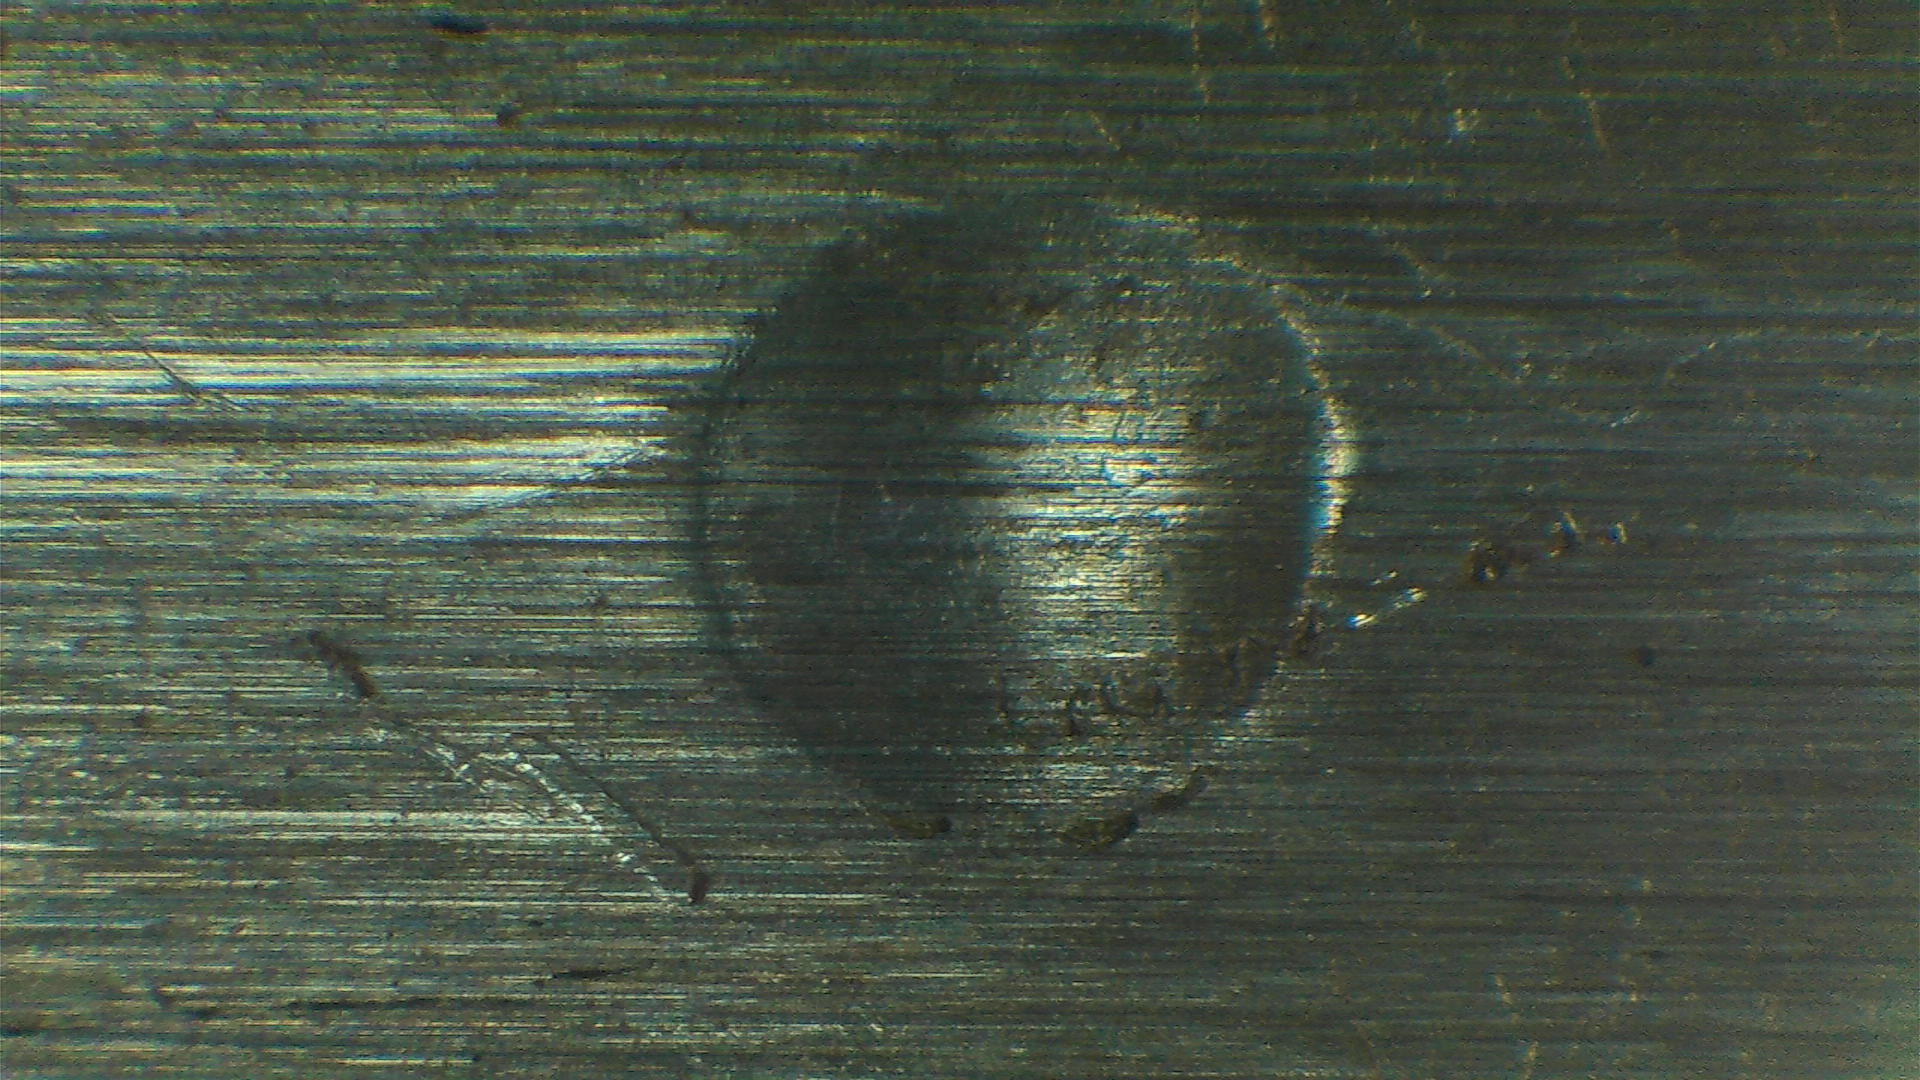
It doesn’t take much to use the dent on the reference bar to calculate the force. As the force is equal on the key, we can use the force to calculate the hardness of the keys. Let’s take a look at a real world example. The next two images are the dents under high magnification.
Key for measurement B1: 214.581 by 209.048 pixels. This is 2.00 mm on average.Reference bar with hardness 187. Measurement B1: 163.809 by 162.959 pixels. 1.55 mm average width.
For completeness, I’ve added the calculations as to make the method repeatable, and accessible to more hobbyists. The force is calculated as follows: P = BHN(reference) * PI * D * (D – SQRT(D^2 – X^2)). Where X is the dent on the reference bar. In LibreOffice Calc, this is =187*PI()*10*(10-SQRT(10^X^2)).
The hardness of the key is calculated BHN(Key) = P /(PI * D *(D^2-Y^2)). Where Y is the dent on the key. In LibreOffice Calc, this is =P/(PI()10(10-SQRT((10^2)-(Y^2))))
For the numbers above, I’ve found the force as 706.25, and the BHN of the key as 110.8. I’ve repeated the test for four more keys and measured them as 114.5, 103.9, 97.0, and 118.2 with an average of 108.9. In similar measurements, I would drop the minimum and maximum and take the average of the remaining samples, which is 109.7.
The following table is the result of my measurements. The results are surprising.
Brand
Average
Aquired date
Comment
Measurement [BHN]
Silca
Three keys
2018
CS206 Brass.
147.1
Silca
Three keys
2022
LD5R Steel.
222.8
JMA
Three keys
2018
Keys from Nigel Tolley.
135.4
Bauelemente
Three keys
2019
SSDeV Impressioning.
123.5
Abus
Three keys
2019
LockCon
133.4
Abus
Three keys
2020
Toool Inventory
135.8
Abus
Five keys
2022
LockCon Box A
127.4
Abus
Five keys
2022
LockCon Box B
108.9
Abus
Five keys
2022
LockCon Box C
131.5
Table of key measurements. Keys for Abus C83 with keyway similar to Y1.
The data revealed something interesting and confirmed a hunch. The hardness of steel keys is the highest, obviously. We see the brass alloy (nickel silver) have a range of values. There are also outliers, for example Box B, these keys are softer than keys acquired on the same day.
I’ve since played with both harnesses and can tell one hardness from another in impressioning. But only after I’ve switched from one hardness to another after a dozen opens, with the same hardness. After switching backwards and forwards, I can’t tell the difference in a blind test.
One final note, the kit comes with one reference bar that is consumable. We have about a hundred measurements in them. I have not found replacement bars, yet. But I believe we can use a similar shaped bar of steel, which is then calibrated with the reference bar before use. This will reduce accuracy, but can be accounted for if the measurements are comparative.
Thanks for taking your time to read about measuring hardness of keys. If you have a professional (Brinell) hardness measurement tool, and want to help out, let’s swap keys and compare notes. I’m always open to learn.
On the 25th and 26th of March, Wendt organized a lockpicking championship in collaboration with SSDeV and ACL. Who is Wendt? They are creators and suppliers of locksmithing and lockpicking tools. They have a yearly house-fair to demonstrate the newest in locksmithing tools, and host competitions. This year’s event was specifically for the lockpicking community.
Wendt HQ in Bergheim, Germany. (Picture copyright Wendt.)
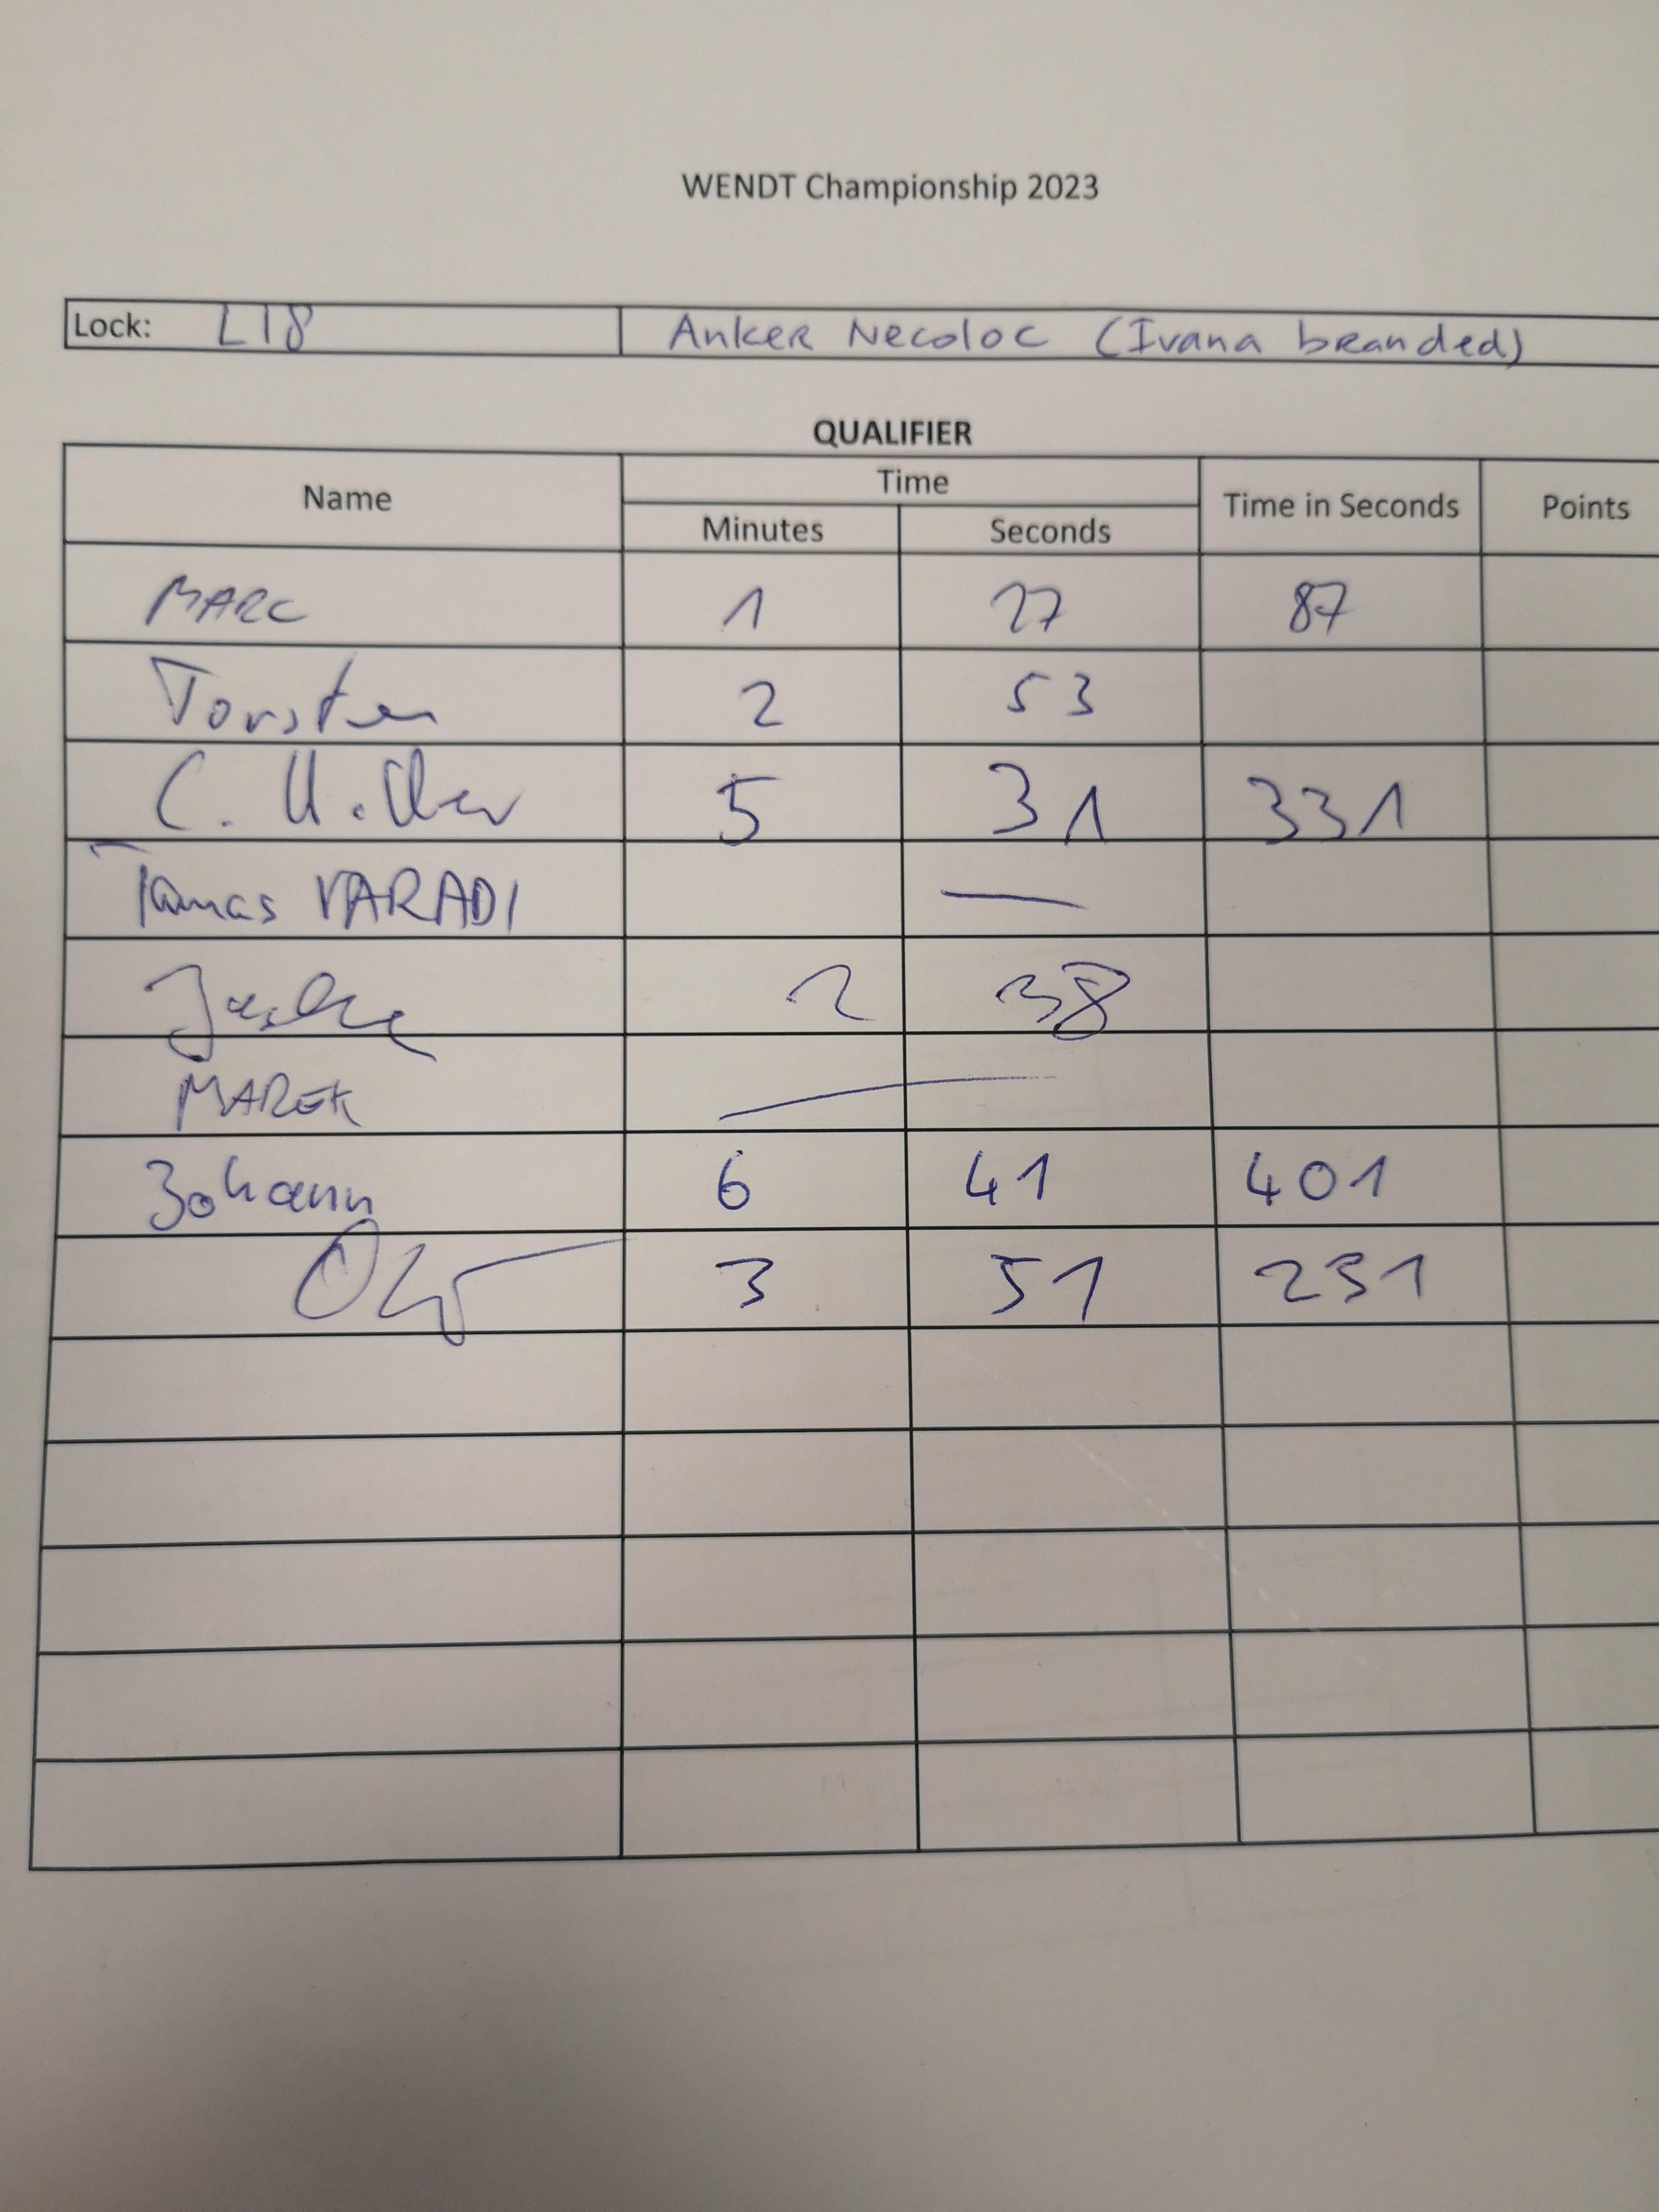
The main attraction is the German-style lockpicking competition. Where, in short, every competitor brings them own double euro pin tumbler cylinder. You’ll have to prove you can pick it yourself in five minutes to qualify. For each of the competitors locks, you get fifteen minutes for your picking attempt. Where the final score is decided by the person with the most opens in the least time.
For this year, a large variety of locks were present. Iseo, M&C, IX Saturn, IX-6, both Abus XP1 and Cisa SP, and Assa twin 2. Some of these, as you can imagine, are not opened often in fifteen minutes. This was felt as a setback by some, while others are encouraged to practice with even harder locks. Not to mention the endurance required to pick locks for over 5h straight.
Walter and Henri competed were in the competition from Toool. For Henri, it was his second lockpicking event. His video (YouTube) is worth it to watch if you are looking for encouragement to join a similar event. For photo’s of the lockpicking, please see the Facebook page of Wendt.
I’d like to share a few notes on a constructive discussion on how to run competitions. To some, the competitions at events like LockCon were too easy. People felt it was a competition in who can rake the locks, the fastest. Whereas, this event had rounds with very difficult locks, and few opens. There is a balance to be found is between the two systems. The comments are clear: give us harder locks to pick, but do give locks that are pickable in a reasonable time.
There was plenty of room to meet other lockpickers at the event, chat with the vendors, and join the side competitions. Han Fey had a very interesting challenge, where you are given a key ring and a box of locks. Where the goal was to match the most keys to the most locks in the least time. The catch is, you only got one chance. If the key didn’t fit, your attempt was over.
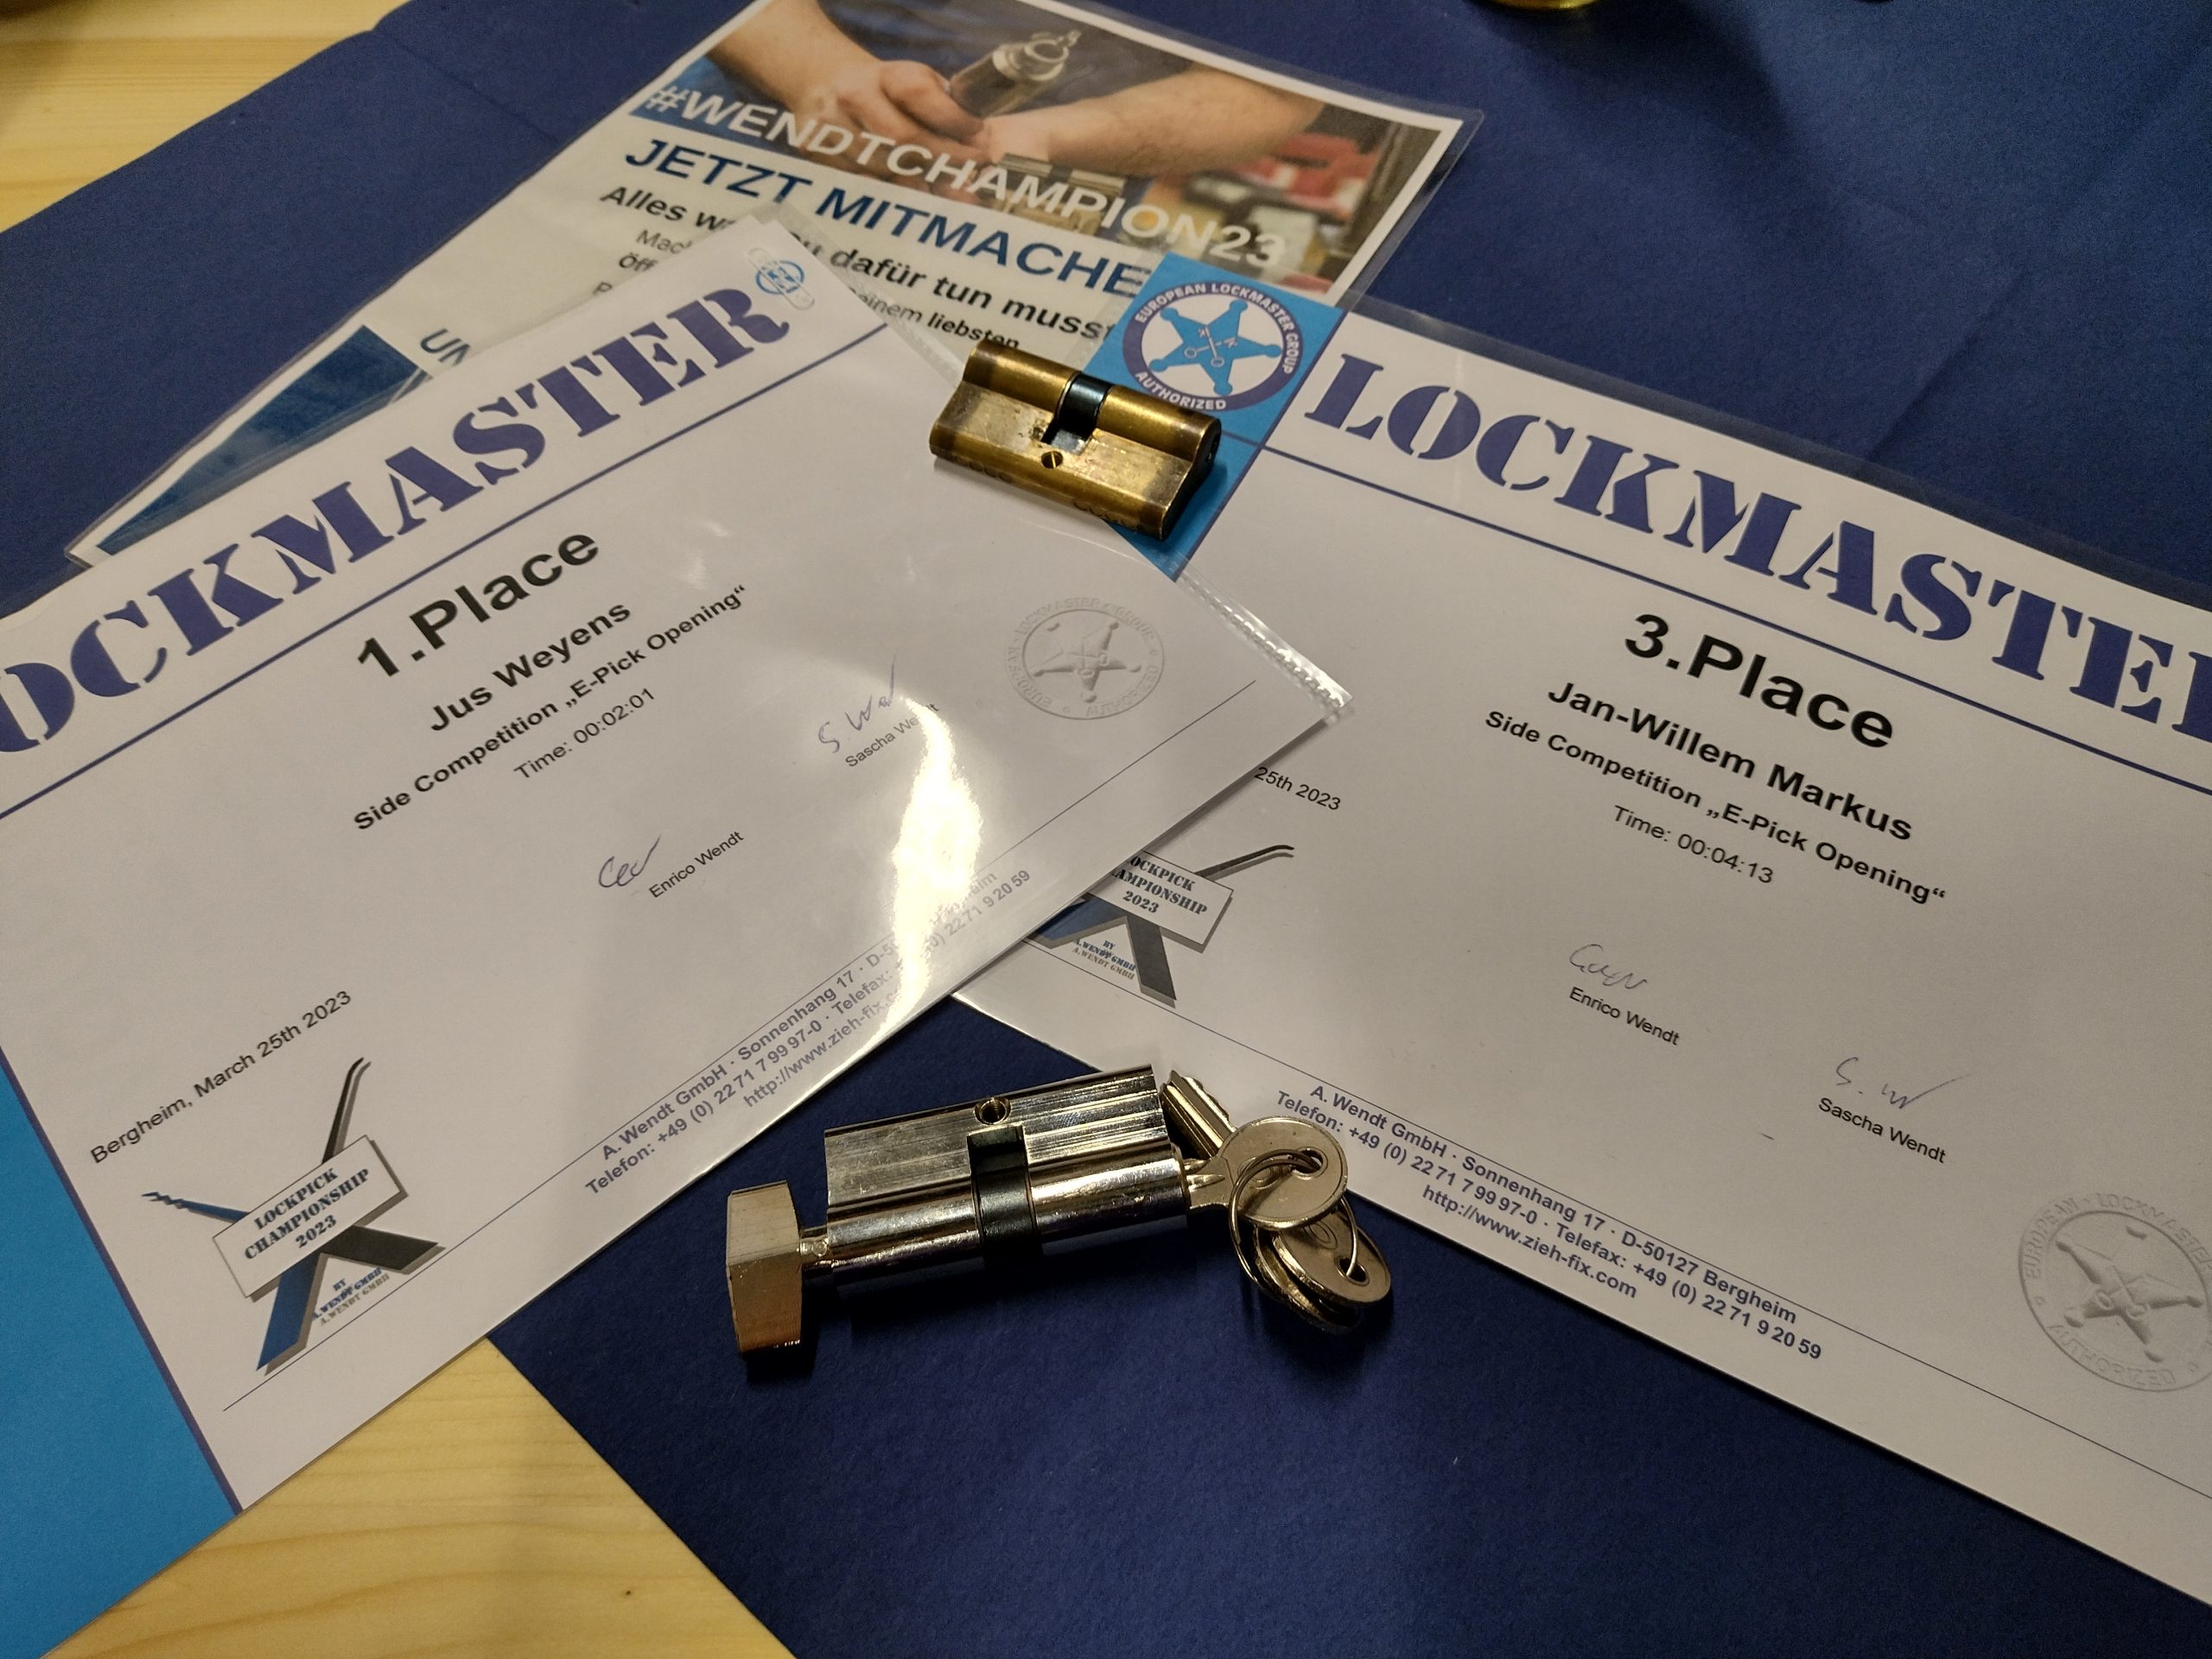
Just for fun, Jos and I competed in the electropicking competition and got 1st and 3rd place. The real star of the show are, of course, the electropicks Wendt sells. Truly amazing equipment.
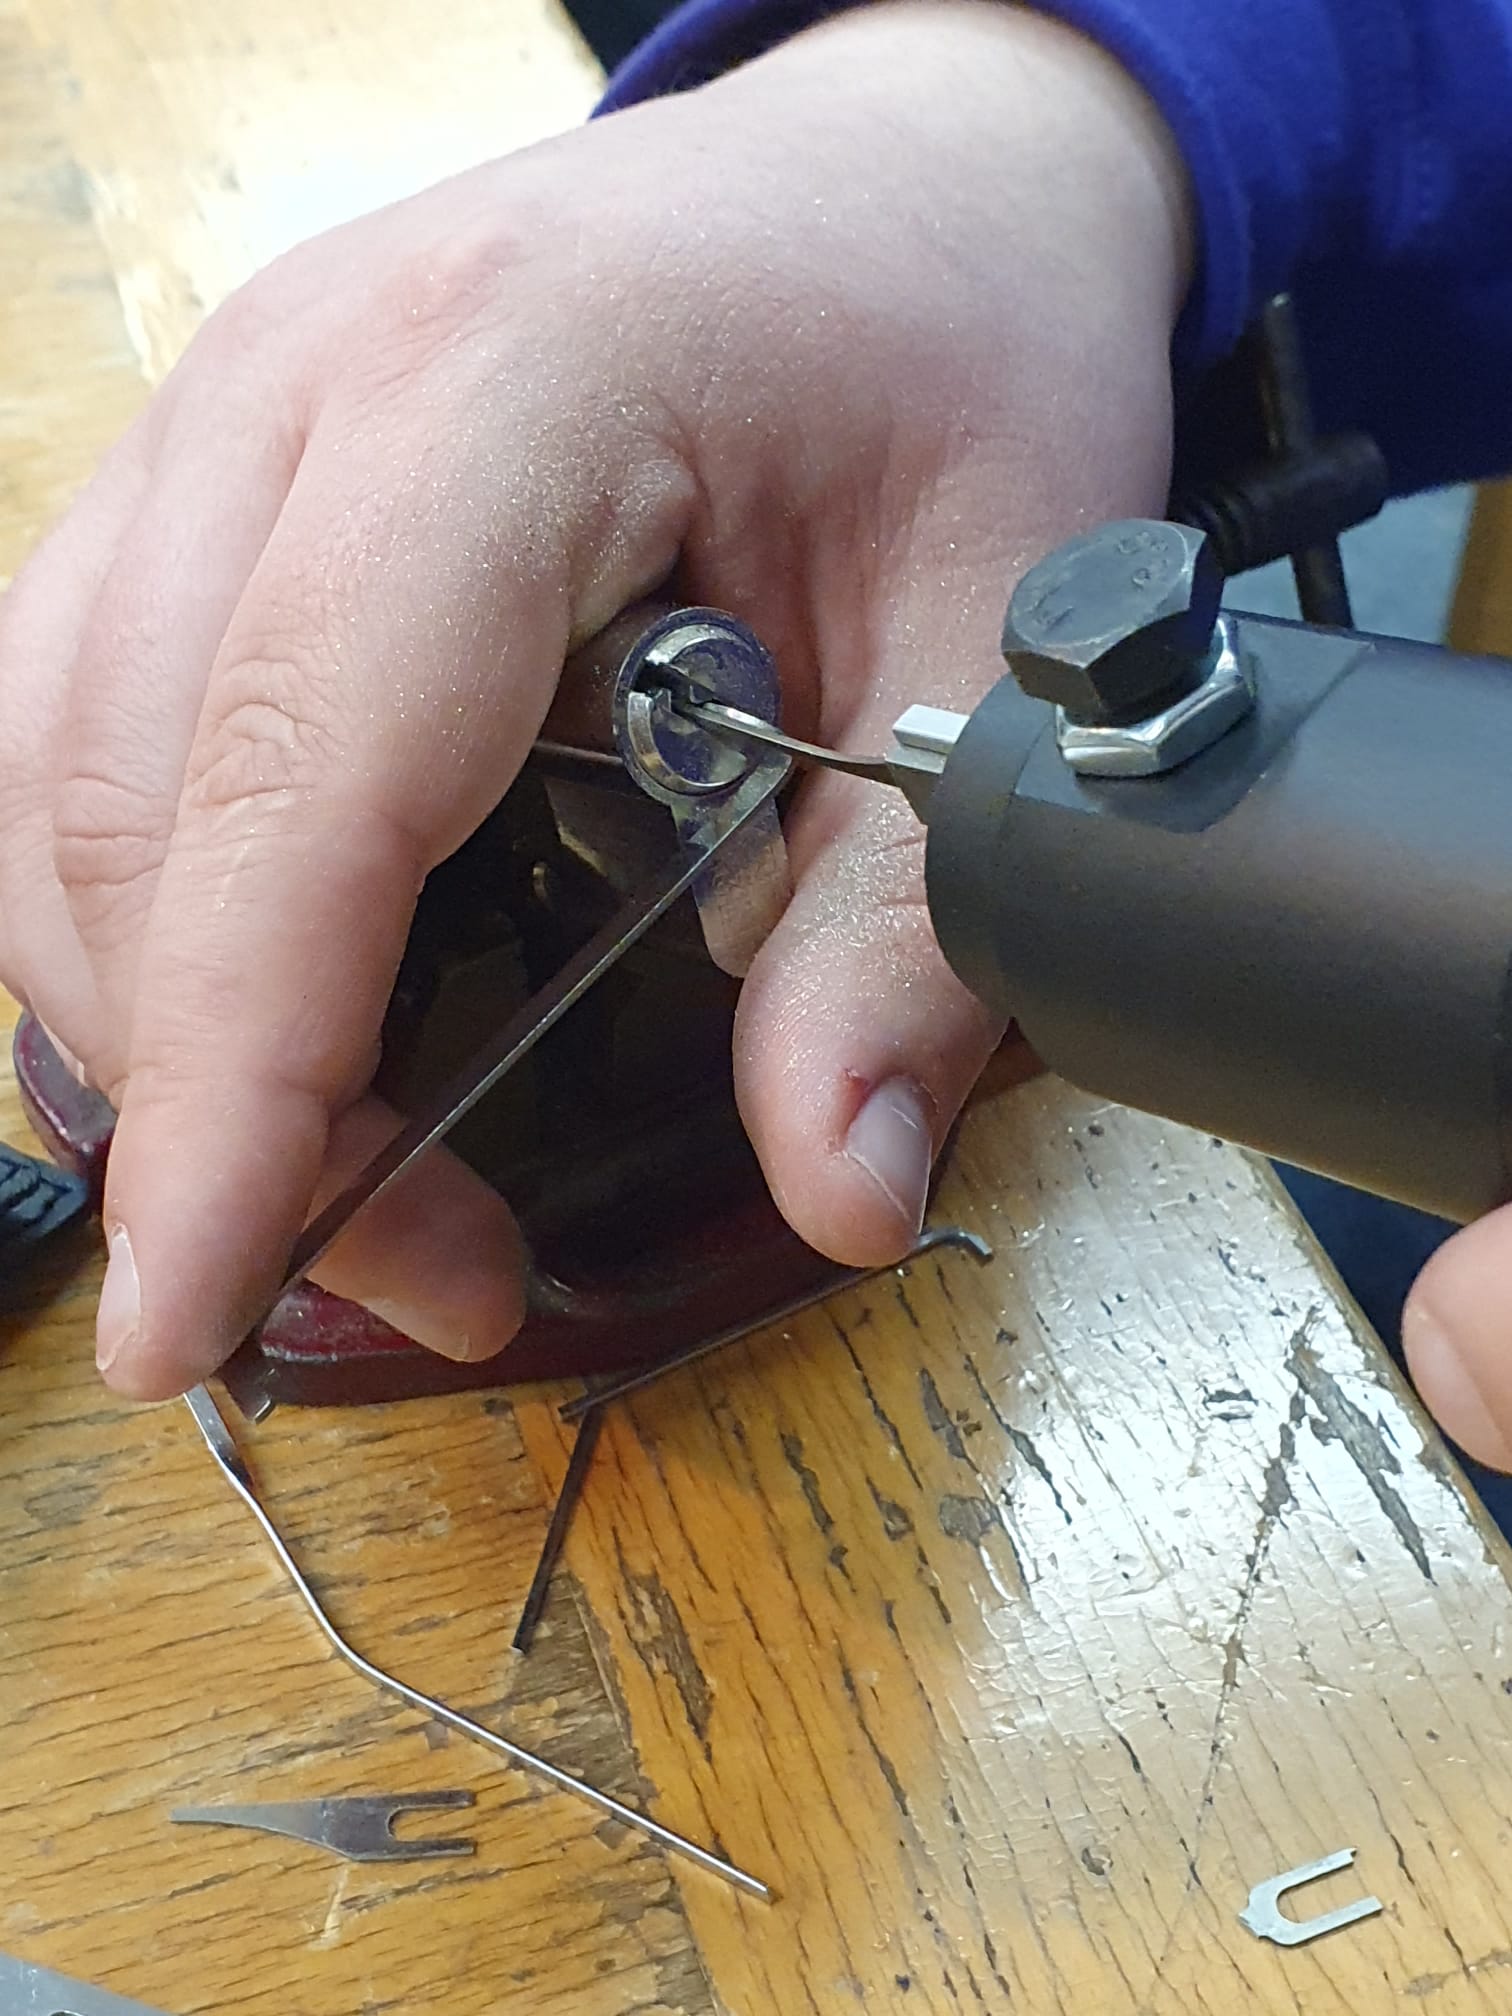
On a side note, we call electropicking non-destructive as the locks remains functional. However, the repeated impact of the pick needle and the pins do create a lot of brass dust, as seen in the picture below.
To wrap up this post, it was great seeing so many old friends and to make new ones. Time well spent. Thanks, Sasha, and the Wendt team, for organizing this event!
Impressioning competition are all about opening the most locks in the least amount of time. Quite often, every second counts. As we have been playing the game for a couple of decades, it wouldn’t surprise you that the locks become harder, the times have been getting faster, and the openings more consistent.
Most of the players have reinvented their setup multiple times. I’ve seen 3D printed attributes for key marking, and often see the newest inventions. To keep it fair, however, you require sharing the idea before the competition, as to prevent an unfair advantage.
My first improvements have been to watch the masters work, and to copy what they do. Whereas my last improvements are much more subtle. I’ve, for example, reduced the distance between the lock, lamp, and table. And improved my handling process to save seconds here and there. I don’t believe we are done, either, as I’m trying to find a better way of placing my file when I’m not using it.
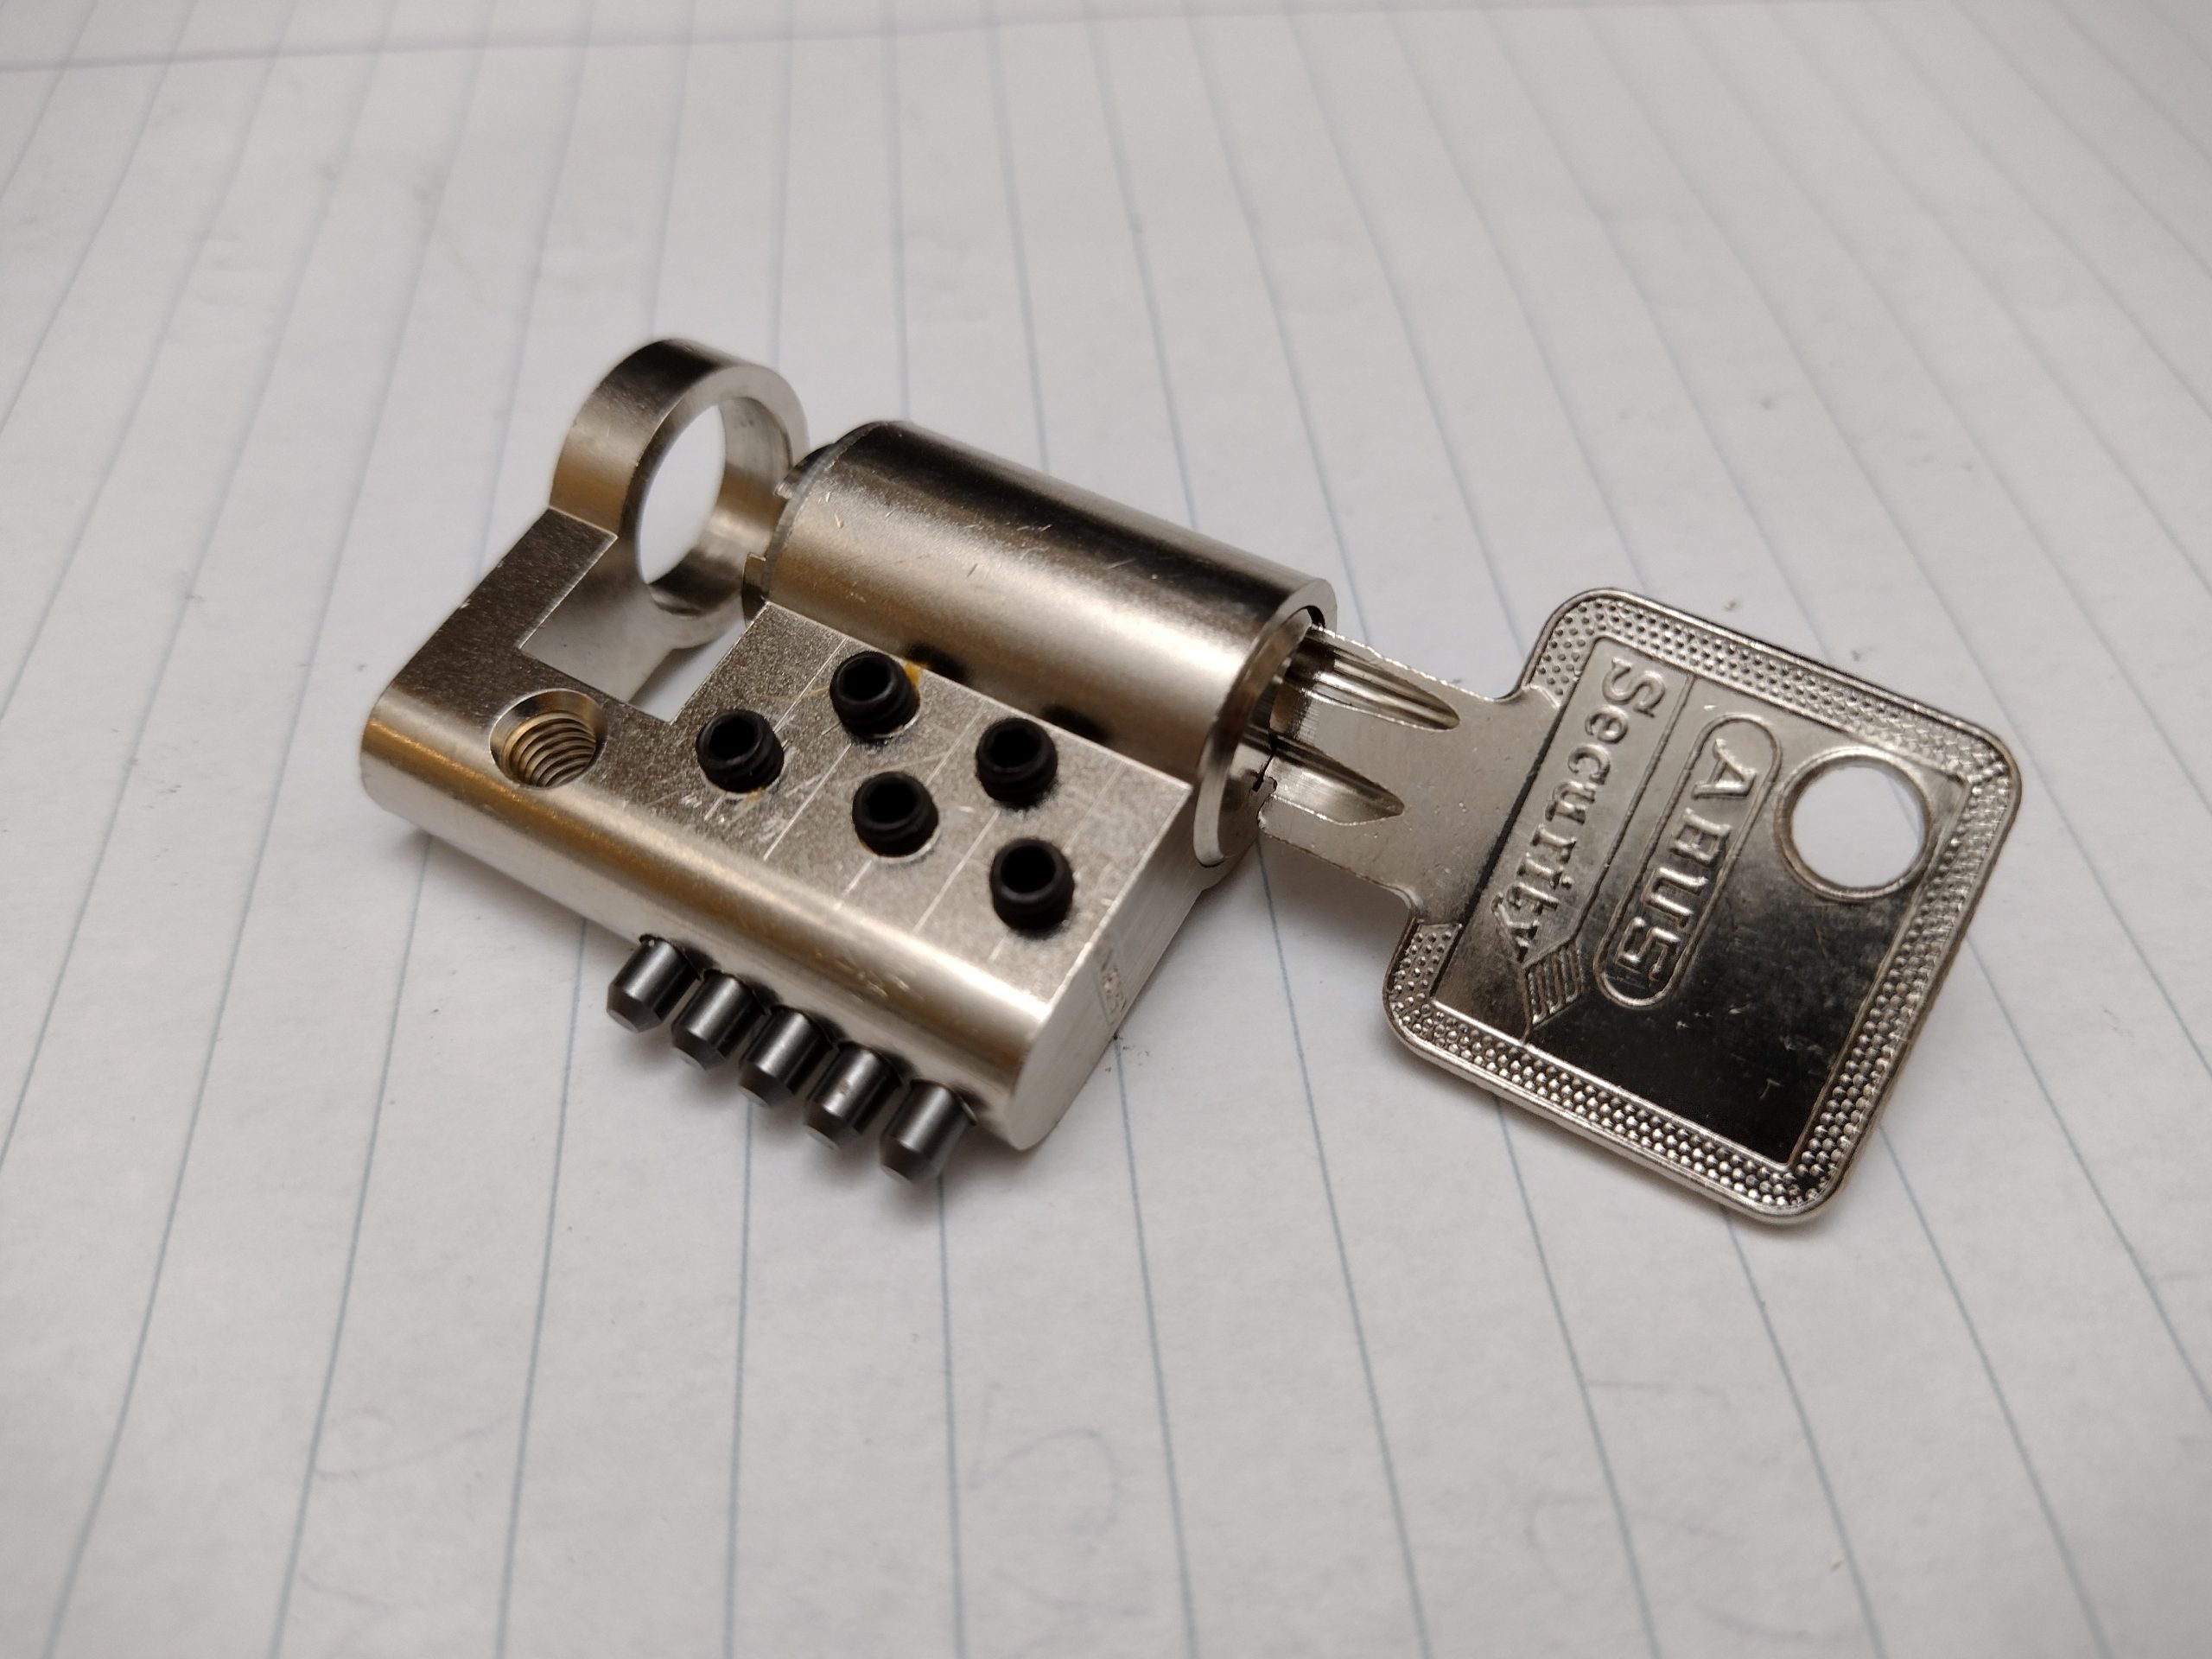
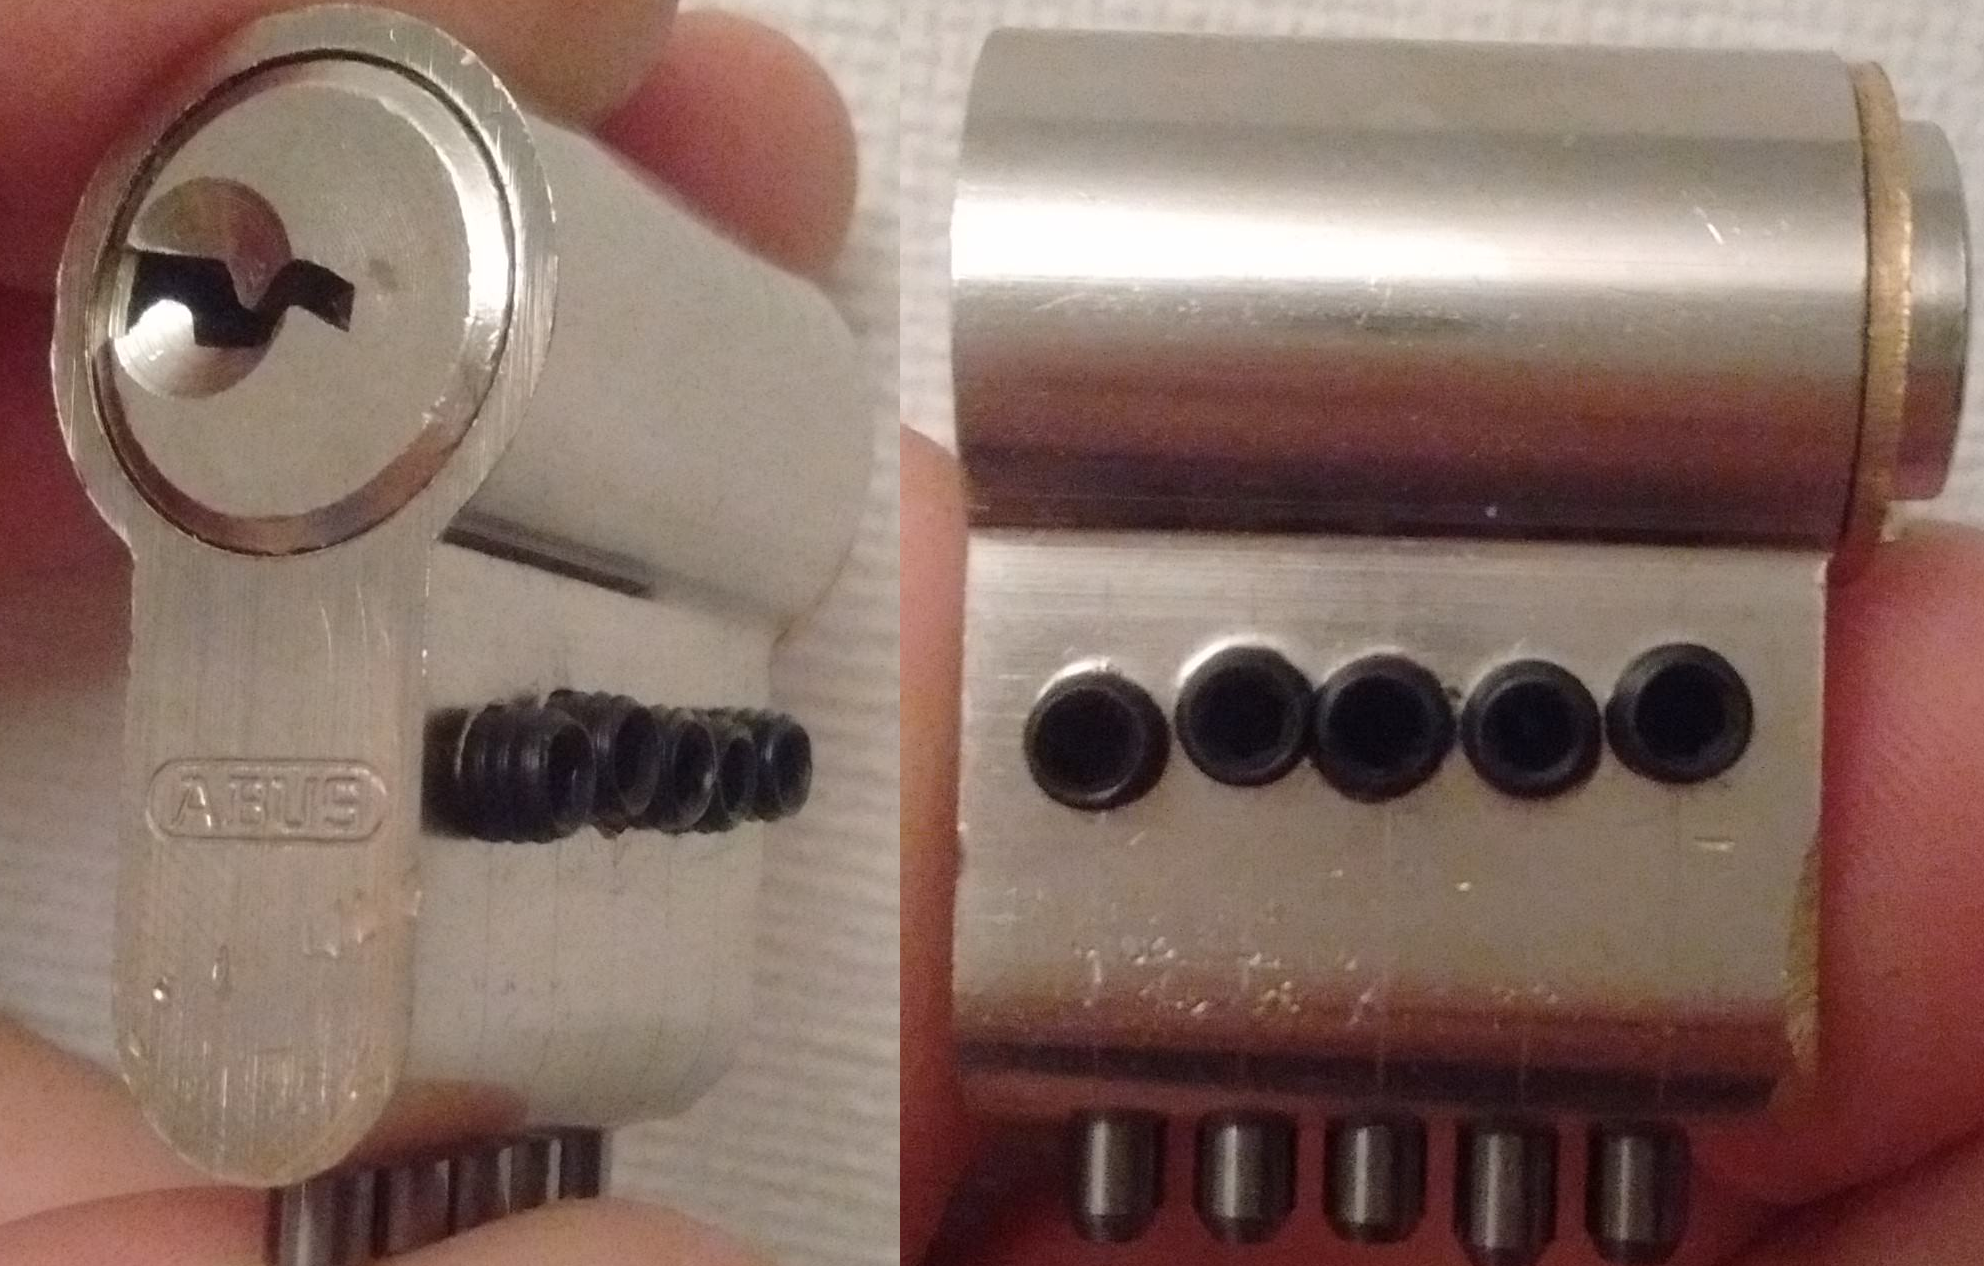
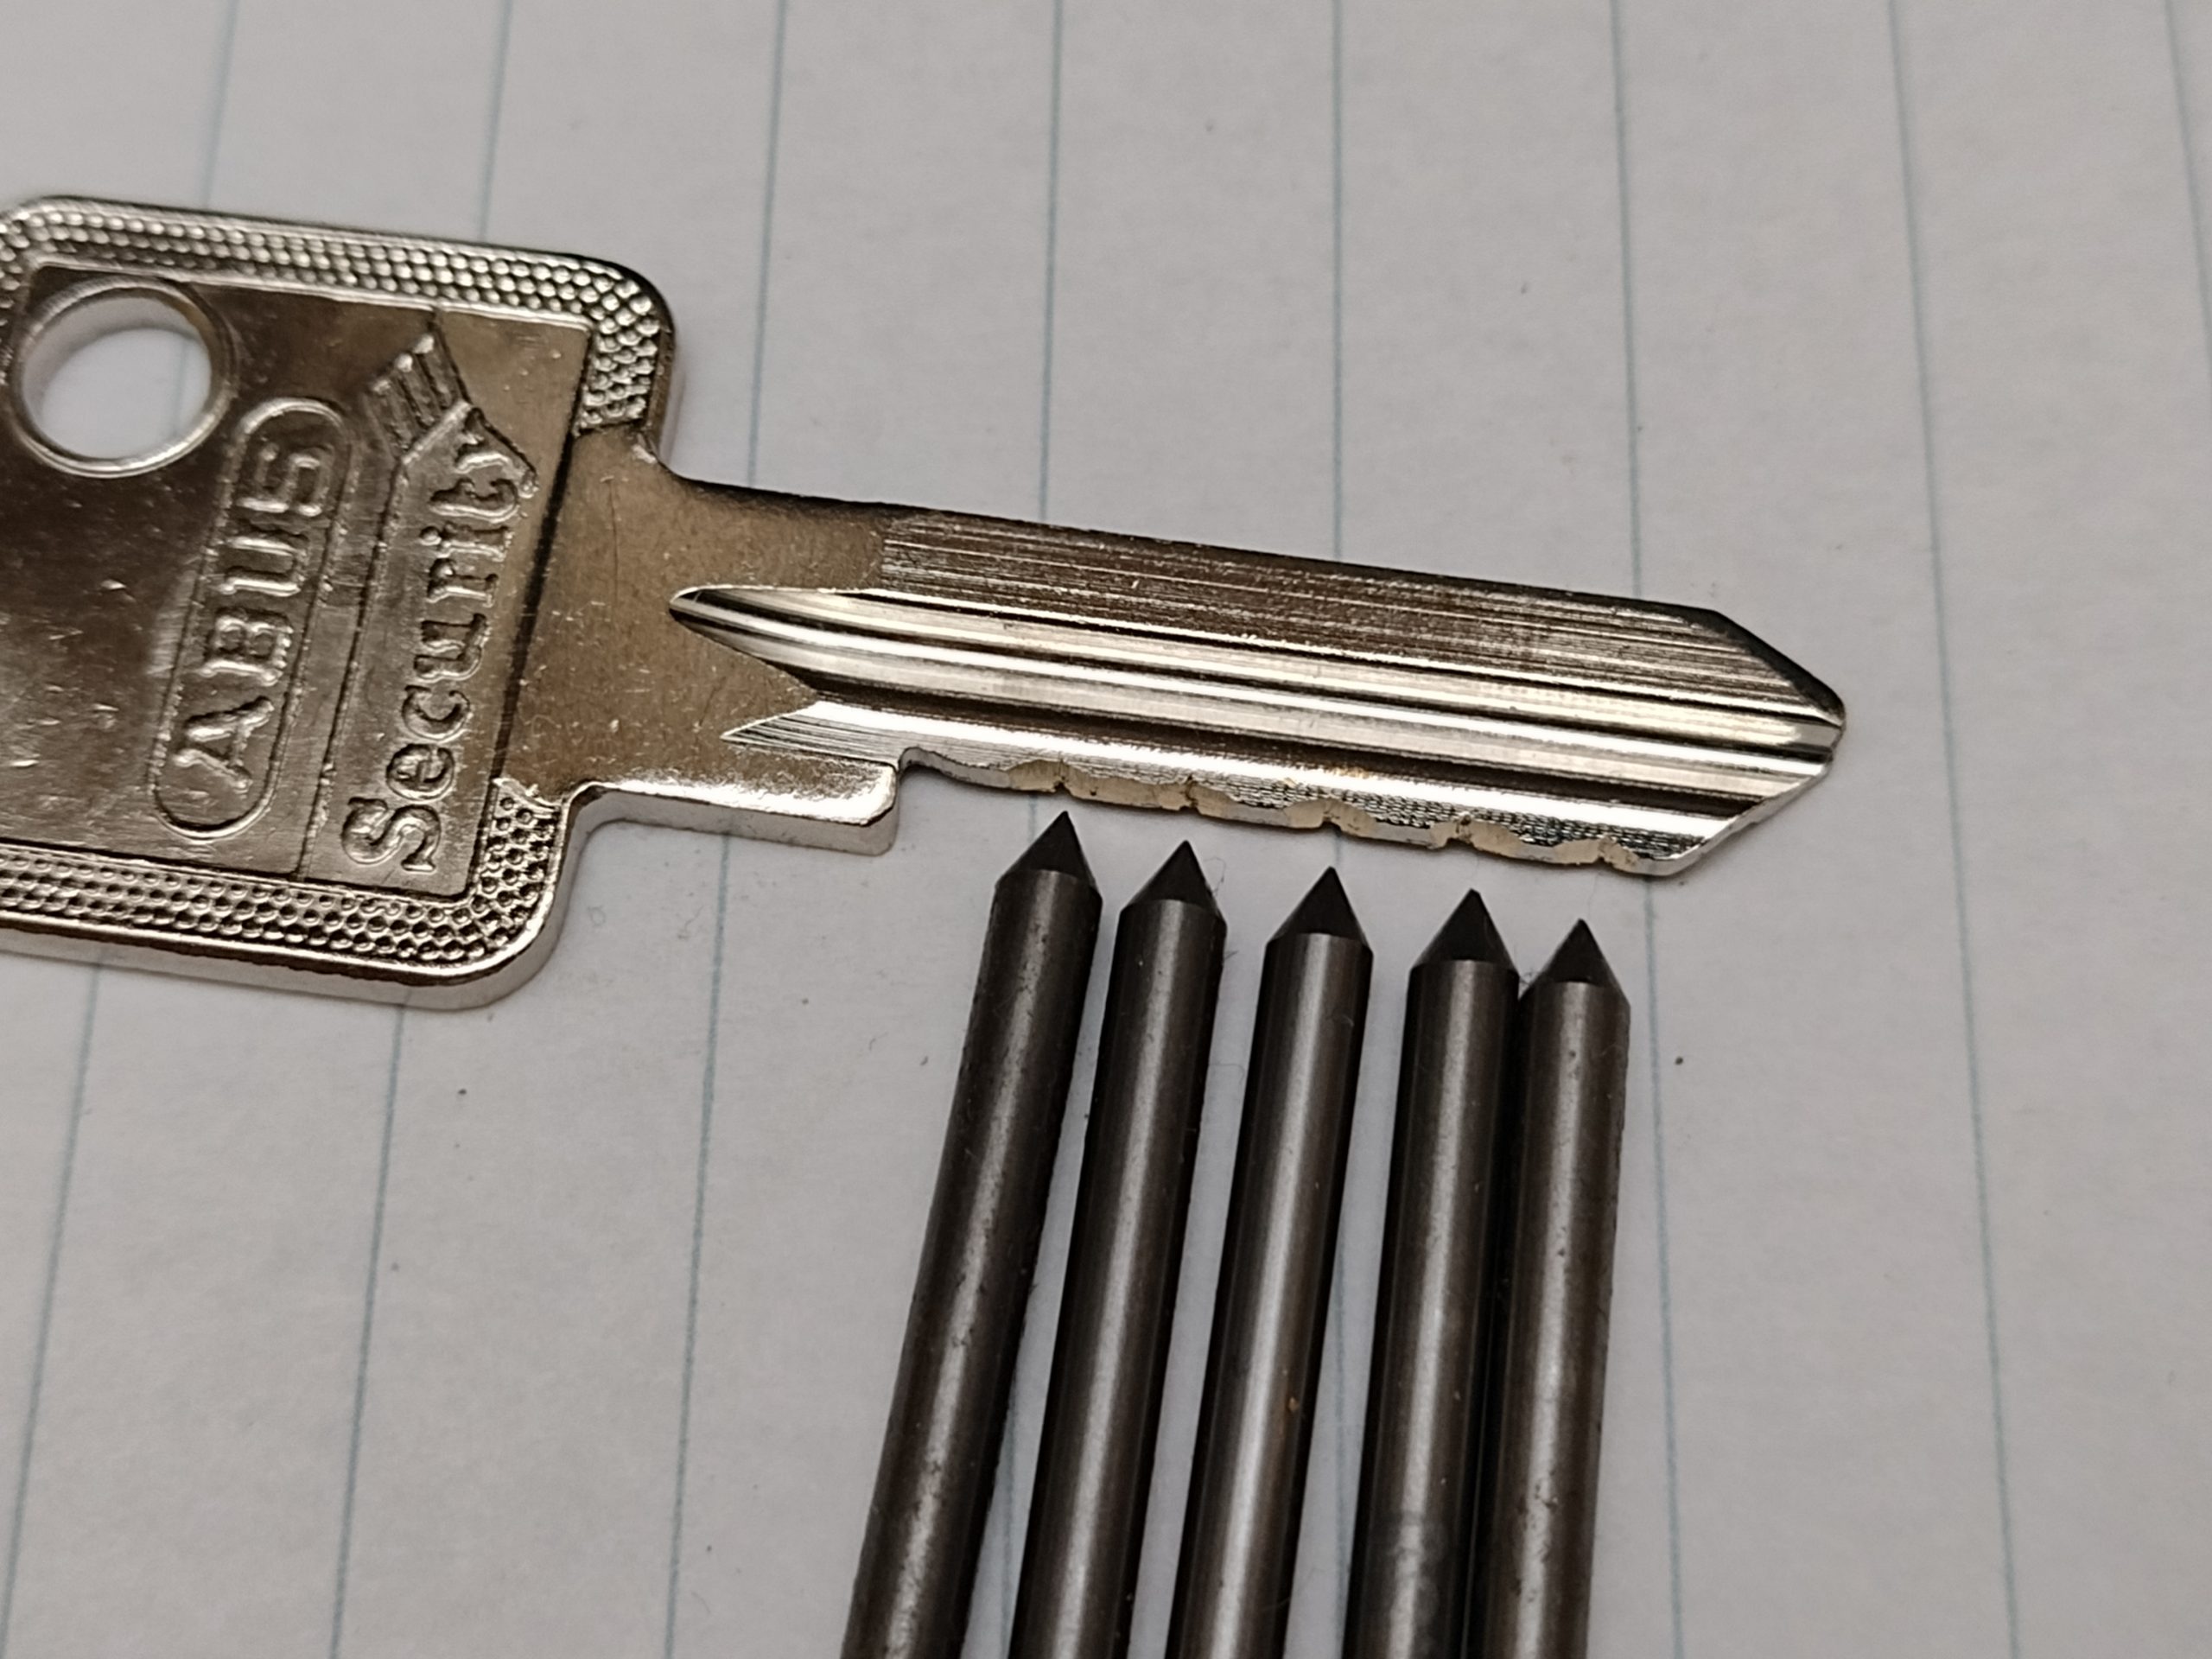
What is it? It’s a modified cylinder where the pins are replaced by sharp carbide rods. By pressing a key into the pins, the pin positions are marked on the key. Which, in turn, allows a key of all depths one to be made. The process takes a second, instead of preparing a blank with sand paper, a filling jig, or marking the positions one by one with a scribe. To be completely honest, it might not save me too much time, I just like it as a convenience tool.
I’ve built my first version after I impressioned my first lock, early 2018. It’s not the prettiest, but it worked for over a thousand keys. At that time, I impressioned a lock a day for every day in January. At UKlocksport forum, this is known as the January challenge. I’ve got some good stories about it, including a friend that just never stopped and has a streak in the thousands. (Please, Toni, remind me to write a blog about it.)
The key below shows the principle of operation. The scribe replacement tips scratch the surface of the key. For this one, the scratches are deeper than I like, but it shows the idea. You want a mark, but not too deep.
The current version, as shown in the pictures below, are from a small series production I’ve made for LockCon 2022. It was well received, and I’ve helped many of my friends with one of them. Making them commercially is very much not worth it. But if you want one, or the bits to make one, I might have some.
Please remember, even with all the impressioning gadgets, it’s not going to make a difference if you didn’t put in the hours. Consistency is key.
Pictures are copyright CCBY4.0 Jan-Willem Markus @ Blackbag.
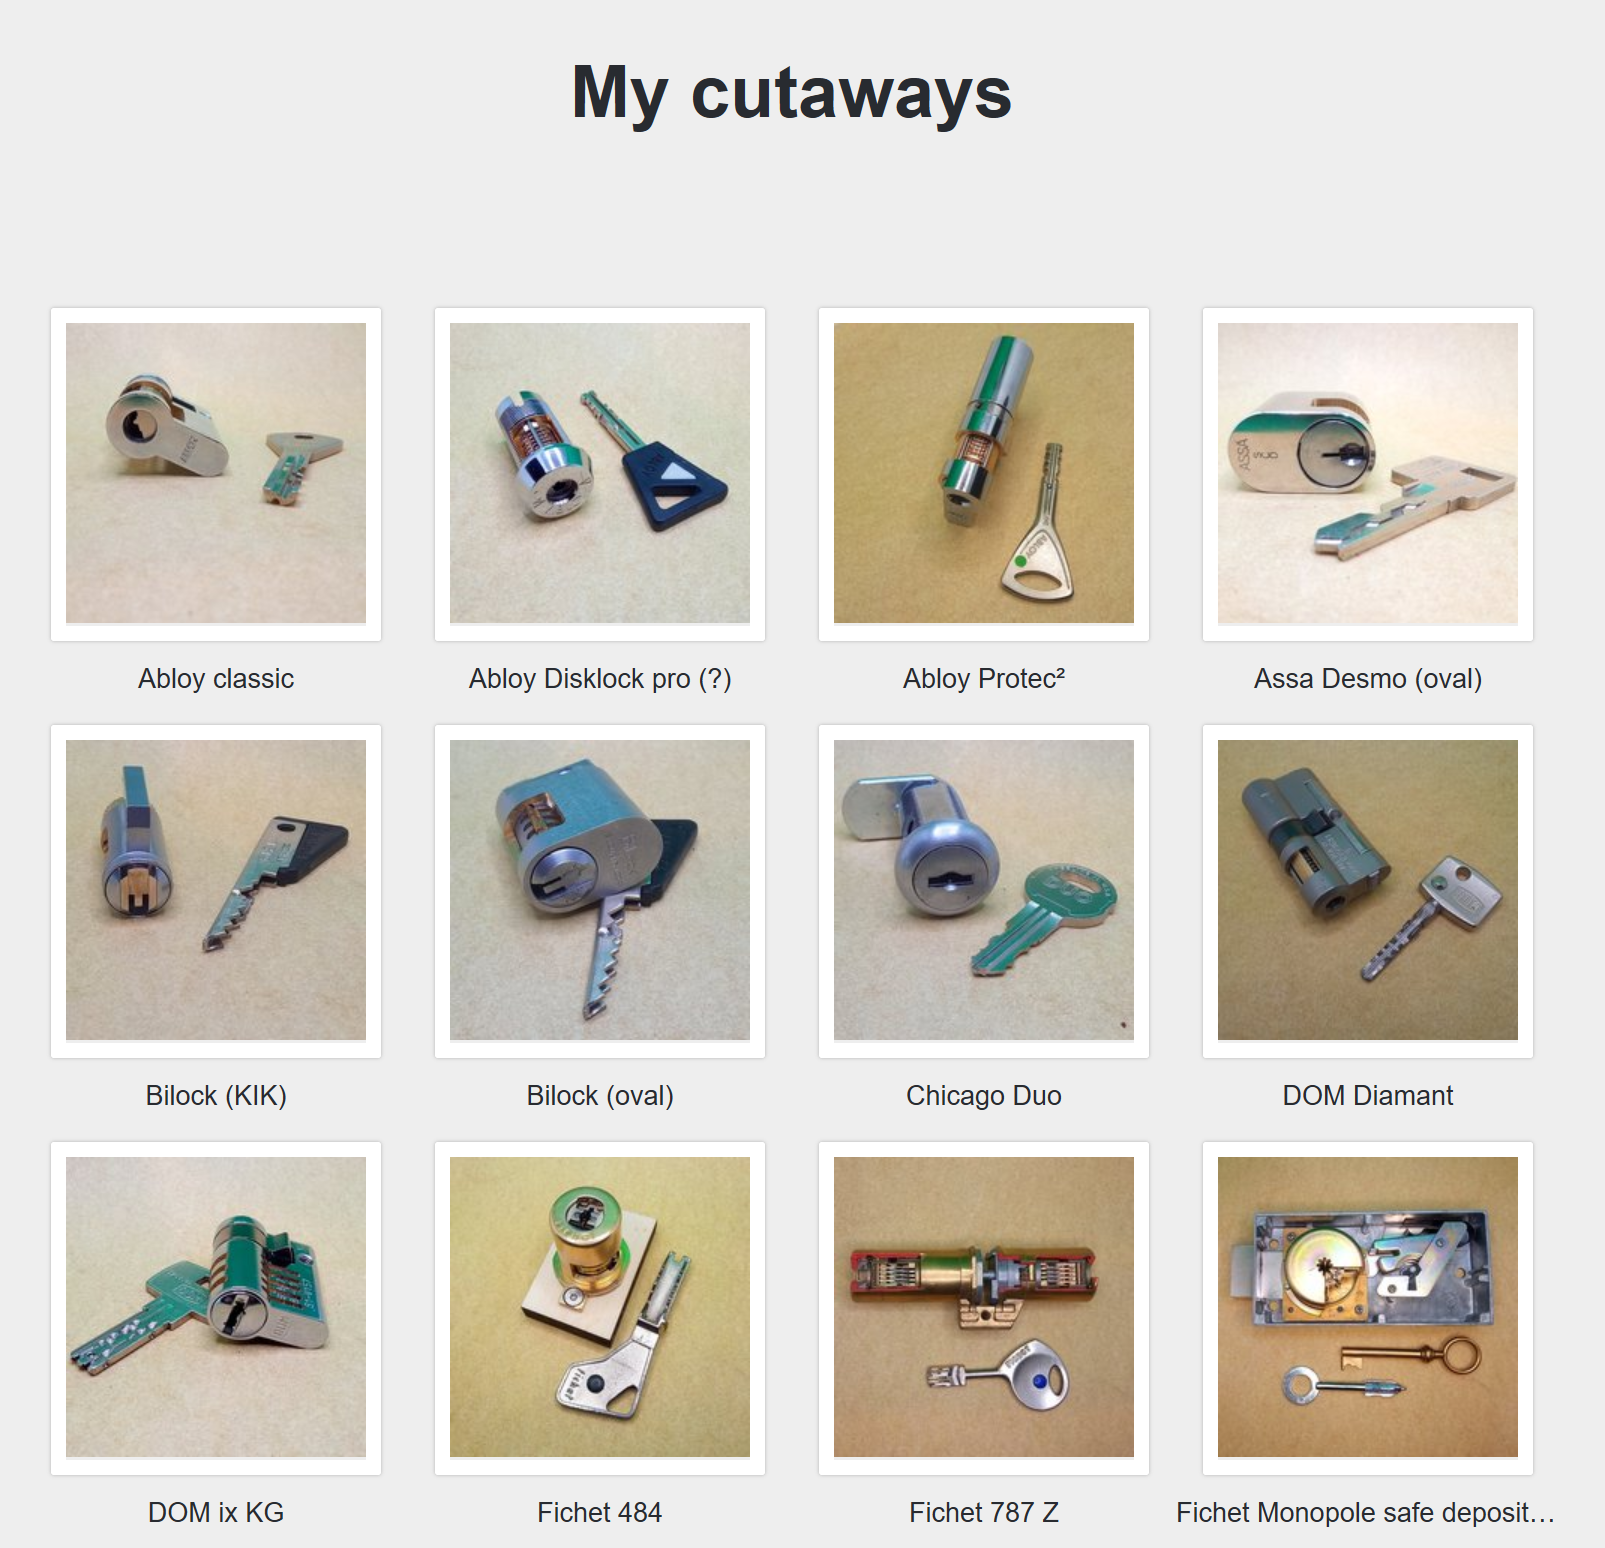
Qikom, lockpicker from France, created gorgeous locks cutaways and shared the images online. I believe cutaways to be very useful for understanding intricate lock designs. Where a good cutaway allows us to observe the elements of the lock while still functioning as normal.
Qikom is an associate professor in mathematics and computer science. Who got interesting in lock picking a little before 2000 after reading R. Feynman (the physicist) autobiography. Like many pickers, he is interested in the “puzzle” aspect of locks, and making a working cutaway is another kind of puzzle. Furthermore, he added, to spend more time making cutaways than picking locks!
Screenshot from Qikom’s website as of January 2023. http://qikom.free.fr/ CC BY-NC-SA 4.0
I’ve asked Qikom for tips on making great cutaways. He says about his cutaway strategy:
“I don’t have a well-defined strategy when planning a new cutaway. I know people start by making a 3D model of the lock to plan the cuts, but I don’t bother. In many of the locks I’ve cut, the cutting plan isn’t all that complex, and I try to set things up, so I can adjust things incrementally. One important thing I do, is to never cut a lock on the same day that I come up with the cutting plan, to get some time to think about it.
I usually try to have at least 2 identical locks to cut, and I consider one of them to be expendable. When everything works, I can sell / trade the second one, and if not, I get to correct any mistake on the second try. A couple of times, I badly failed twice, but could salvage enough parts to get the third attempt. But there are still some locks waiting because I wouldn’t want to mess them up.
I’ve made several embarrassing goofs along the way, but none of them would have been prevented by that! The graveyard includes several Robur, Rosengrens, Abloy, Fontaine, and Fichet… I’ve only attempted cutting an F3D when I got a couple of broken ones. This was a good idea, because the first 3 attempts were failures.
But there are still some locks waiting because I wouldn’t want to mess them up. Including the Emhart.”
Qikom often sells his cutaways online to partially fund the hobby. If you have interesting in these locks, or have a few spares that would work as a cutaway, consider contacting Qikom at qikom@free.fr
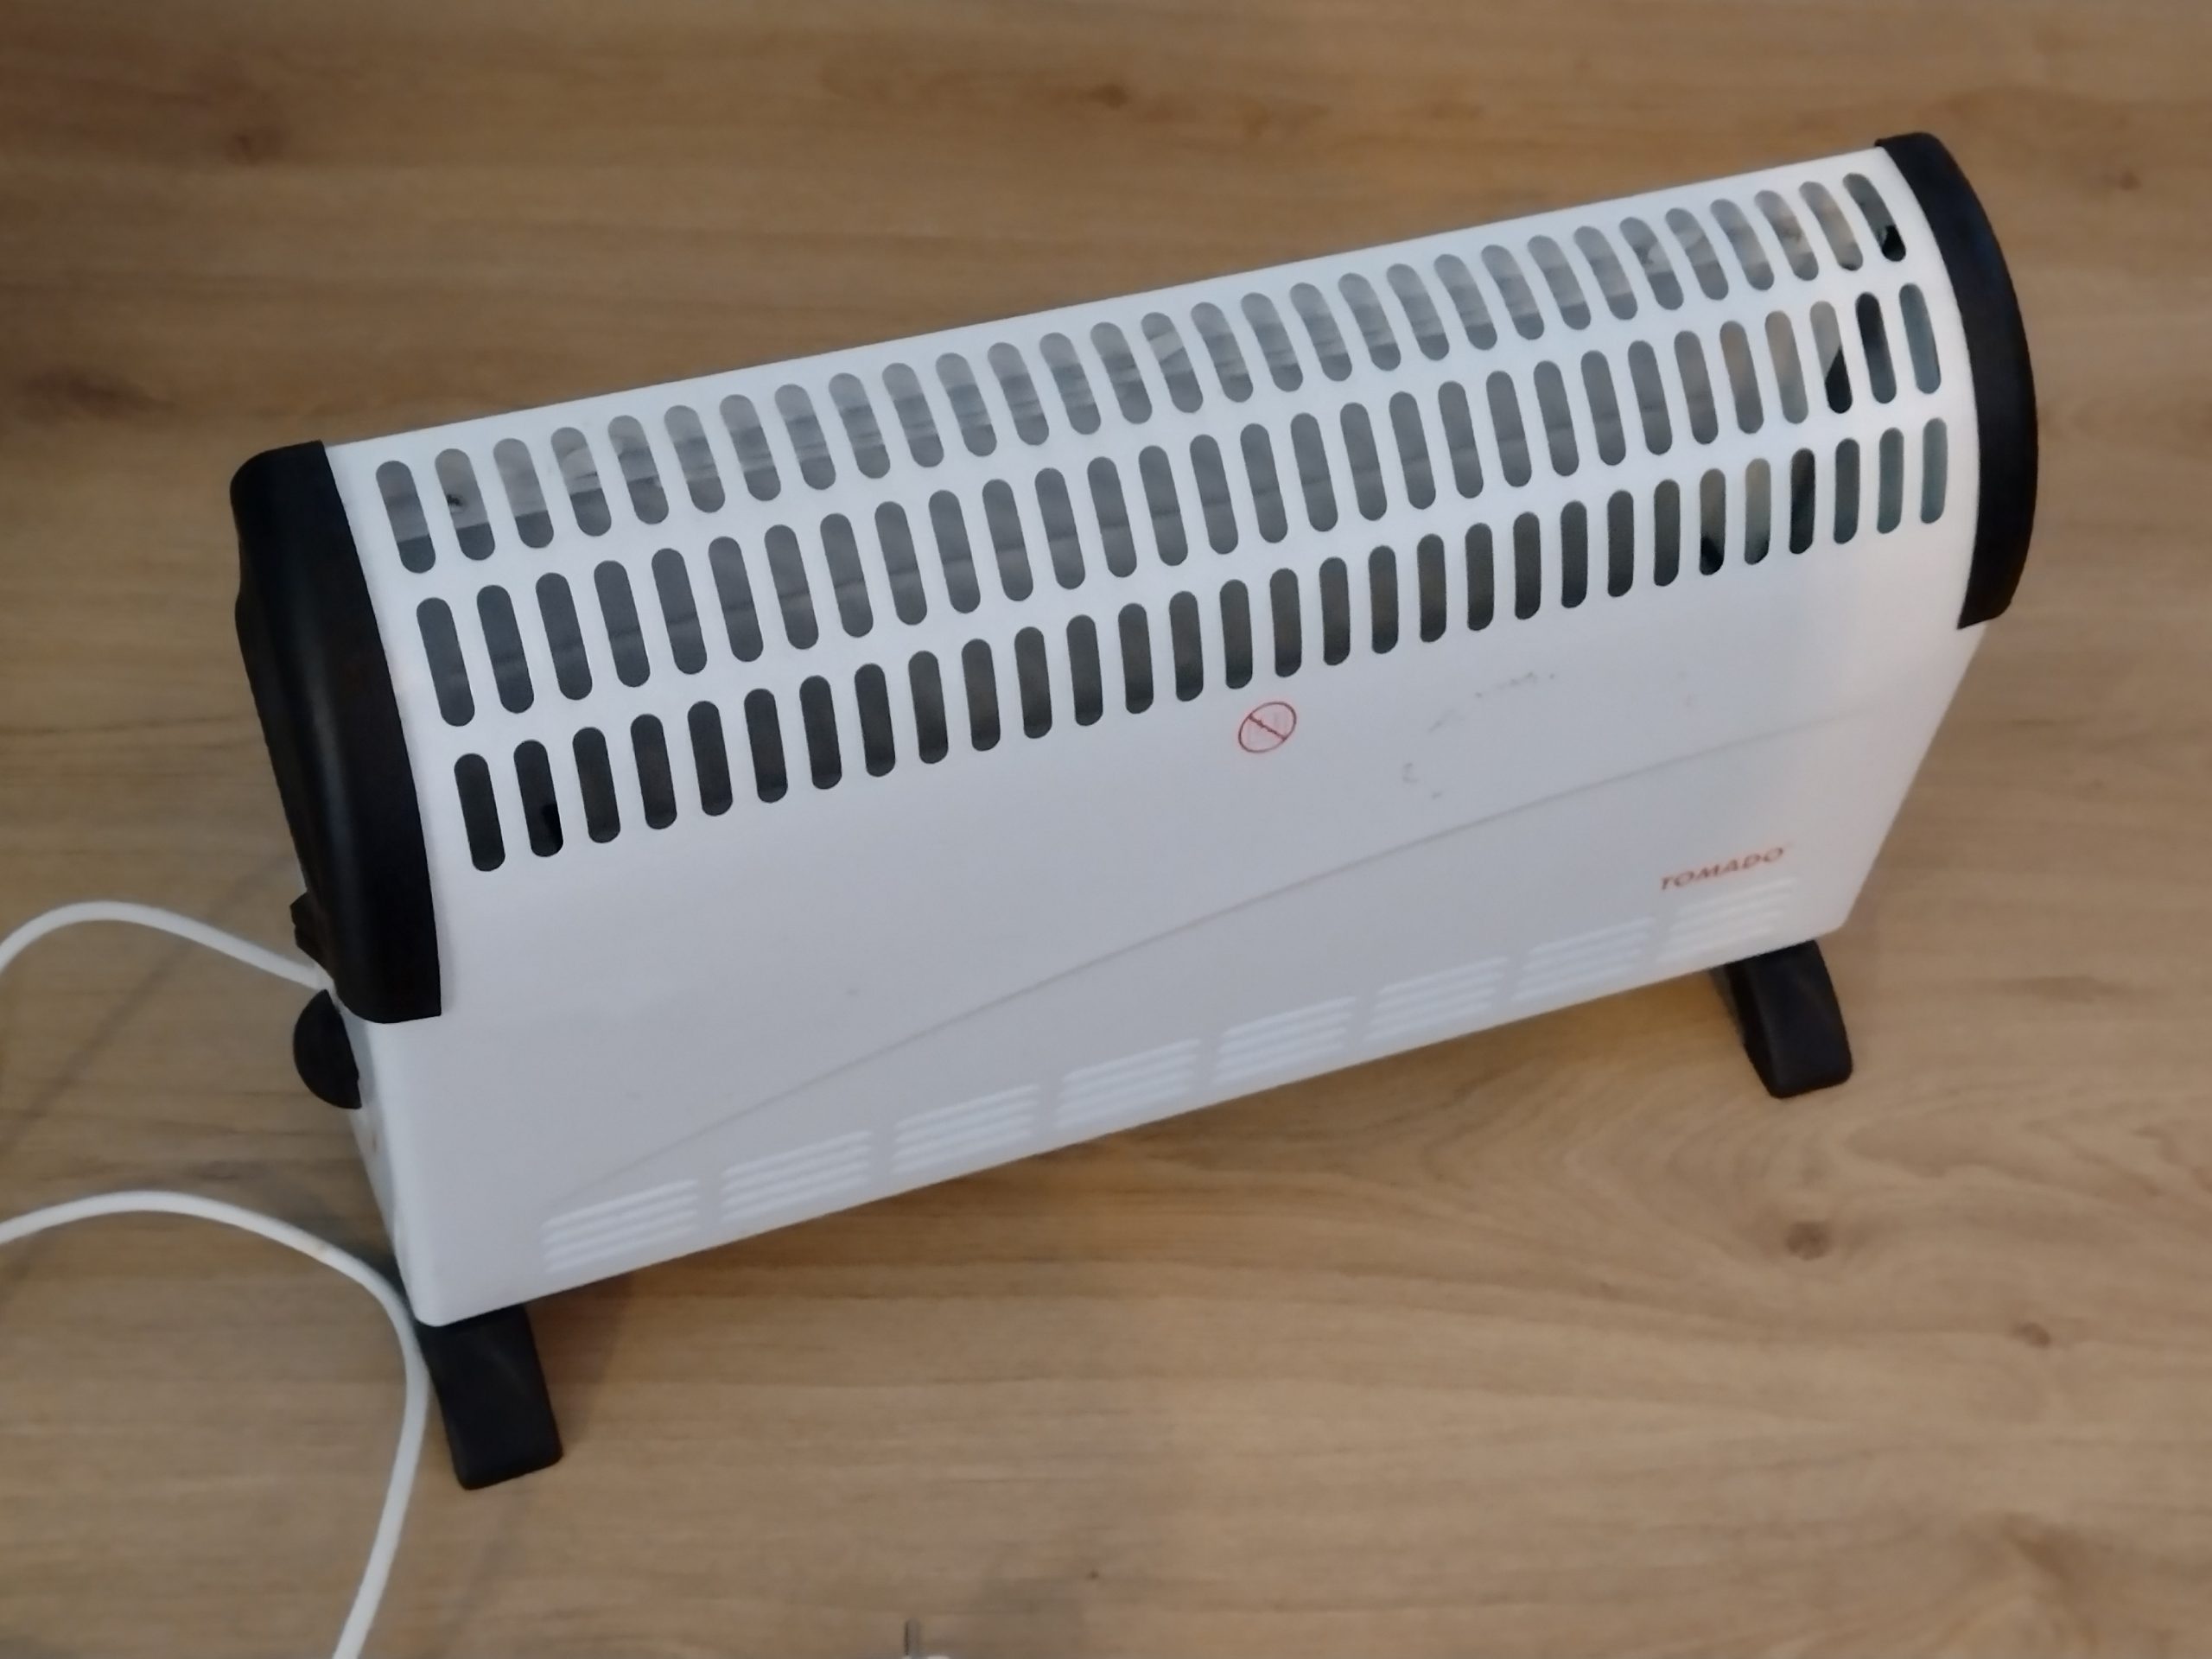
This post is a bit of unusual content for this blog, but I believe it to be worth sharing. In summary, I’ve modified a 1500 W space heater to output 400 W heat continuous. This lets me heat up just my computer corner, and subsequently save on my energy bill.
The winter is cold. While not unusual, this year’s energy prices are going through the roof. (For reference, electricity is about €0.8 per kWh and gas goes for €3 per m^3.) This requires us to be smarter about energy use, or pay the price. It doesn’t help that my house isn’t very energy efficient. Luckily, I wasn’t home during the coldest weeks of December. Annoyingly, I’ve paid about €50 in heating for the single day I used my central heating. While I can afford it, I’d rather spend it on locks.
One solution to save on the energy bill is to use a localized heating over central heating. The newest technology in that regard are infrared (IR) panels. They radiate infrared light, which is absorbed by surfaces. This is believed to be more energy efficient than heating the air. The panels are usually mounted to the wall. But I’ve also seen then hanging from the ceiling, or as large format placemats under a computer keyboard. I couldn’t find one that fit my needs, so I modified a fairly useless space heater instead.
Useless, wouldn’t usually be my way of describing these devices. Space heaters work as designed, converting electrical energy into heat. I’ve bought a 2* 750 W version some years ago, but have not used it much. It heats up quickly, and shuts off as it reached it maximum temperature. Heat for 10 seconds, cold for 30. This hysteresis is quite annoying to me. Therefore, I chose to wire the two 750 W elements in series, reducing the power output to approximately 400 W. This appears to be enough to make my workstation habitable. (Given, I’m dressed for the weather as well.)
The difference is, the heater will get less hot, and the temperature is more stable as the tipping point of the thermostat is rarely reached. You might even forget it is even there. (Please don’t, as it’s still a fire risk.) I’m using the heater for about 5h a day on normal winter days, and have not used my central heating for a month.
While the modification isn’t difficult for the average maker, I rather share the complete story and make it more accessible. Do take care, though, as electricity is largely unforgiving, and the dangers are easy to underestimate.
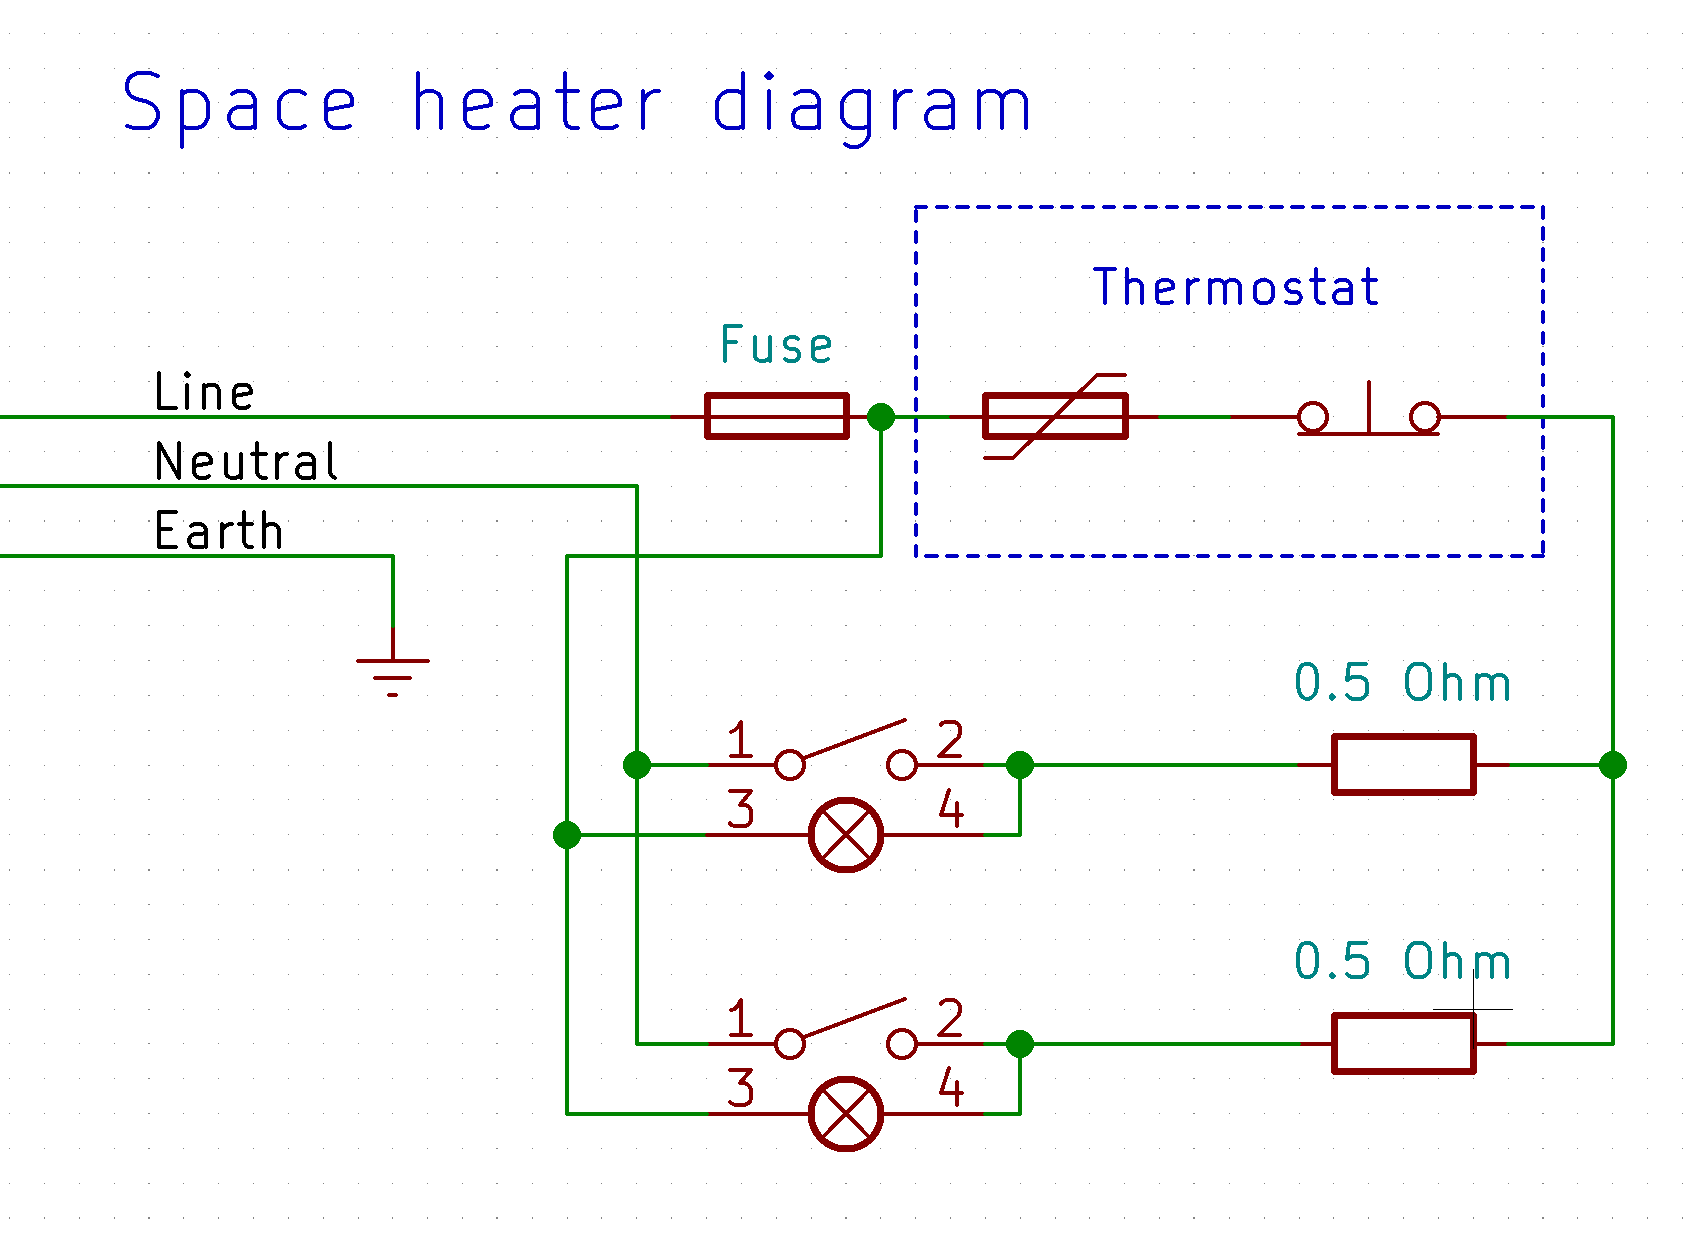
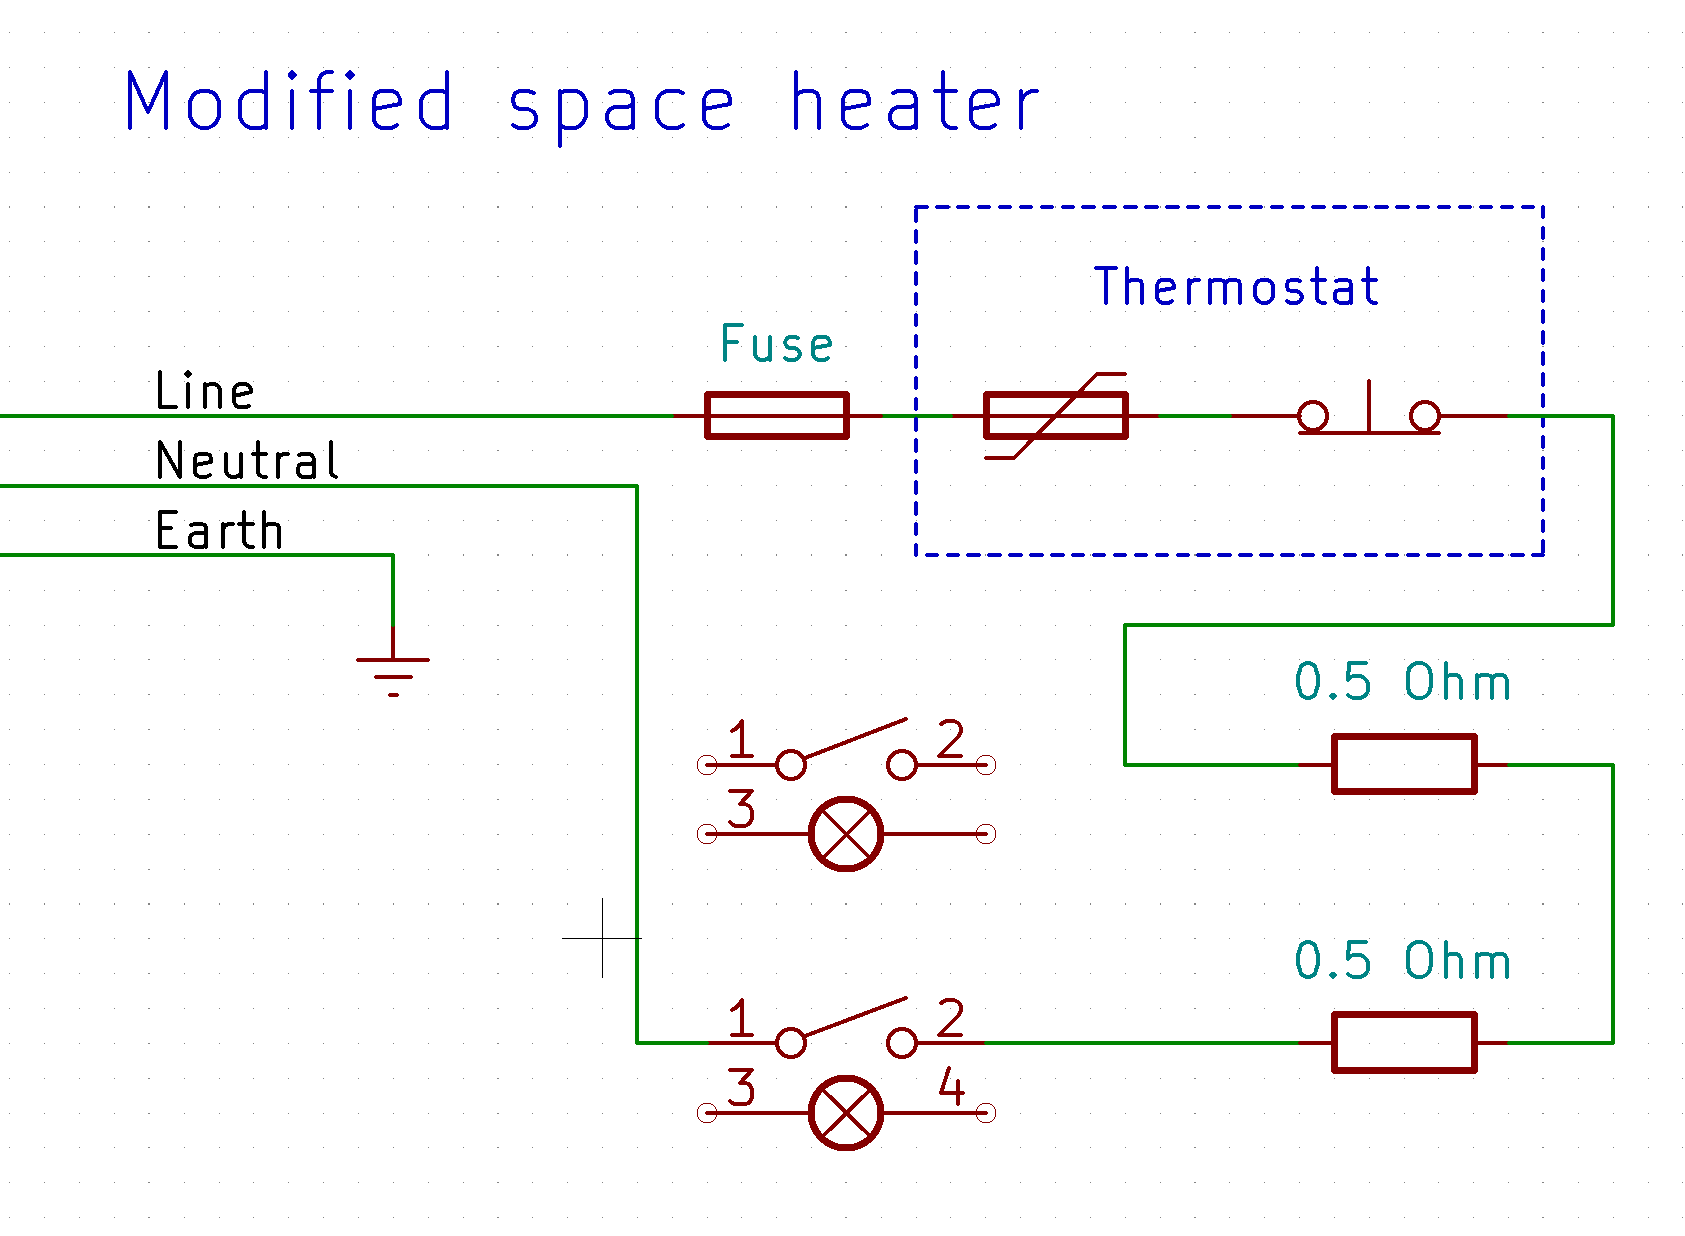
In the figure below, there are simplified two diagrams which represent the original and the modification. In simple terms, electricity flows through a heating element to create heat. As continuous heat can burn out the element, they added a thermostat to regulate the temperature. This is quite a dumb device and consists of a bi-stable thermal switch. The heat builds up, until it trips the temperature dependent switch. The switch is turned on again when the temperature cools down below the set point. The overshoot and undershoot is called the hysteresis.
Switches with a build in lights are added for usability, and the earth is the safety feature to complete the build. It should be connected to the metal case, as a short from line or neutral to ground will trip the ground fault circuit interrupter (GFCI or RCD), or at the worst case, cause your circuit breaker(s) to pop.
In the original configuration, the heater can be used as 750 W or 1500 W heater. Making it into something arguably more useful isn’t hard. I’ve simply wired both heating elements in series, which quadruples the resistance, and sets the power output to 375 W.
The modifications are fairly straight forward, as clip on connectors are used to simplify manufacturing. Swapping the wires is usually enough to make it work. As you will see, I’ve not wired the optional switch light, and reused the cable for another connection.
Please take care of the necessary safety precautions, including unplugging it from the wall. Furthermore, don’t forget to wire the earth, (thermal) fuse, and thermostat correctly as they are life-saving features.
Let’s summarize. I’ve outlined a simple modification to a space heater to output 400 W heat continuously. This is enough for me to heat my work space in moderate Dutch winter weather. For the next winter, I’m very likely to invent in a heated work table surface, and a heated office chair, instead.
Hopefully this inspired you to modify your devices, and save some money on the electricity bill. I’d rather see you spend the money on other necessities, and if possible your lockpicking hobby.
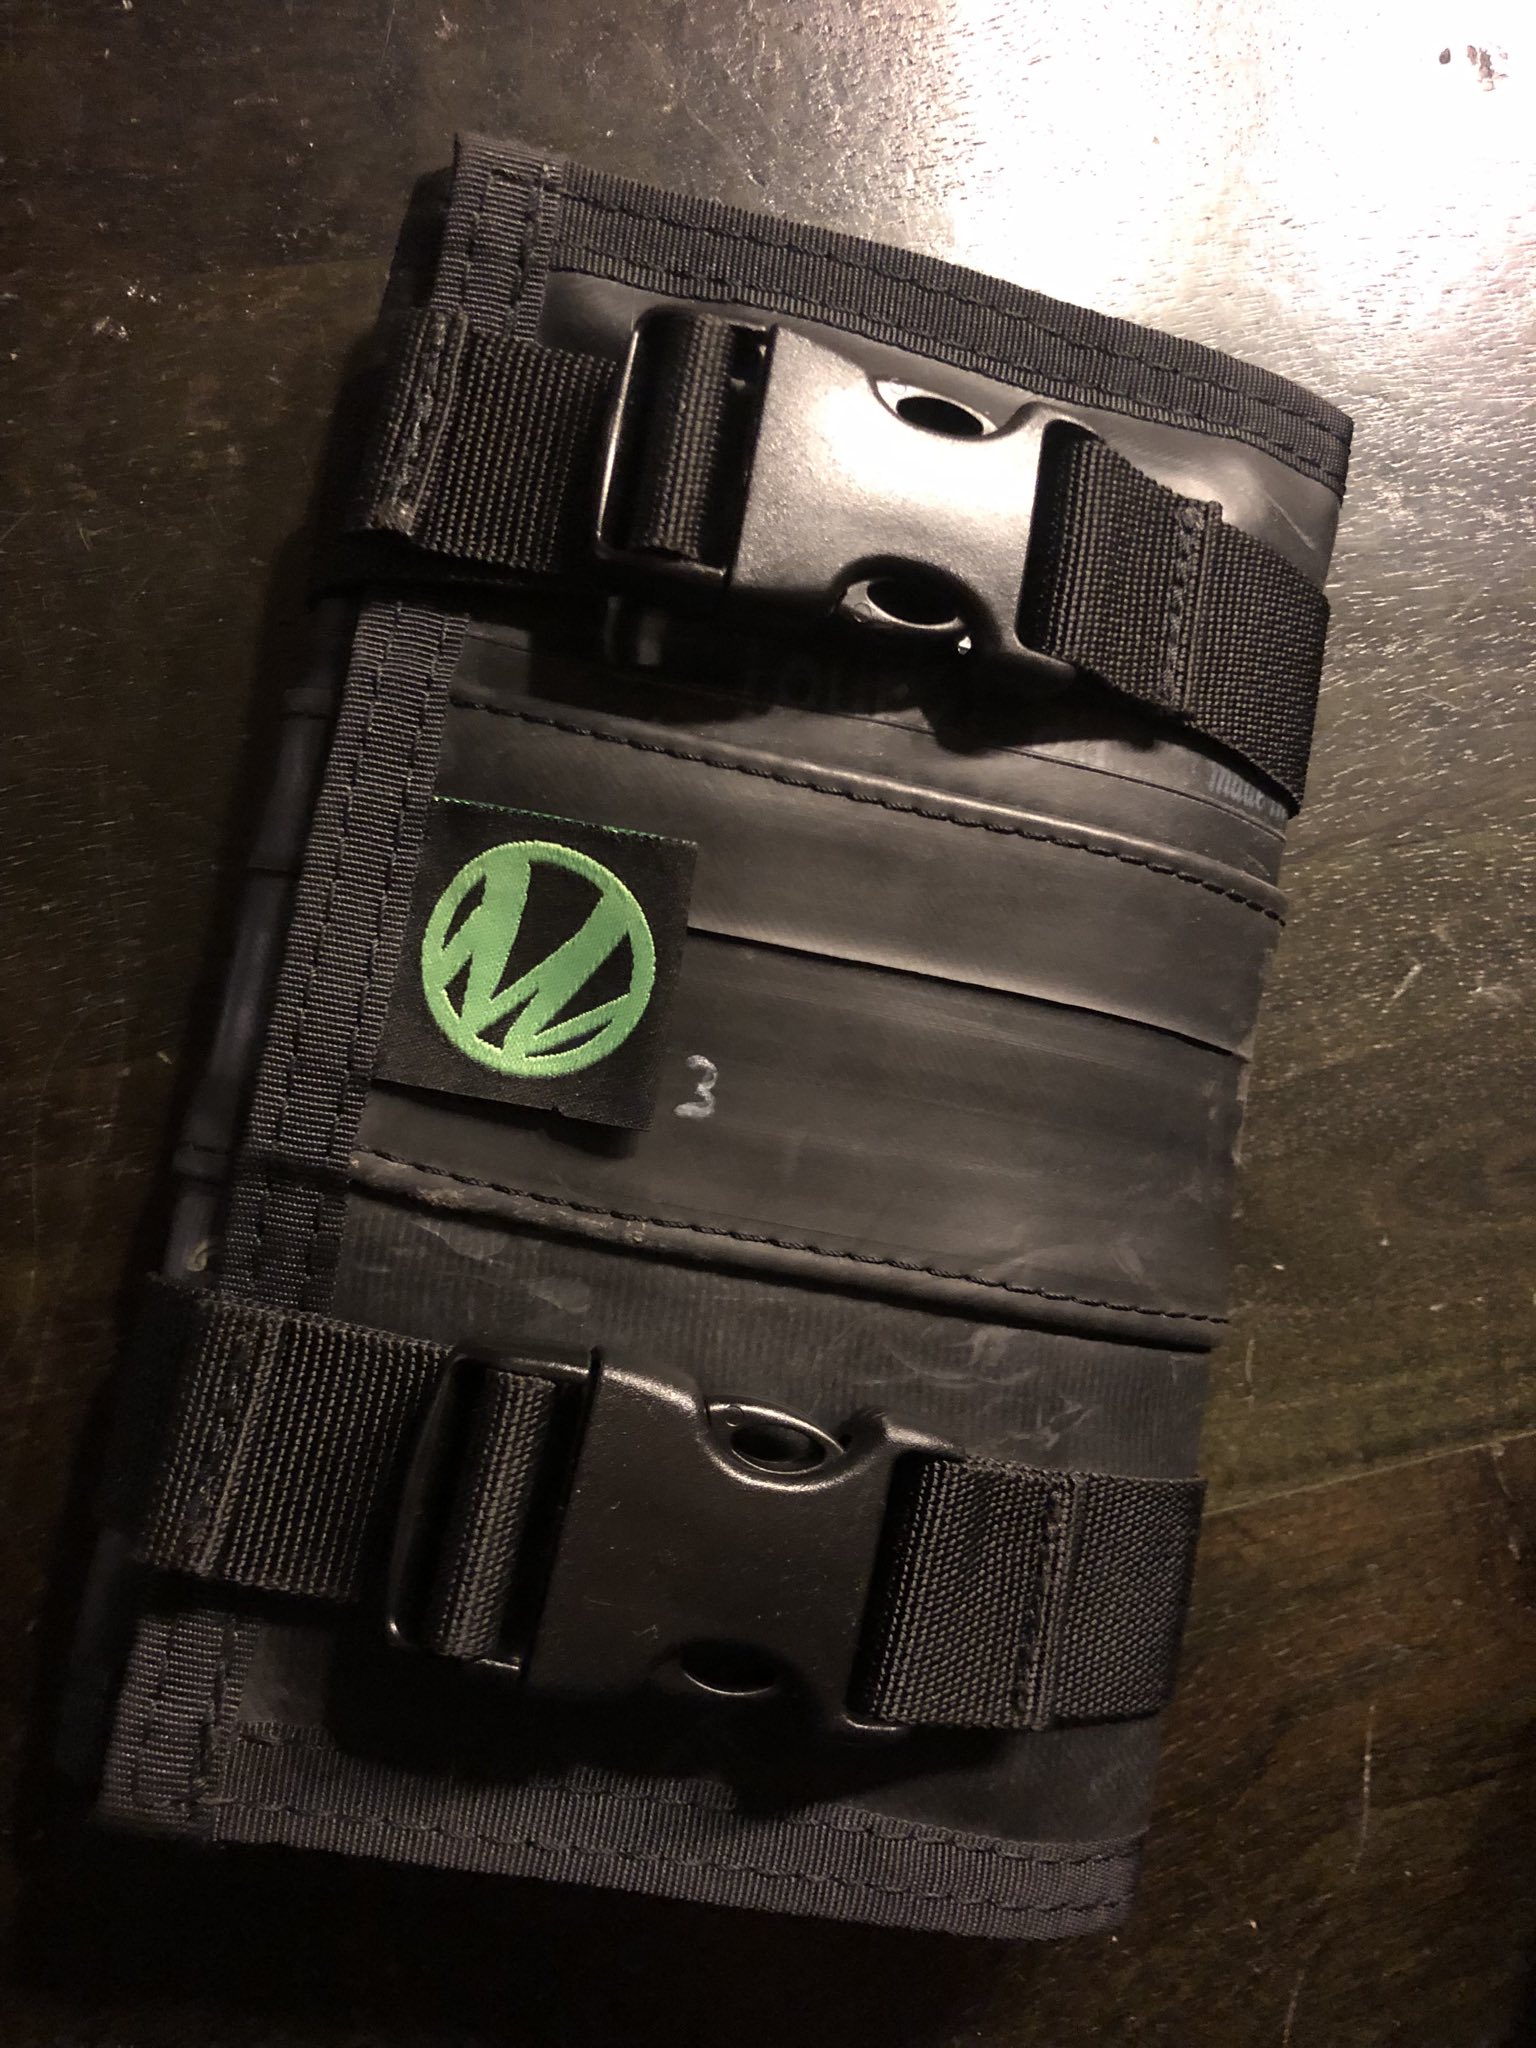
Hi everyone, this is a quick blog post to show off a lockpick set by Lockpick maker Moki who also makes wonderful pick cases, as seen below. These cases are made in part from bicycle inner tube, which appealed to us.
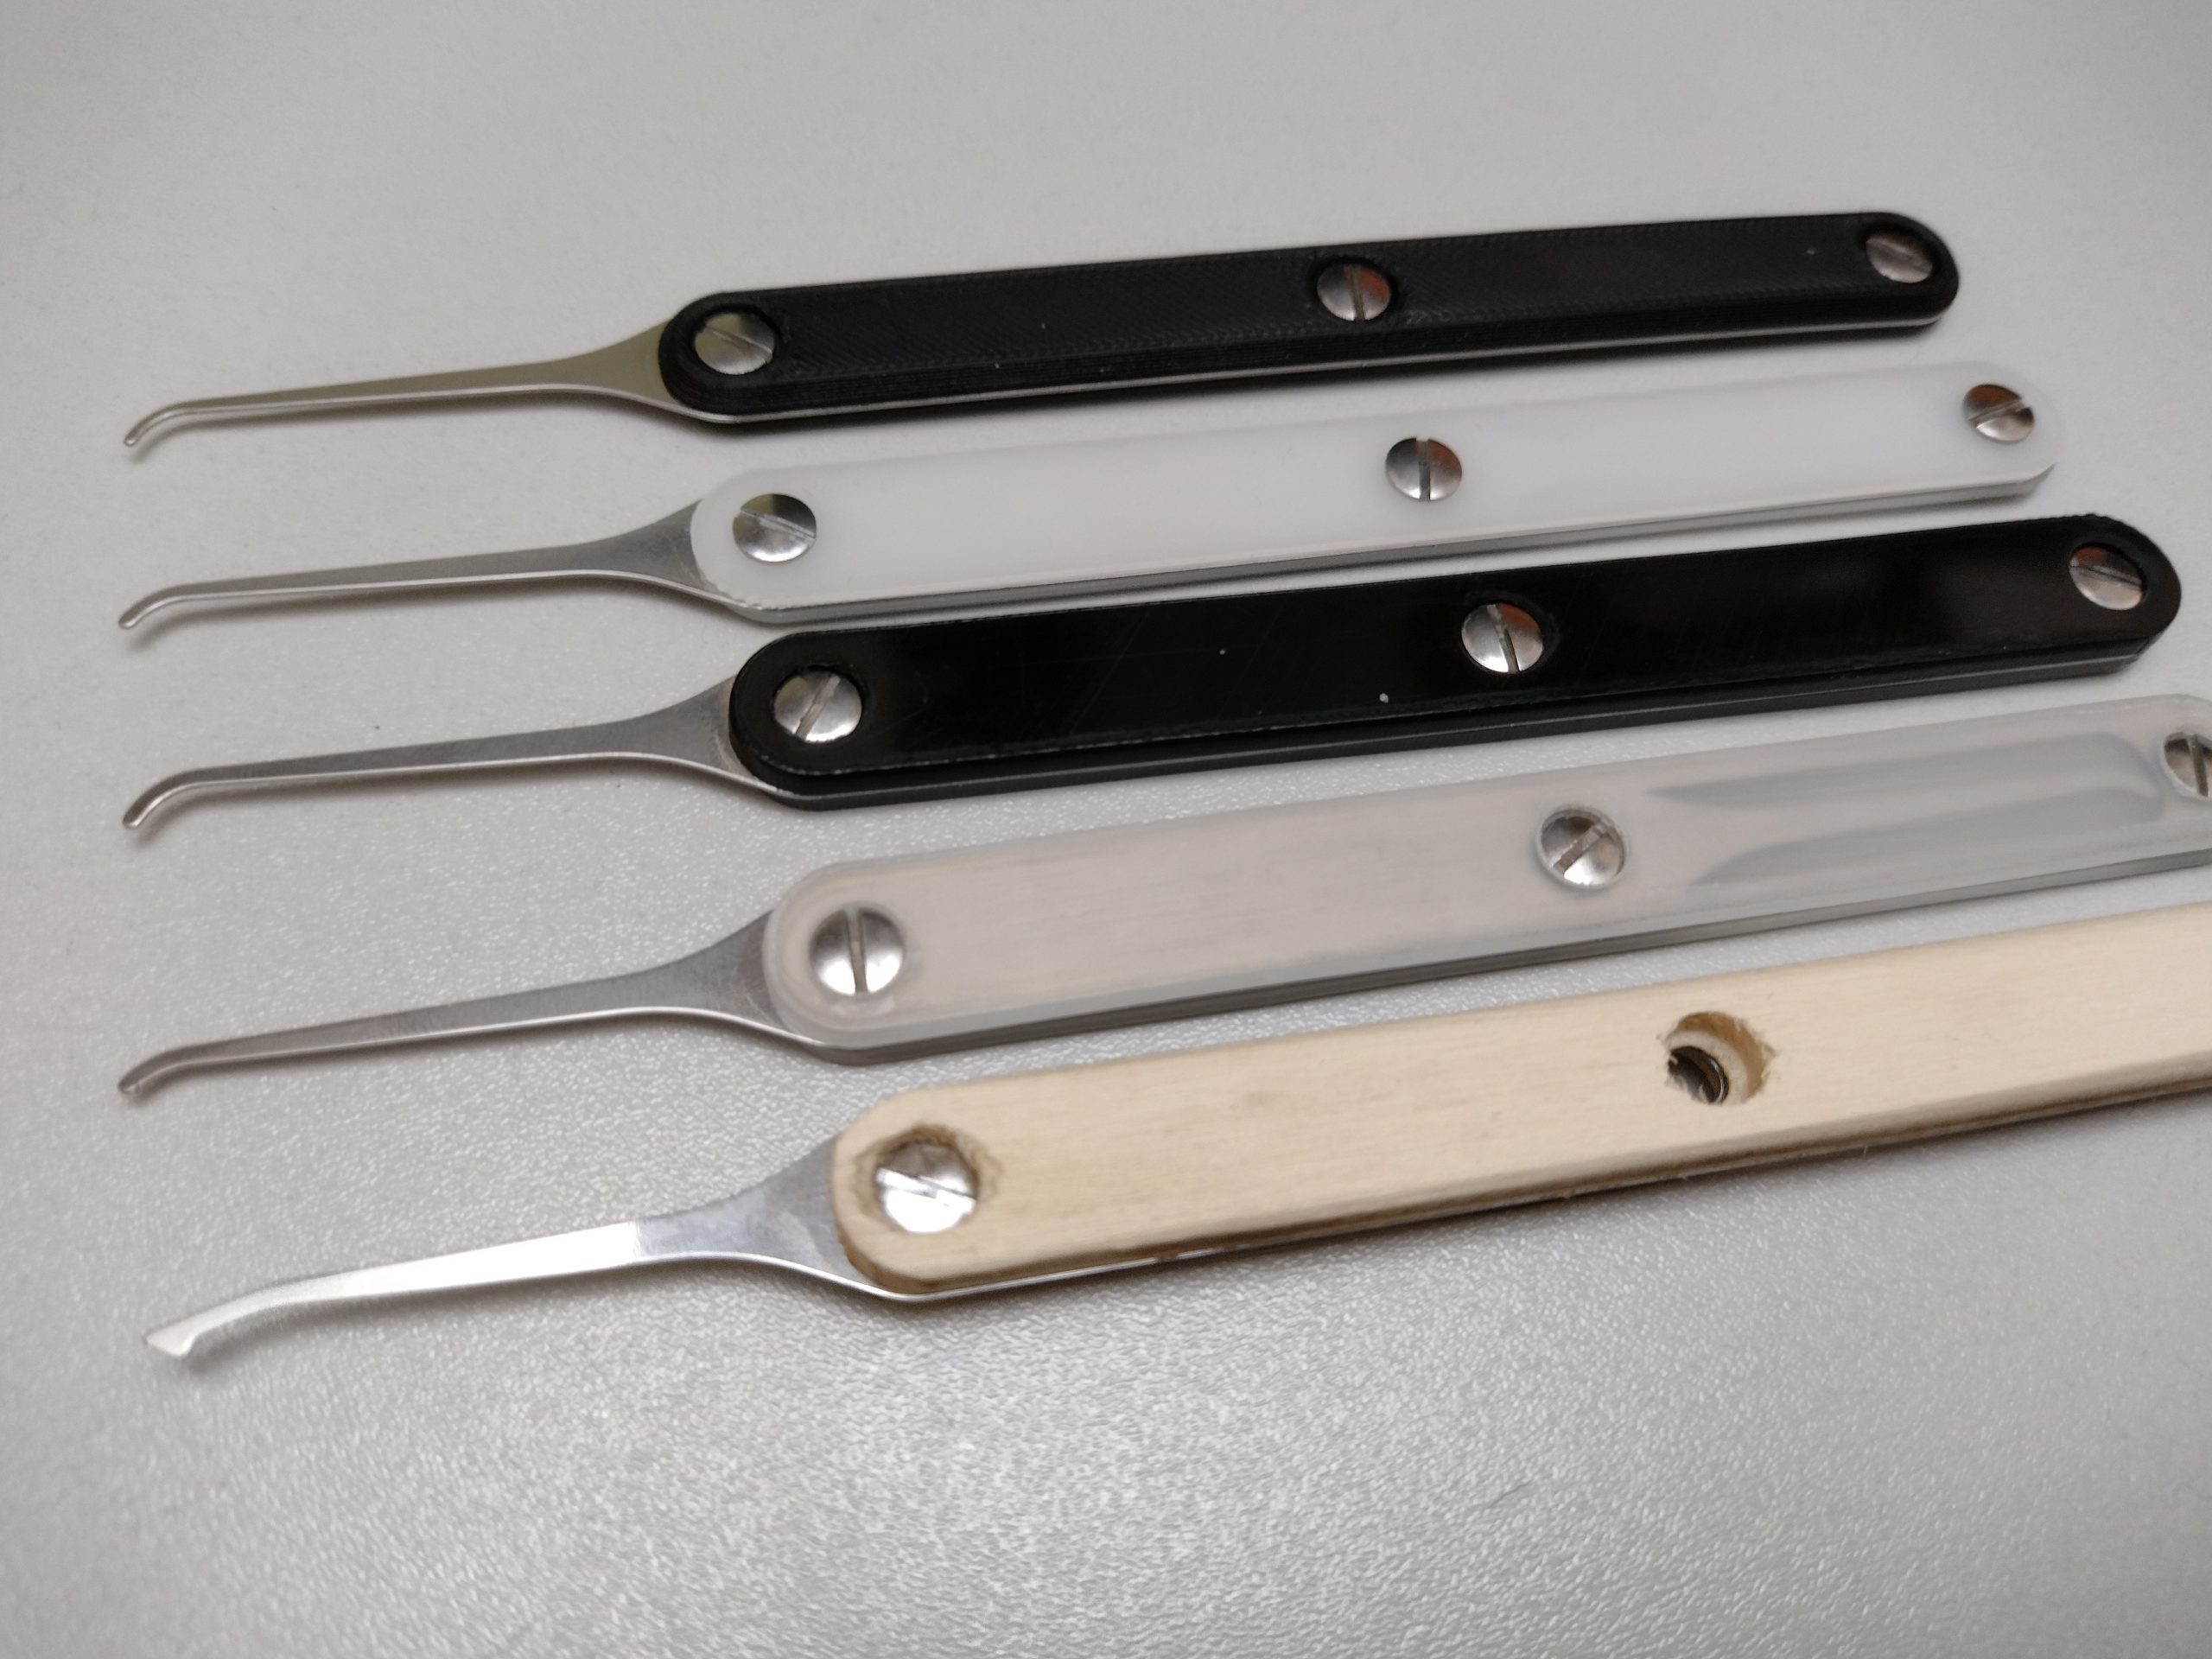
Moki pickcase with a Explorer Set lockpicks and 3D printed PETG handles Bicycle inner tube lockpicking pouch
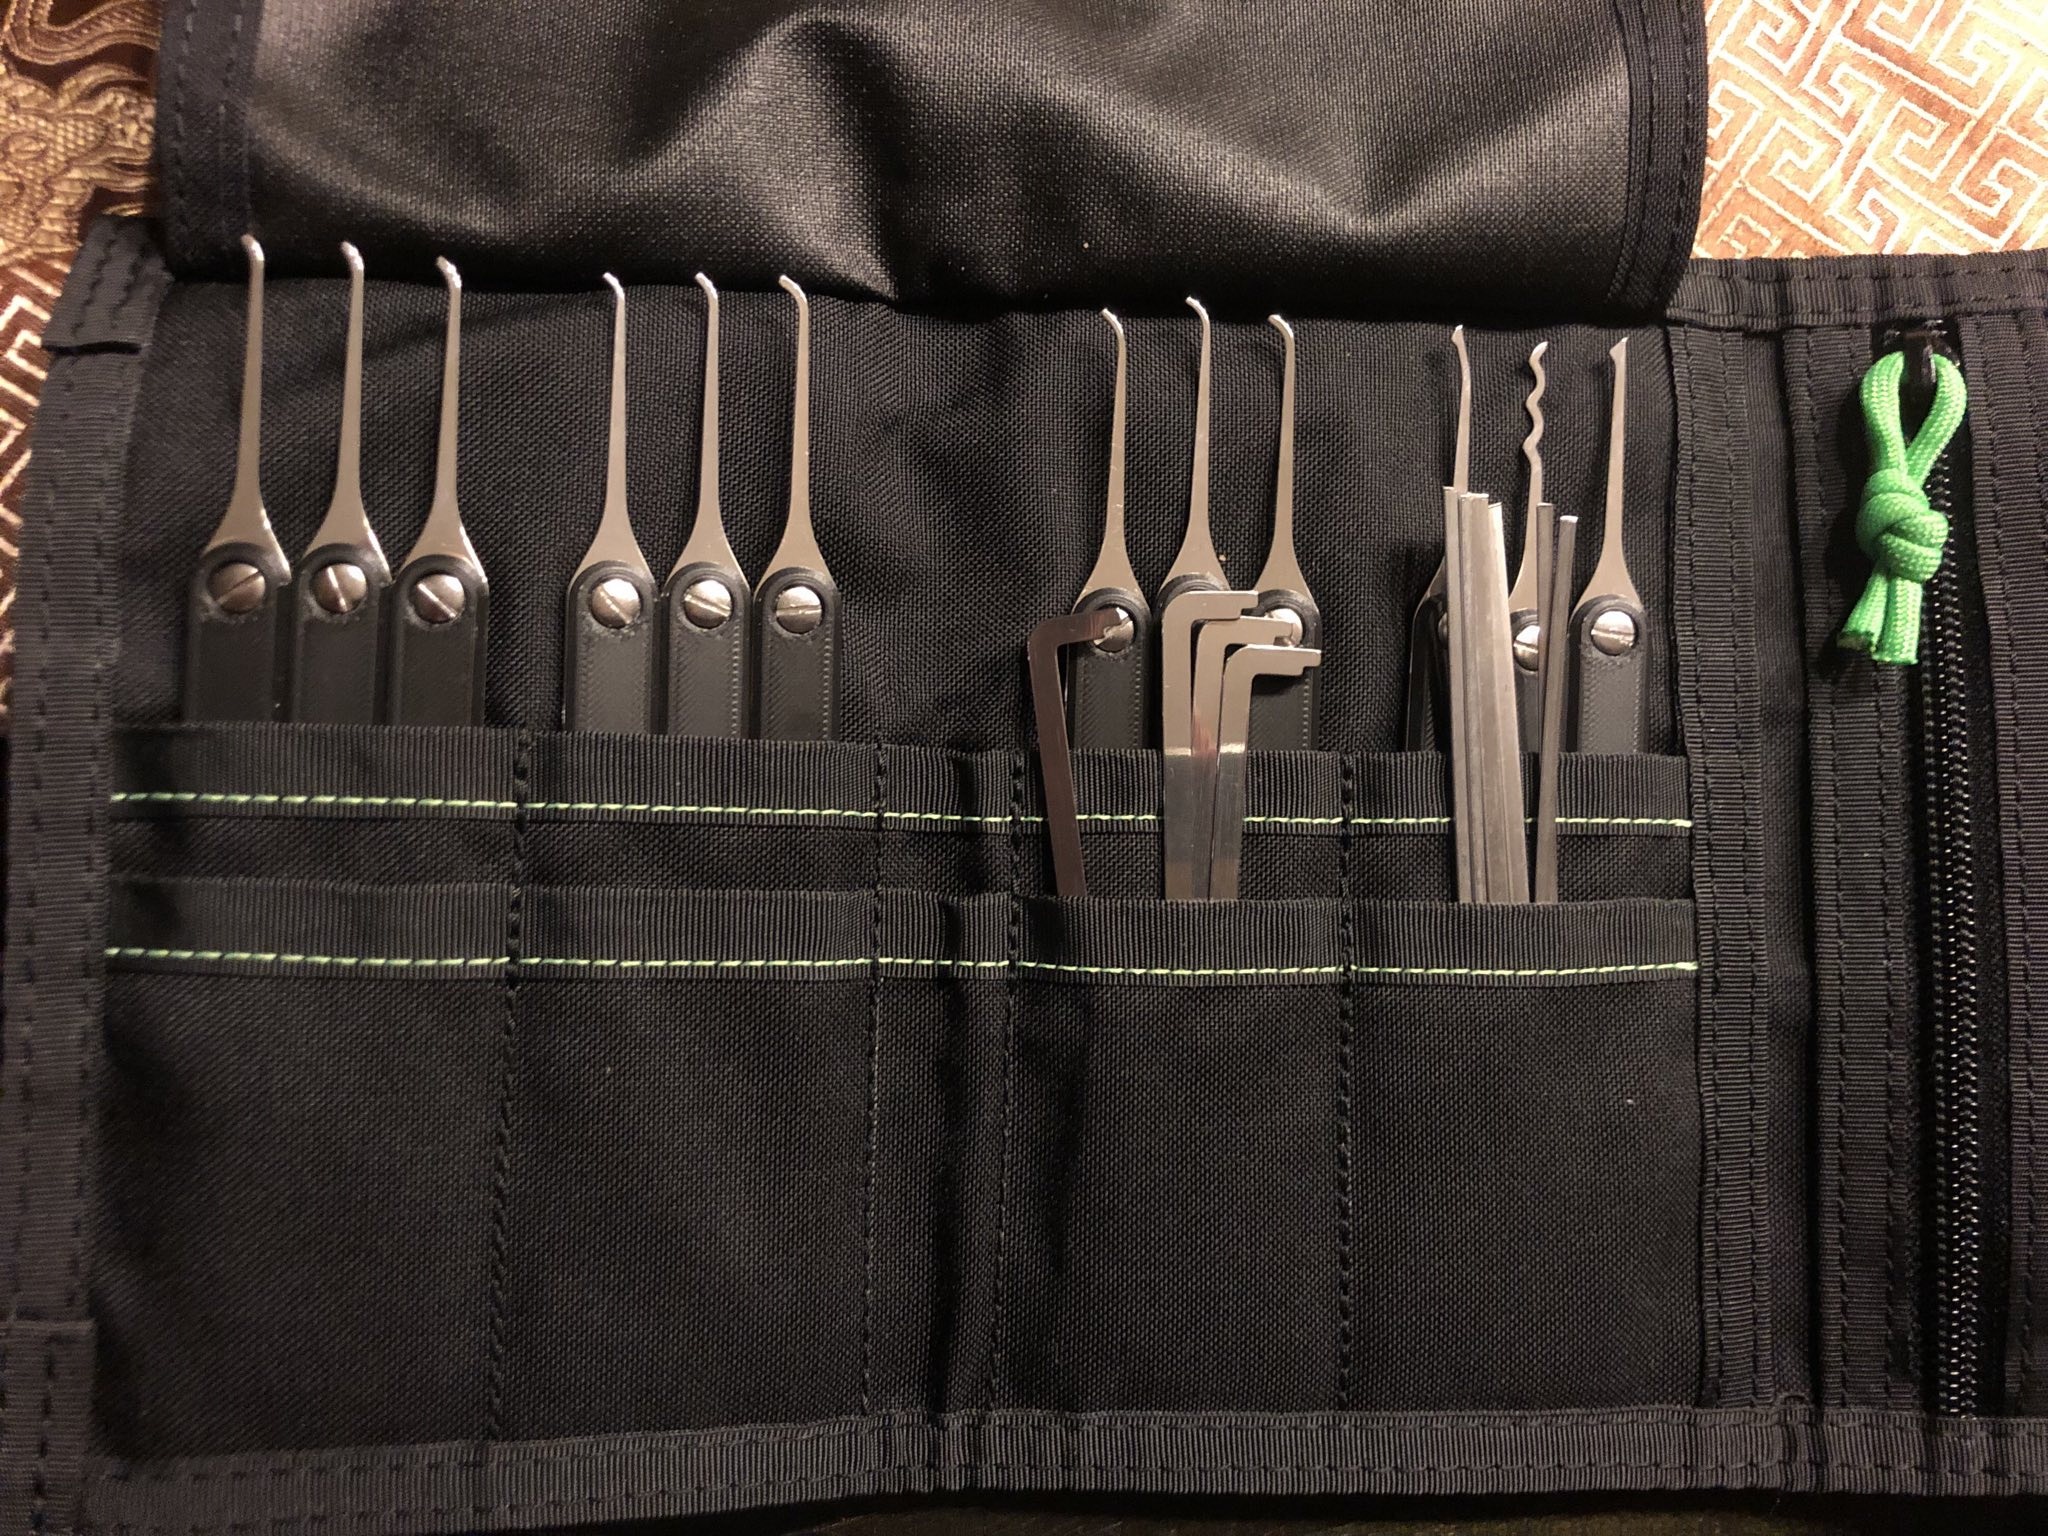
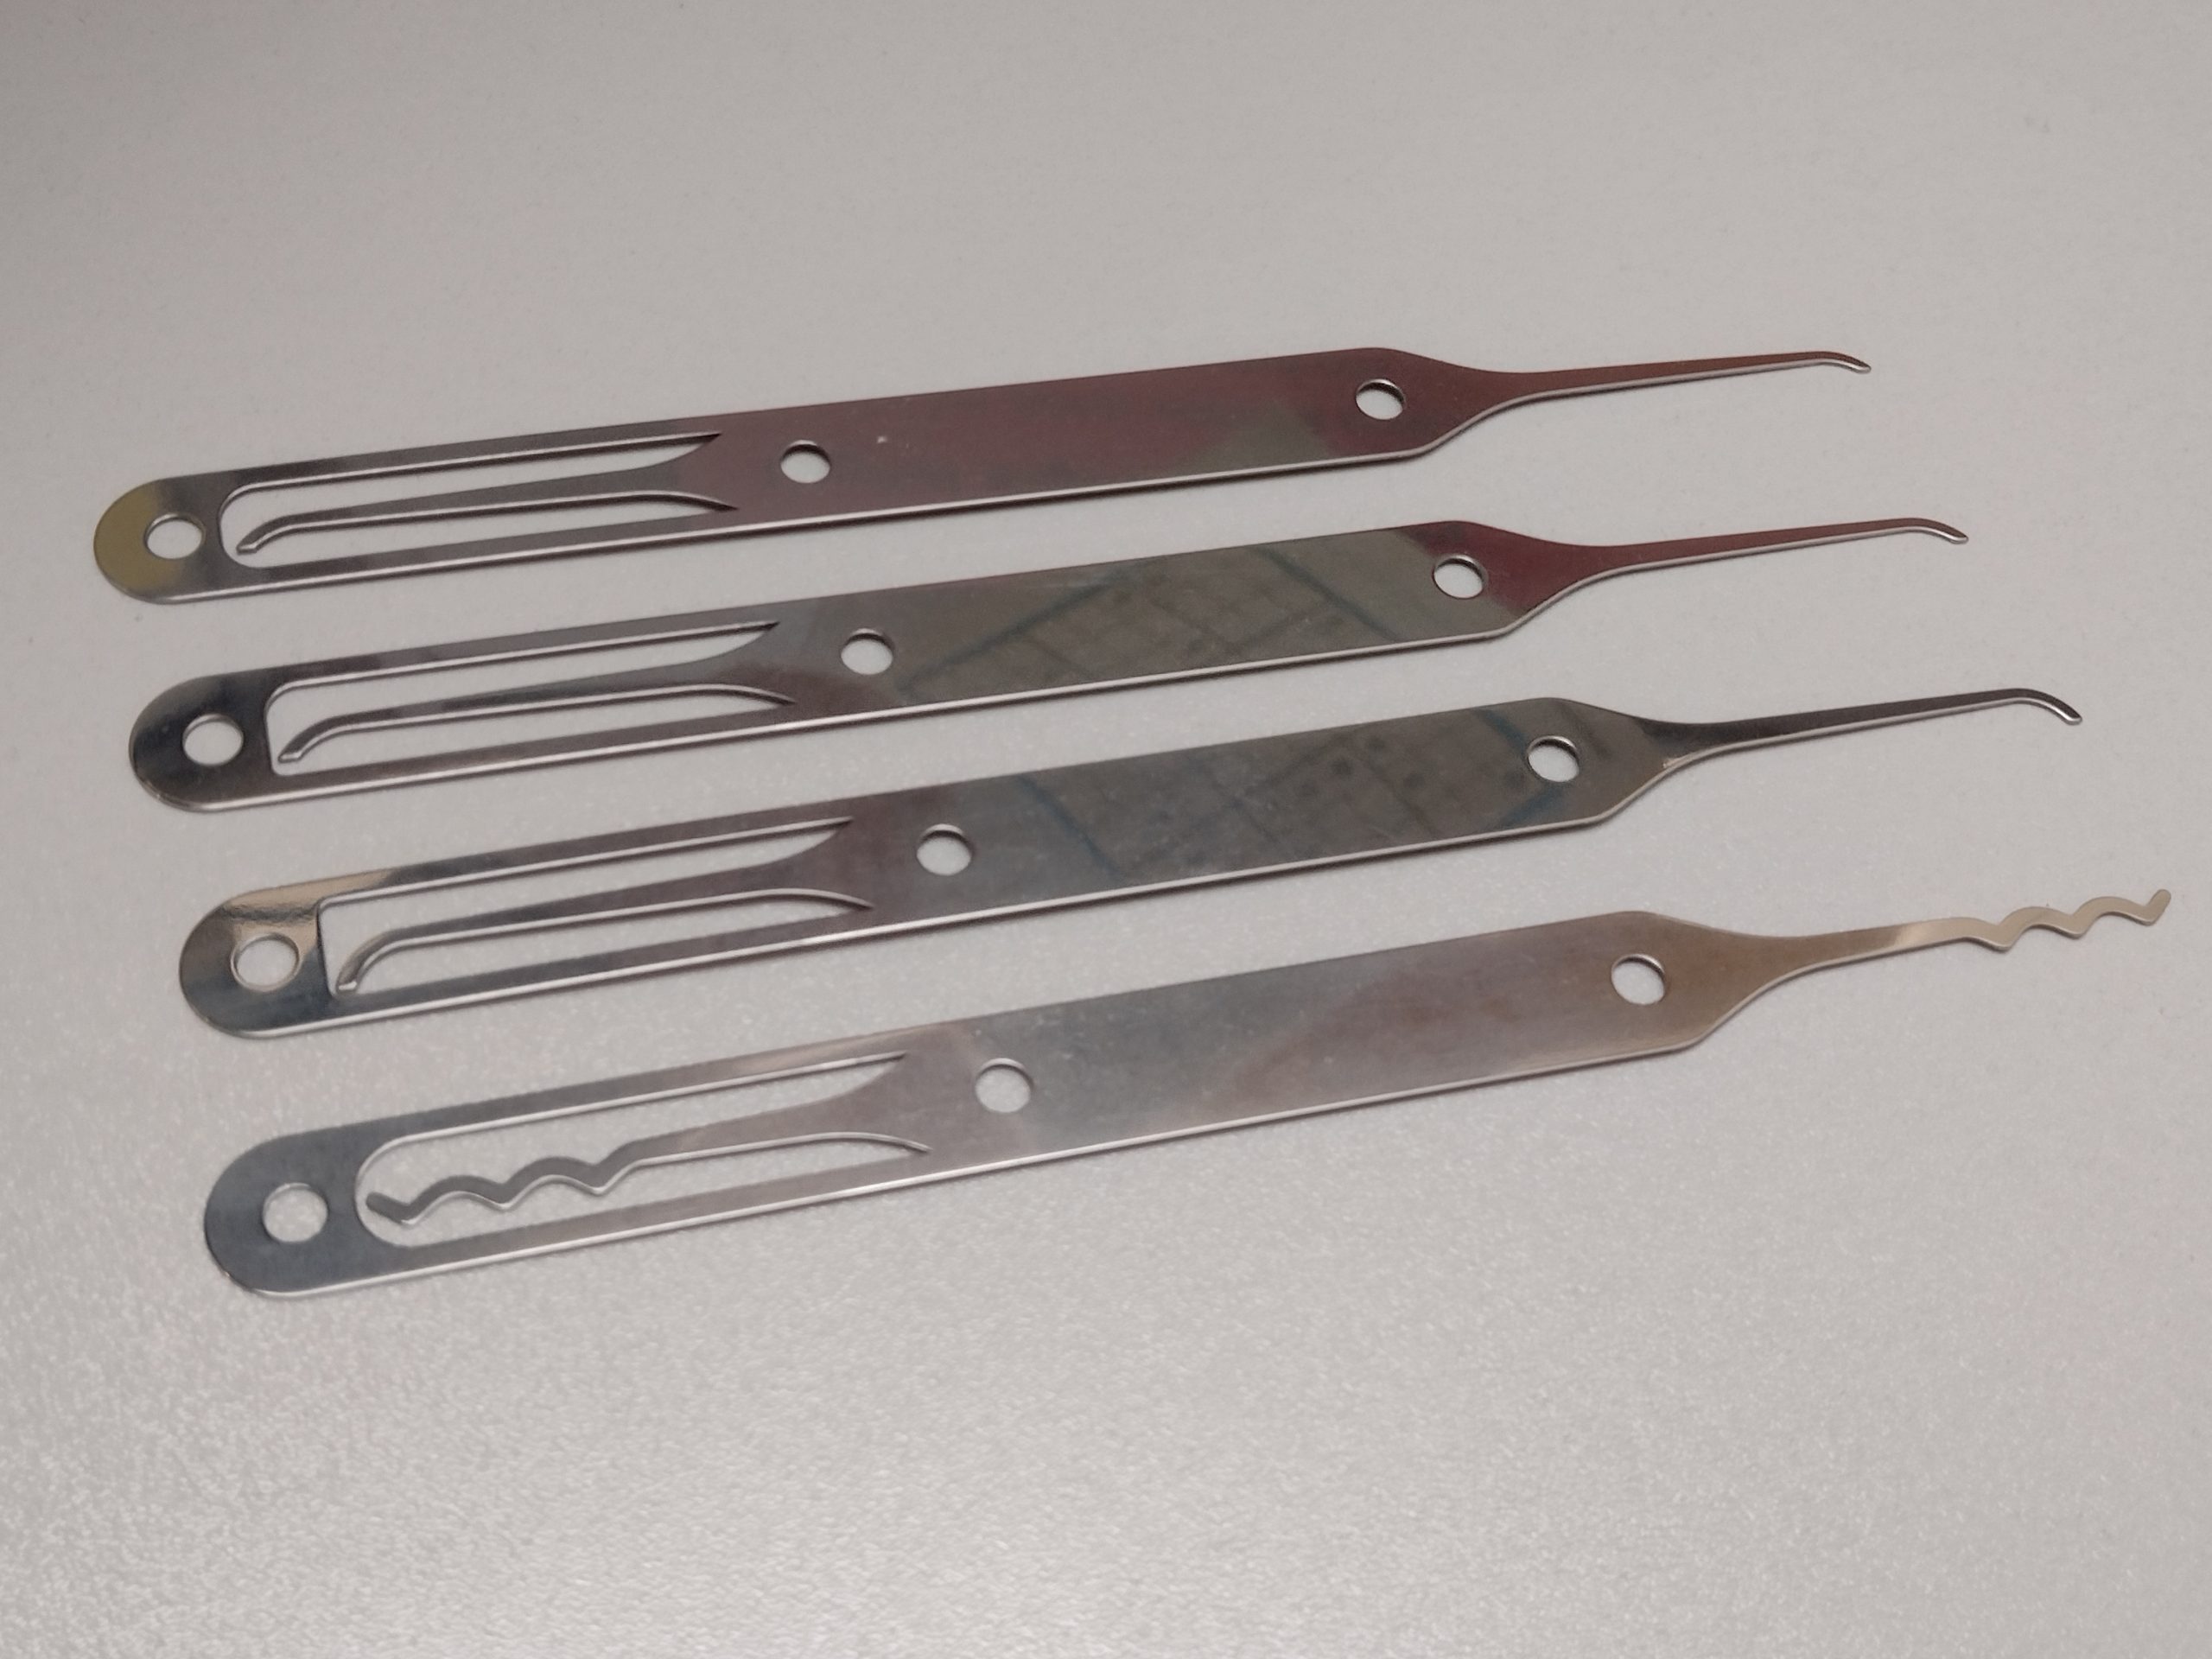
The Moki set contains three hook sets; small, medium, and deep hook of pointy, flat and round hooks similar style to the Sparrows SSDeV and Law Lock Tools Tipene set. All the lockpick shapes work very well. There is often debate on which is best, but we are open to all lockpick shapes, each has their function.
While we don’t expect to break these lockpicks, it’s an interesting design choice to have a replacement tip in the handle. All lockpicks came heavily polished, more so than any commercial lockpick we have seen.
The set of flat hooks and a triple peak rake. (Don’t look too closely at the reflections).
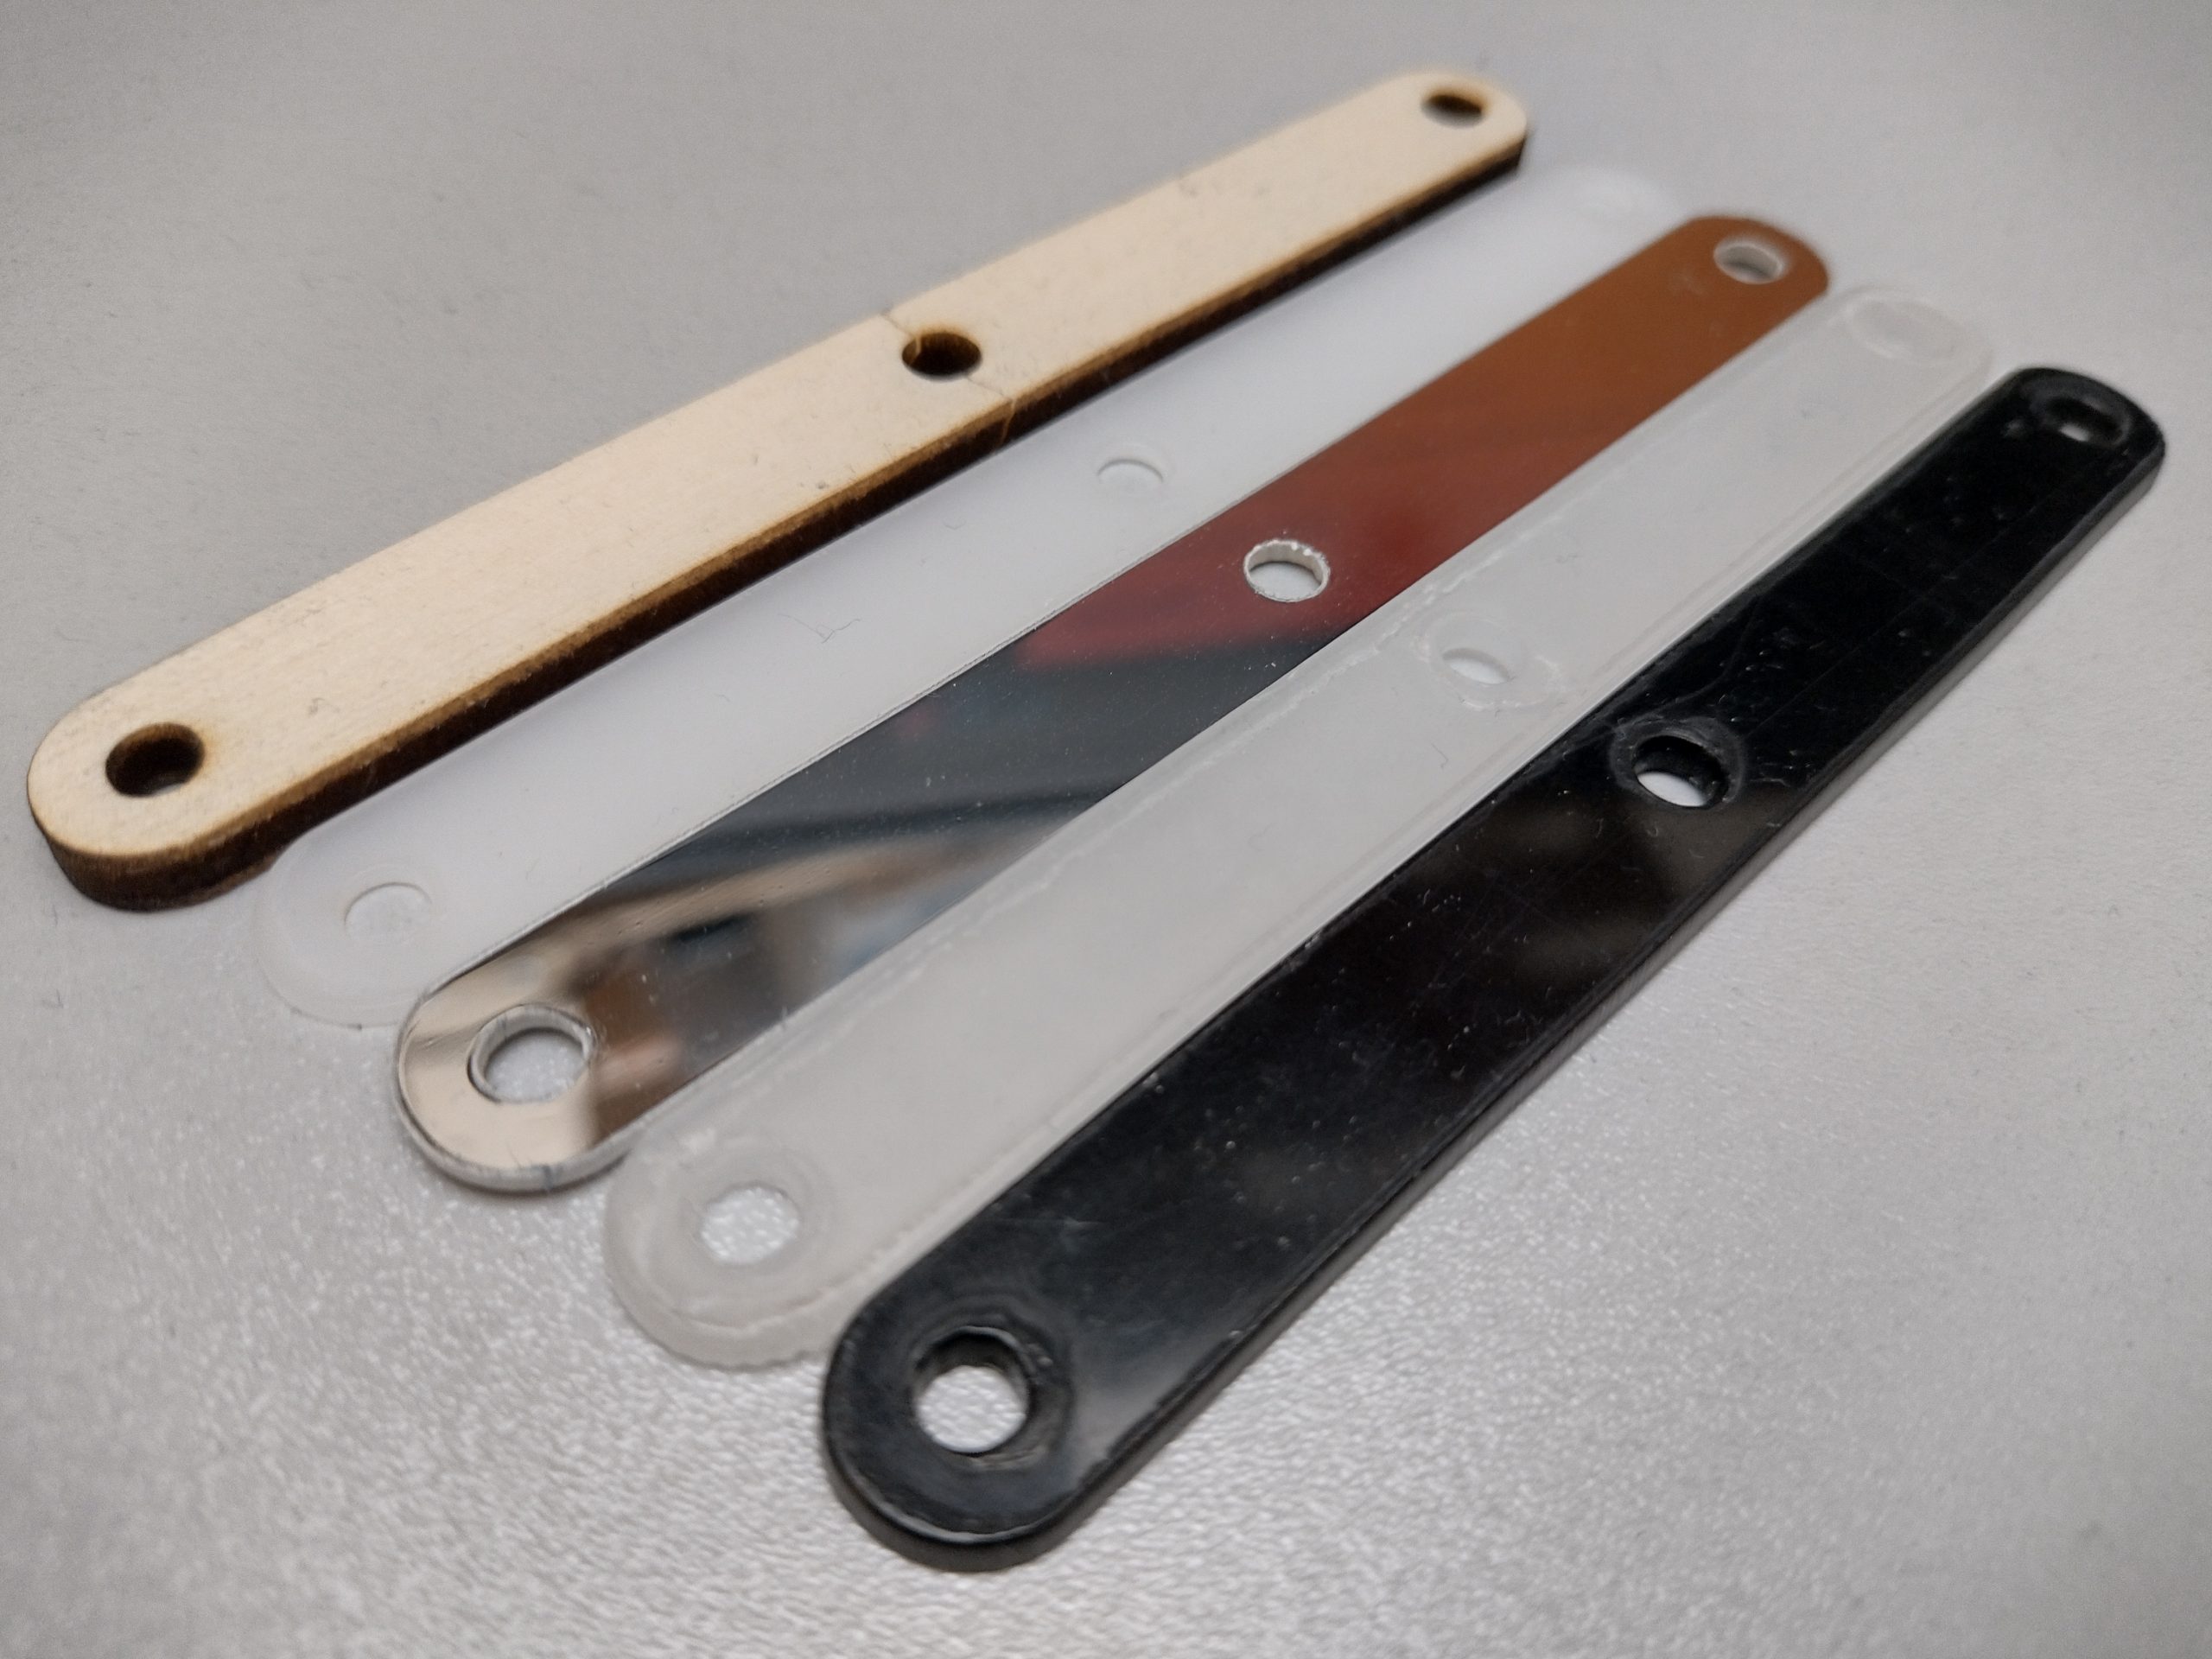
The lockpicks are longer and wider than standard lockpicks, think Law Lock Tools Pro, or Sparrows Sandman. Due to the size, the picks are quite flexible and are thus heavily improved with handles. Moki sells 3D printed handles from PETG, and has sold thick metal handles in the past. But it wouldn’t take much to make your own.
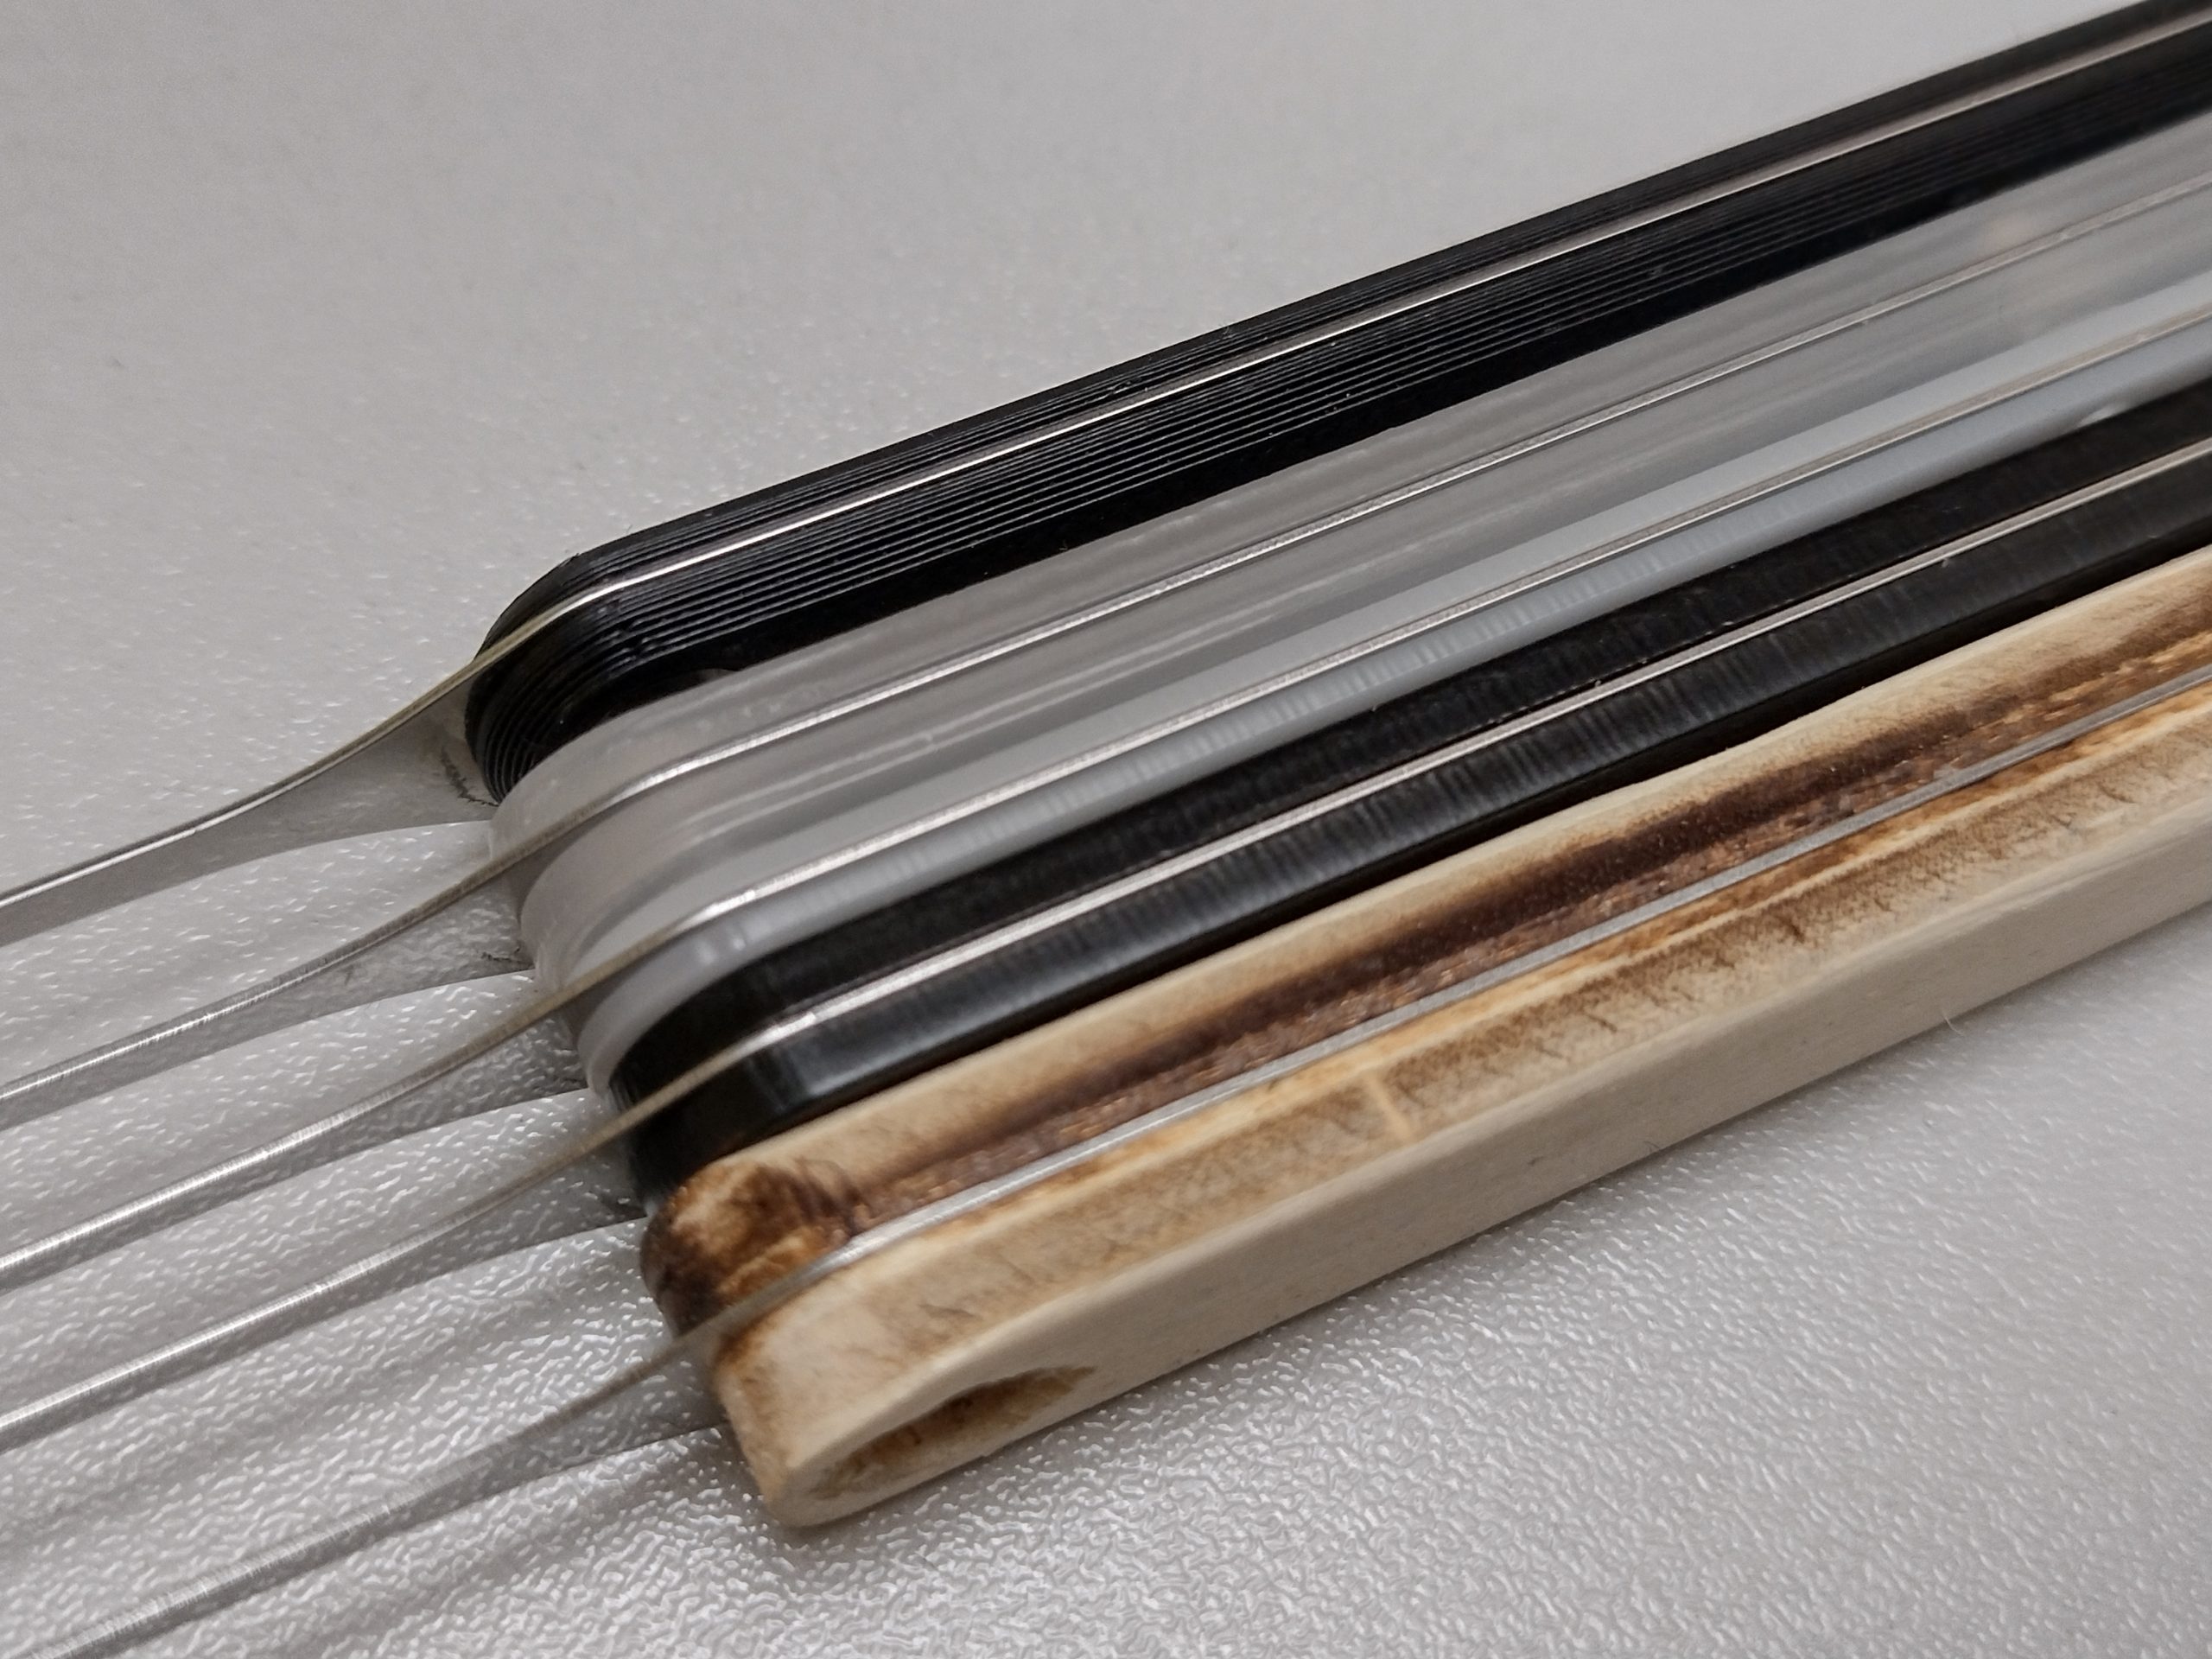
Experimenting a bit with the size and shape shows 2mm at each side works best. The screws in the set require countersunk holes, and are a bit fiddly to put together.
It is quite interesting working with these different handle materials. The 4mm thick wood is superb in feedback, but is thicker than any usual lockpick.
All plastic handles are an improvement over the handleless lockpicks, but none have the same feedback as glued/welded metal handles. The search for the best handle continues…
Closeup of the handle thickness.The sky is the limit, except for the flex in wood.
In 2018 Walter was at def.camp and made it to the local television by lockpicking the ATM of the payment village. This attack was not in scope, but it took the guys longer to ask not to pick the lock than for Walter to pick the lock. (https://blackbag.lockcon.nl/?p=2701)
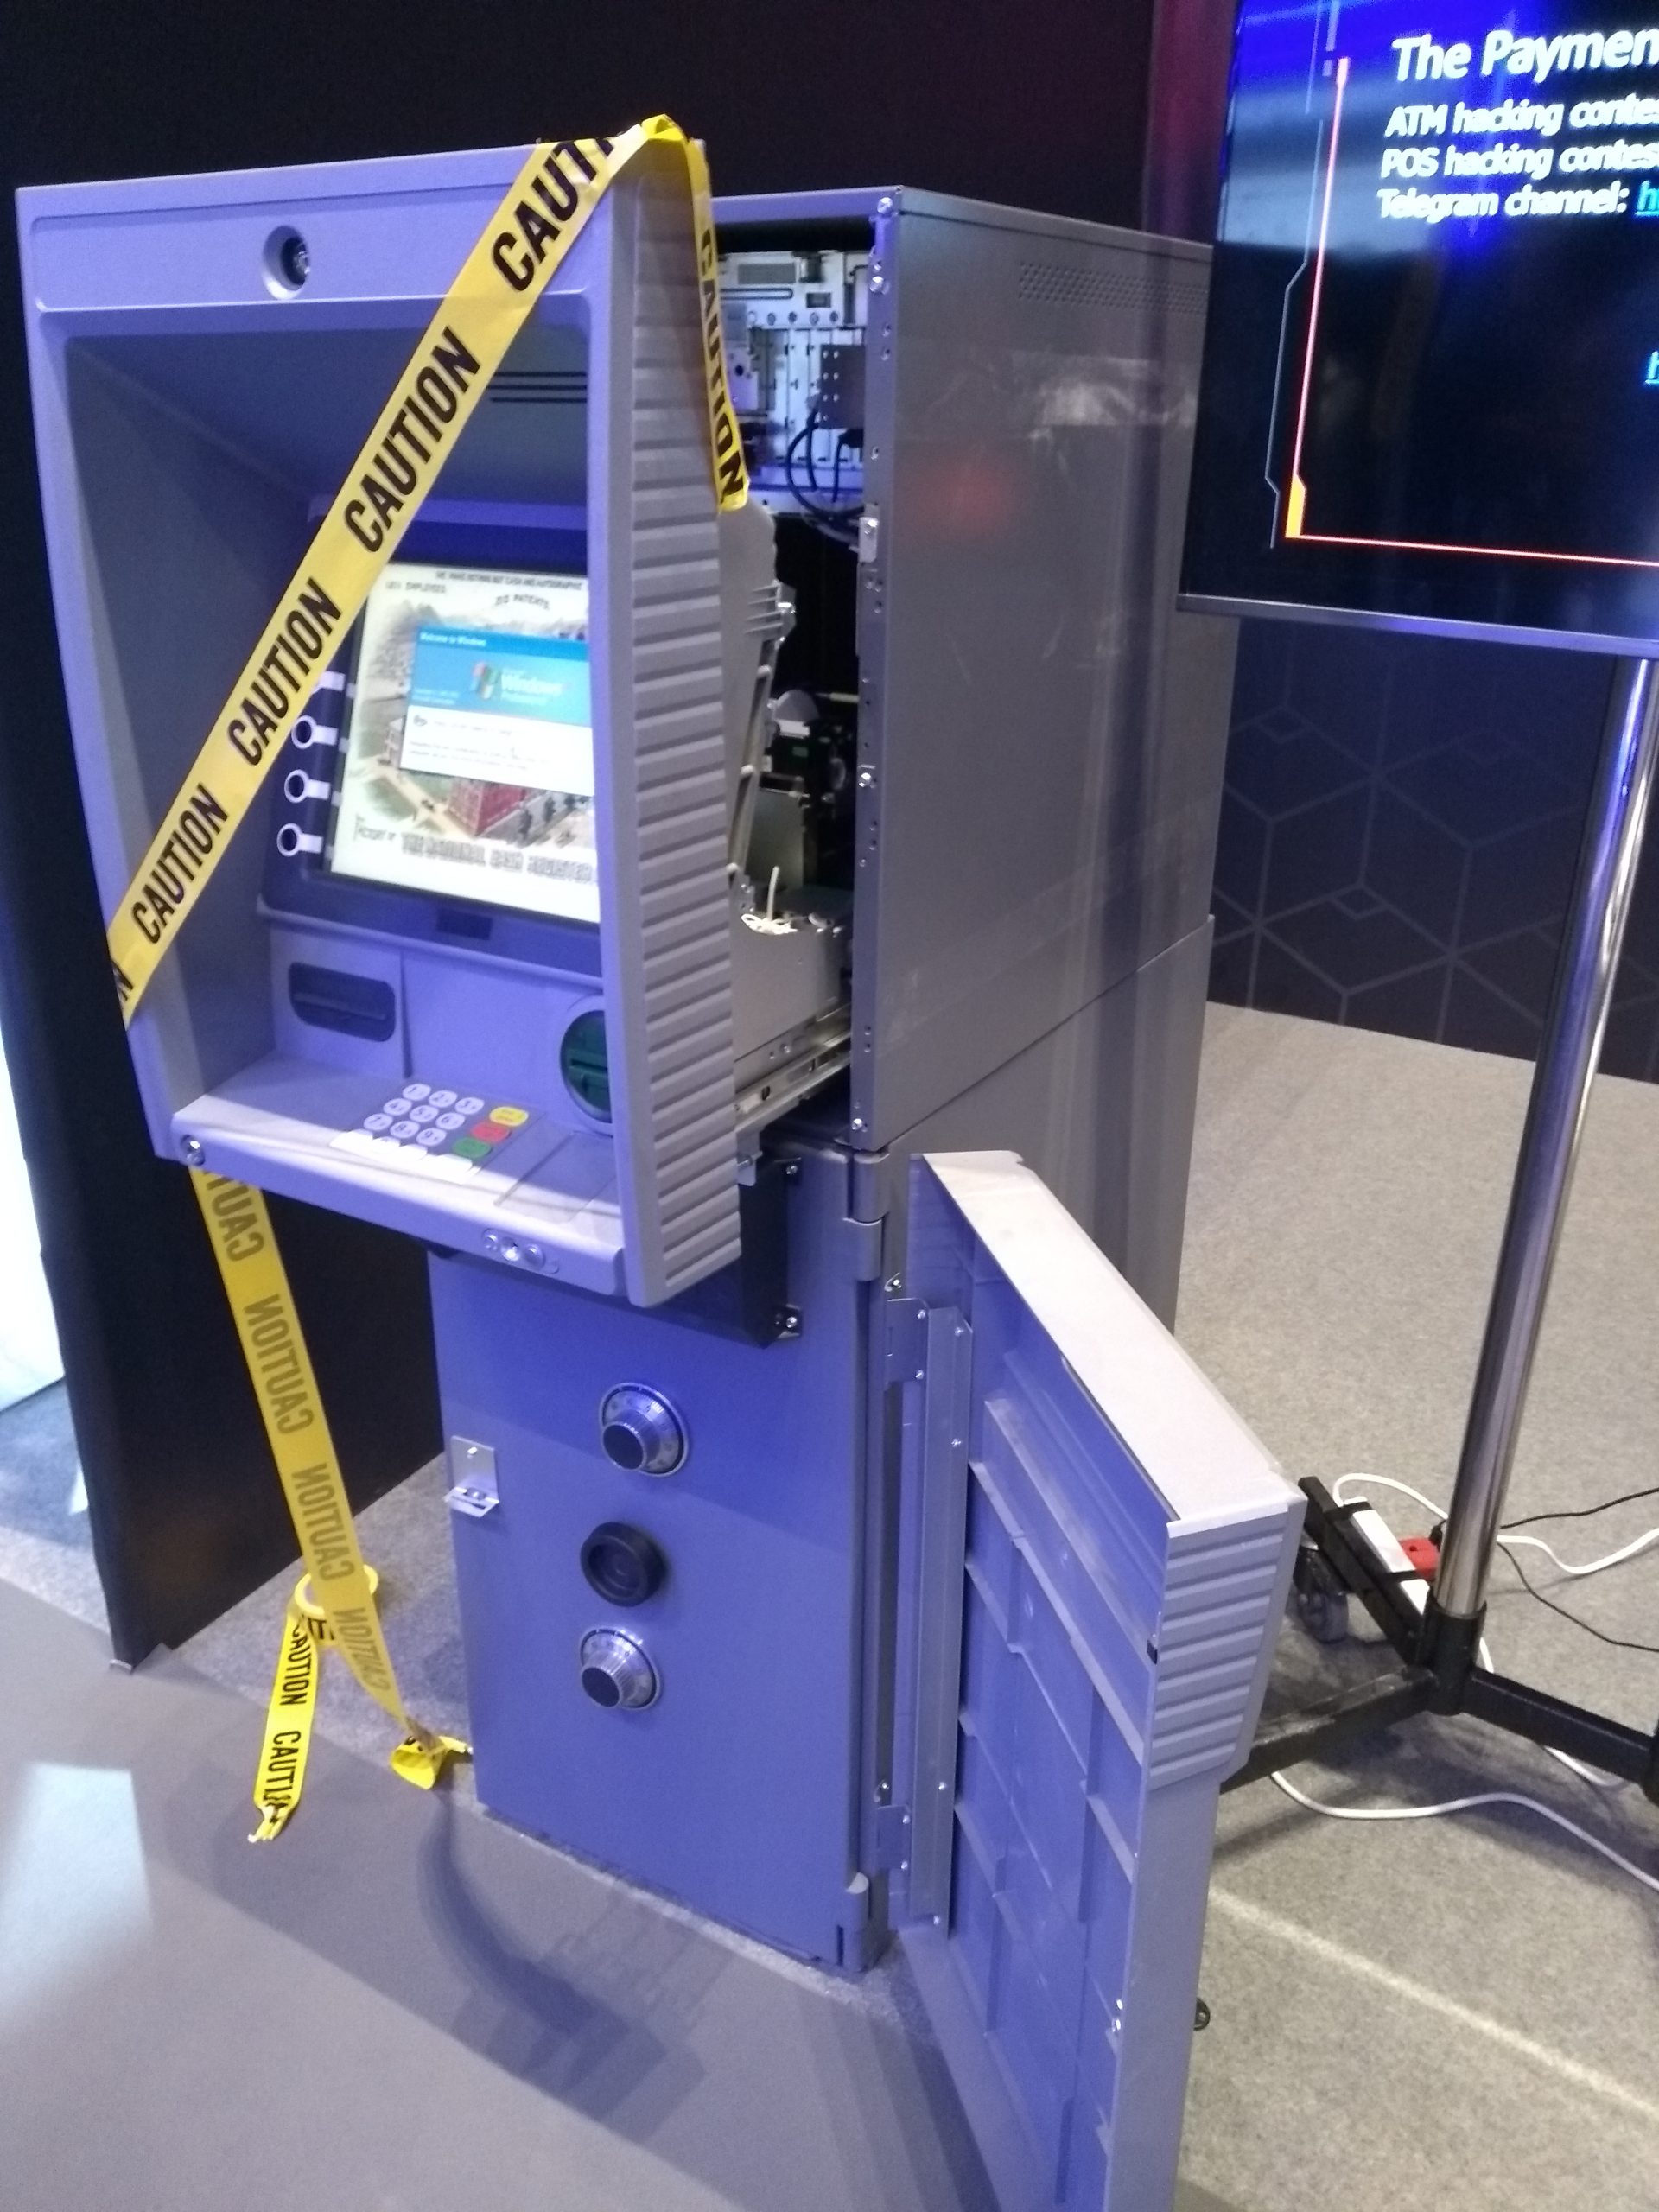
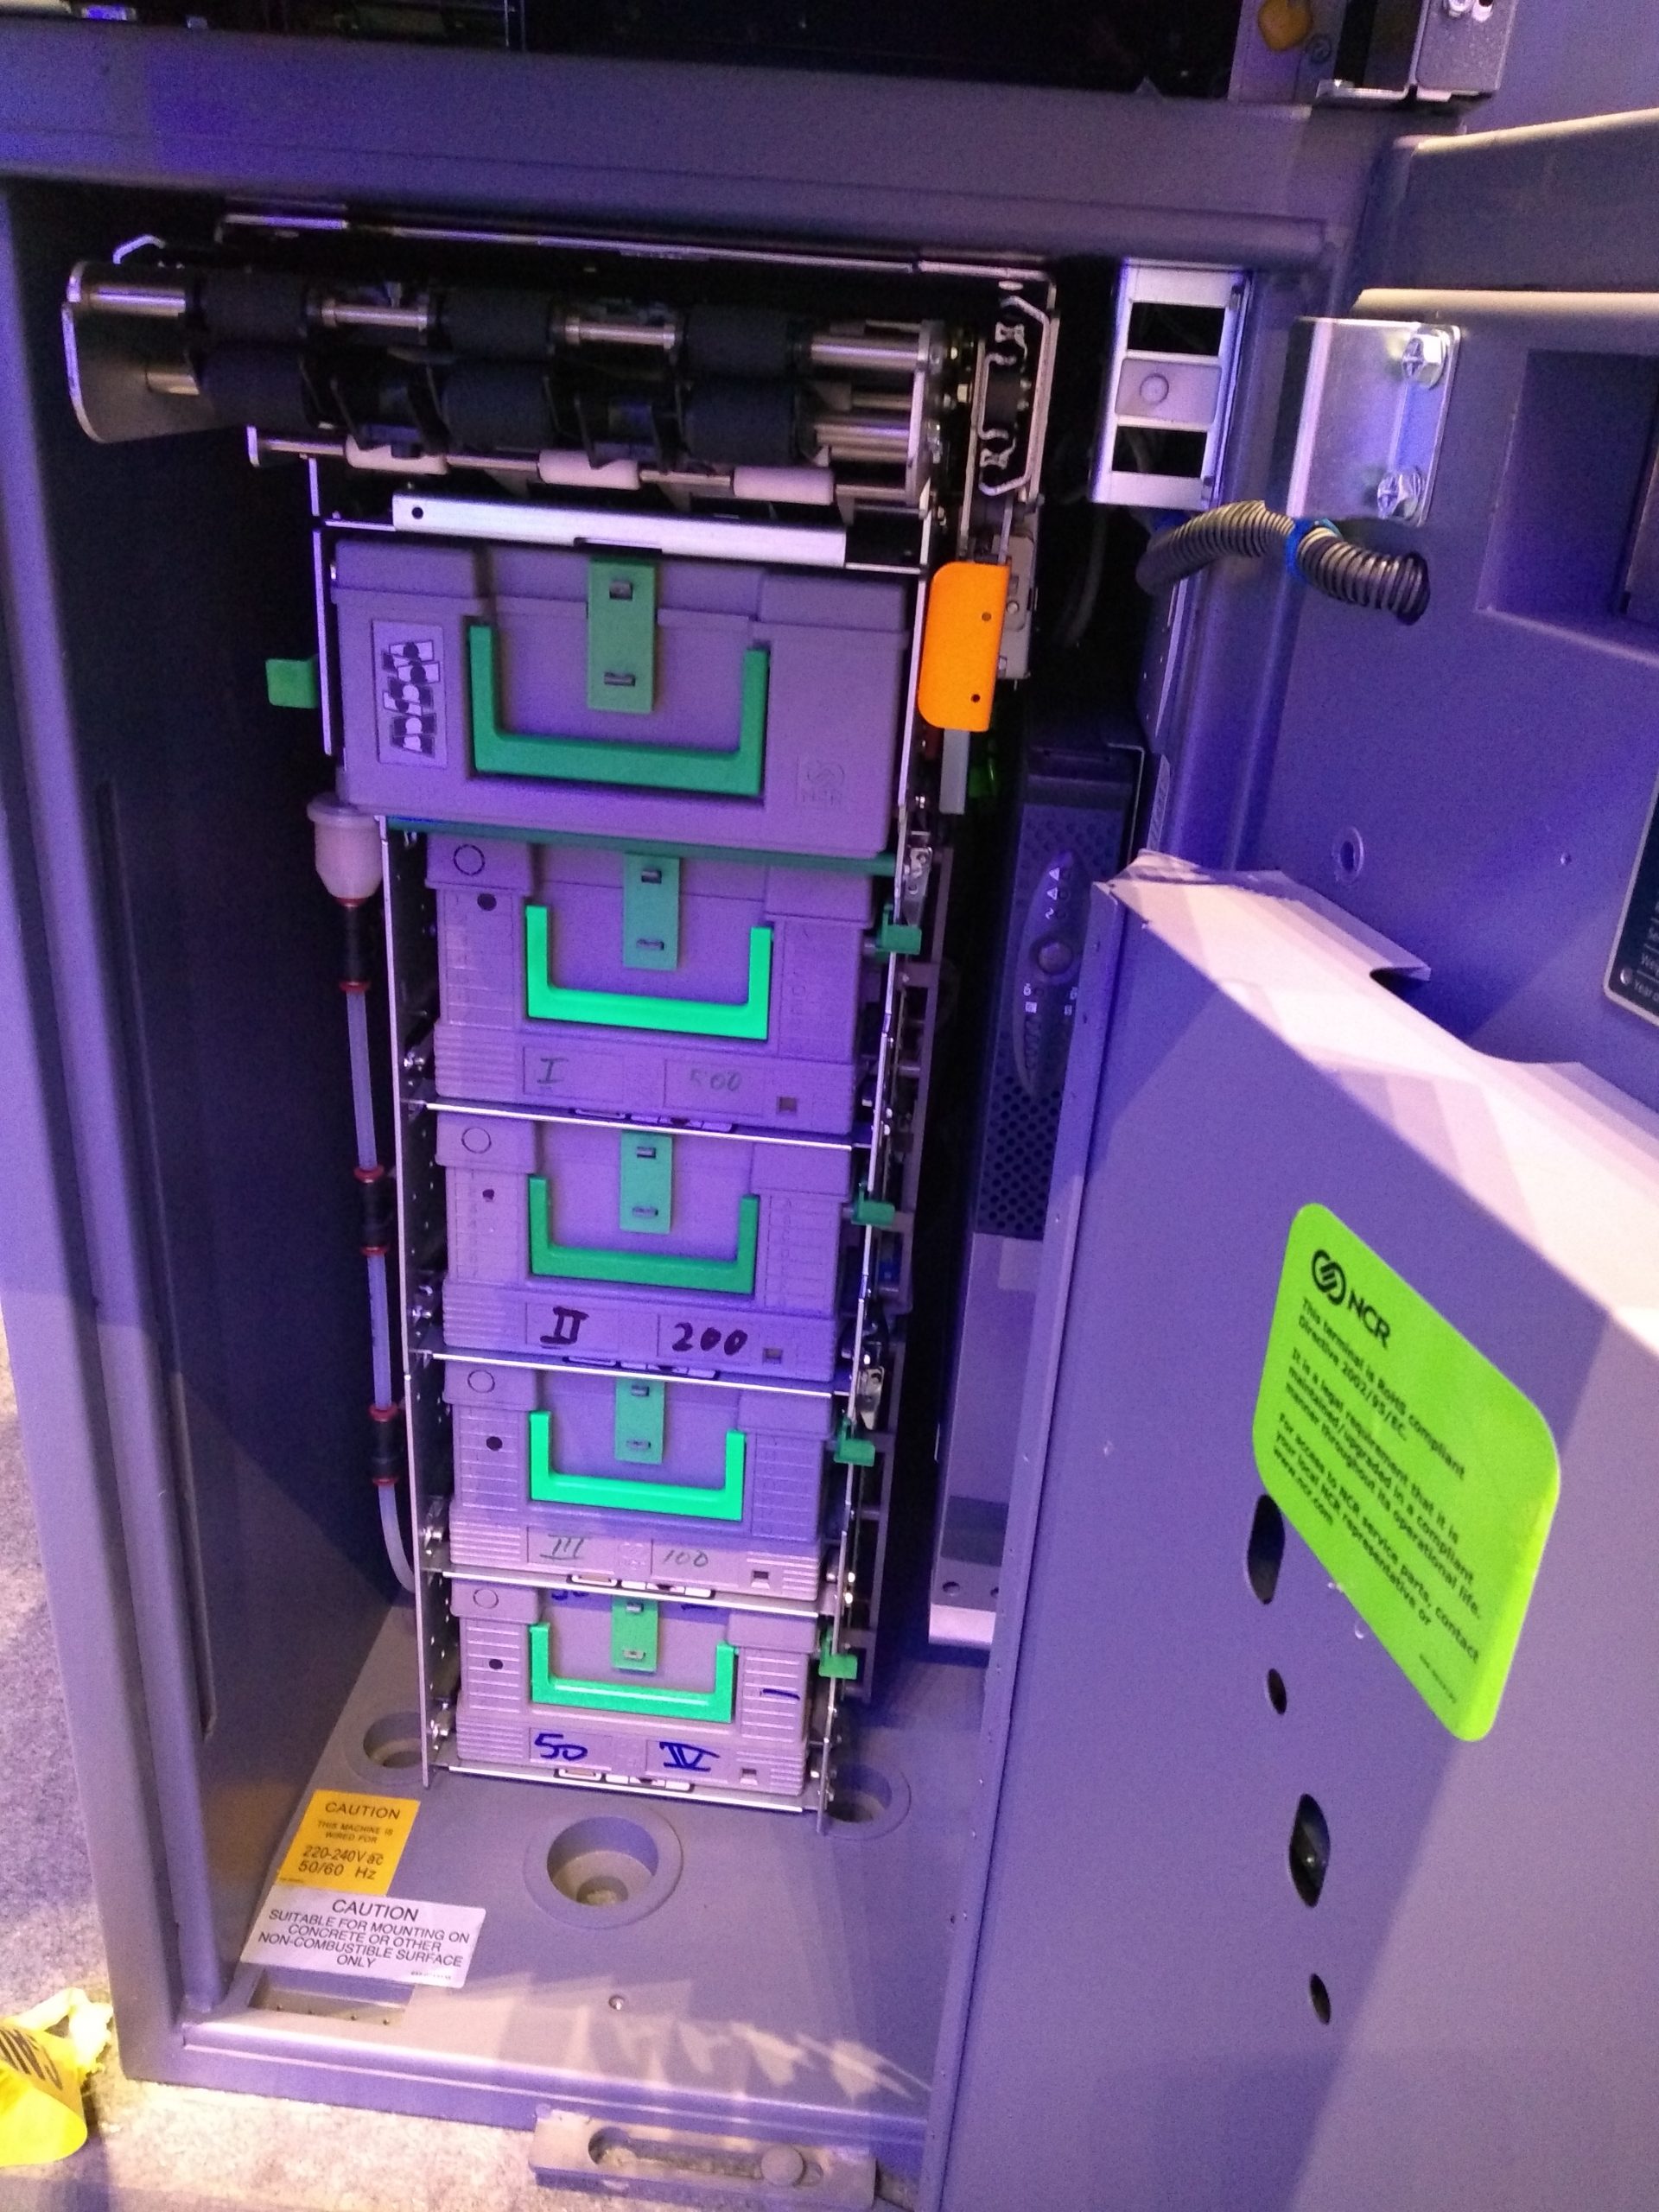
The payment village shares their skill by buying an ATM locally, as it’s rather hard traveling with an ATM. The locks on the ATM in Romania wasn’t great. However, the ATM Timur Yunusov (@a66ot) bought for HITB Cyberweek was quite nice. Unfortunately, the ATM wasn’t functional when we visited the village. It did ,however, give us a rare insight in one of these machines.
I’ll ignore that this device runs Windows version and focus on the physical security aspects, instead. The ATM is build very sturdy, as its main goal is to thwart access to the money by destructive means. But, what would it take to pick one of these? The lock was a Abloy disk detainer, where at this moment only a handful of pickers are experienced in picking these. Furthermore, the money was protected by another two safe locks. Let’s have a look.
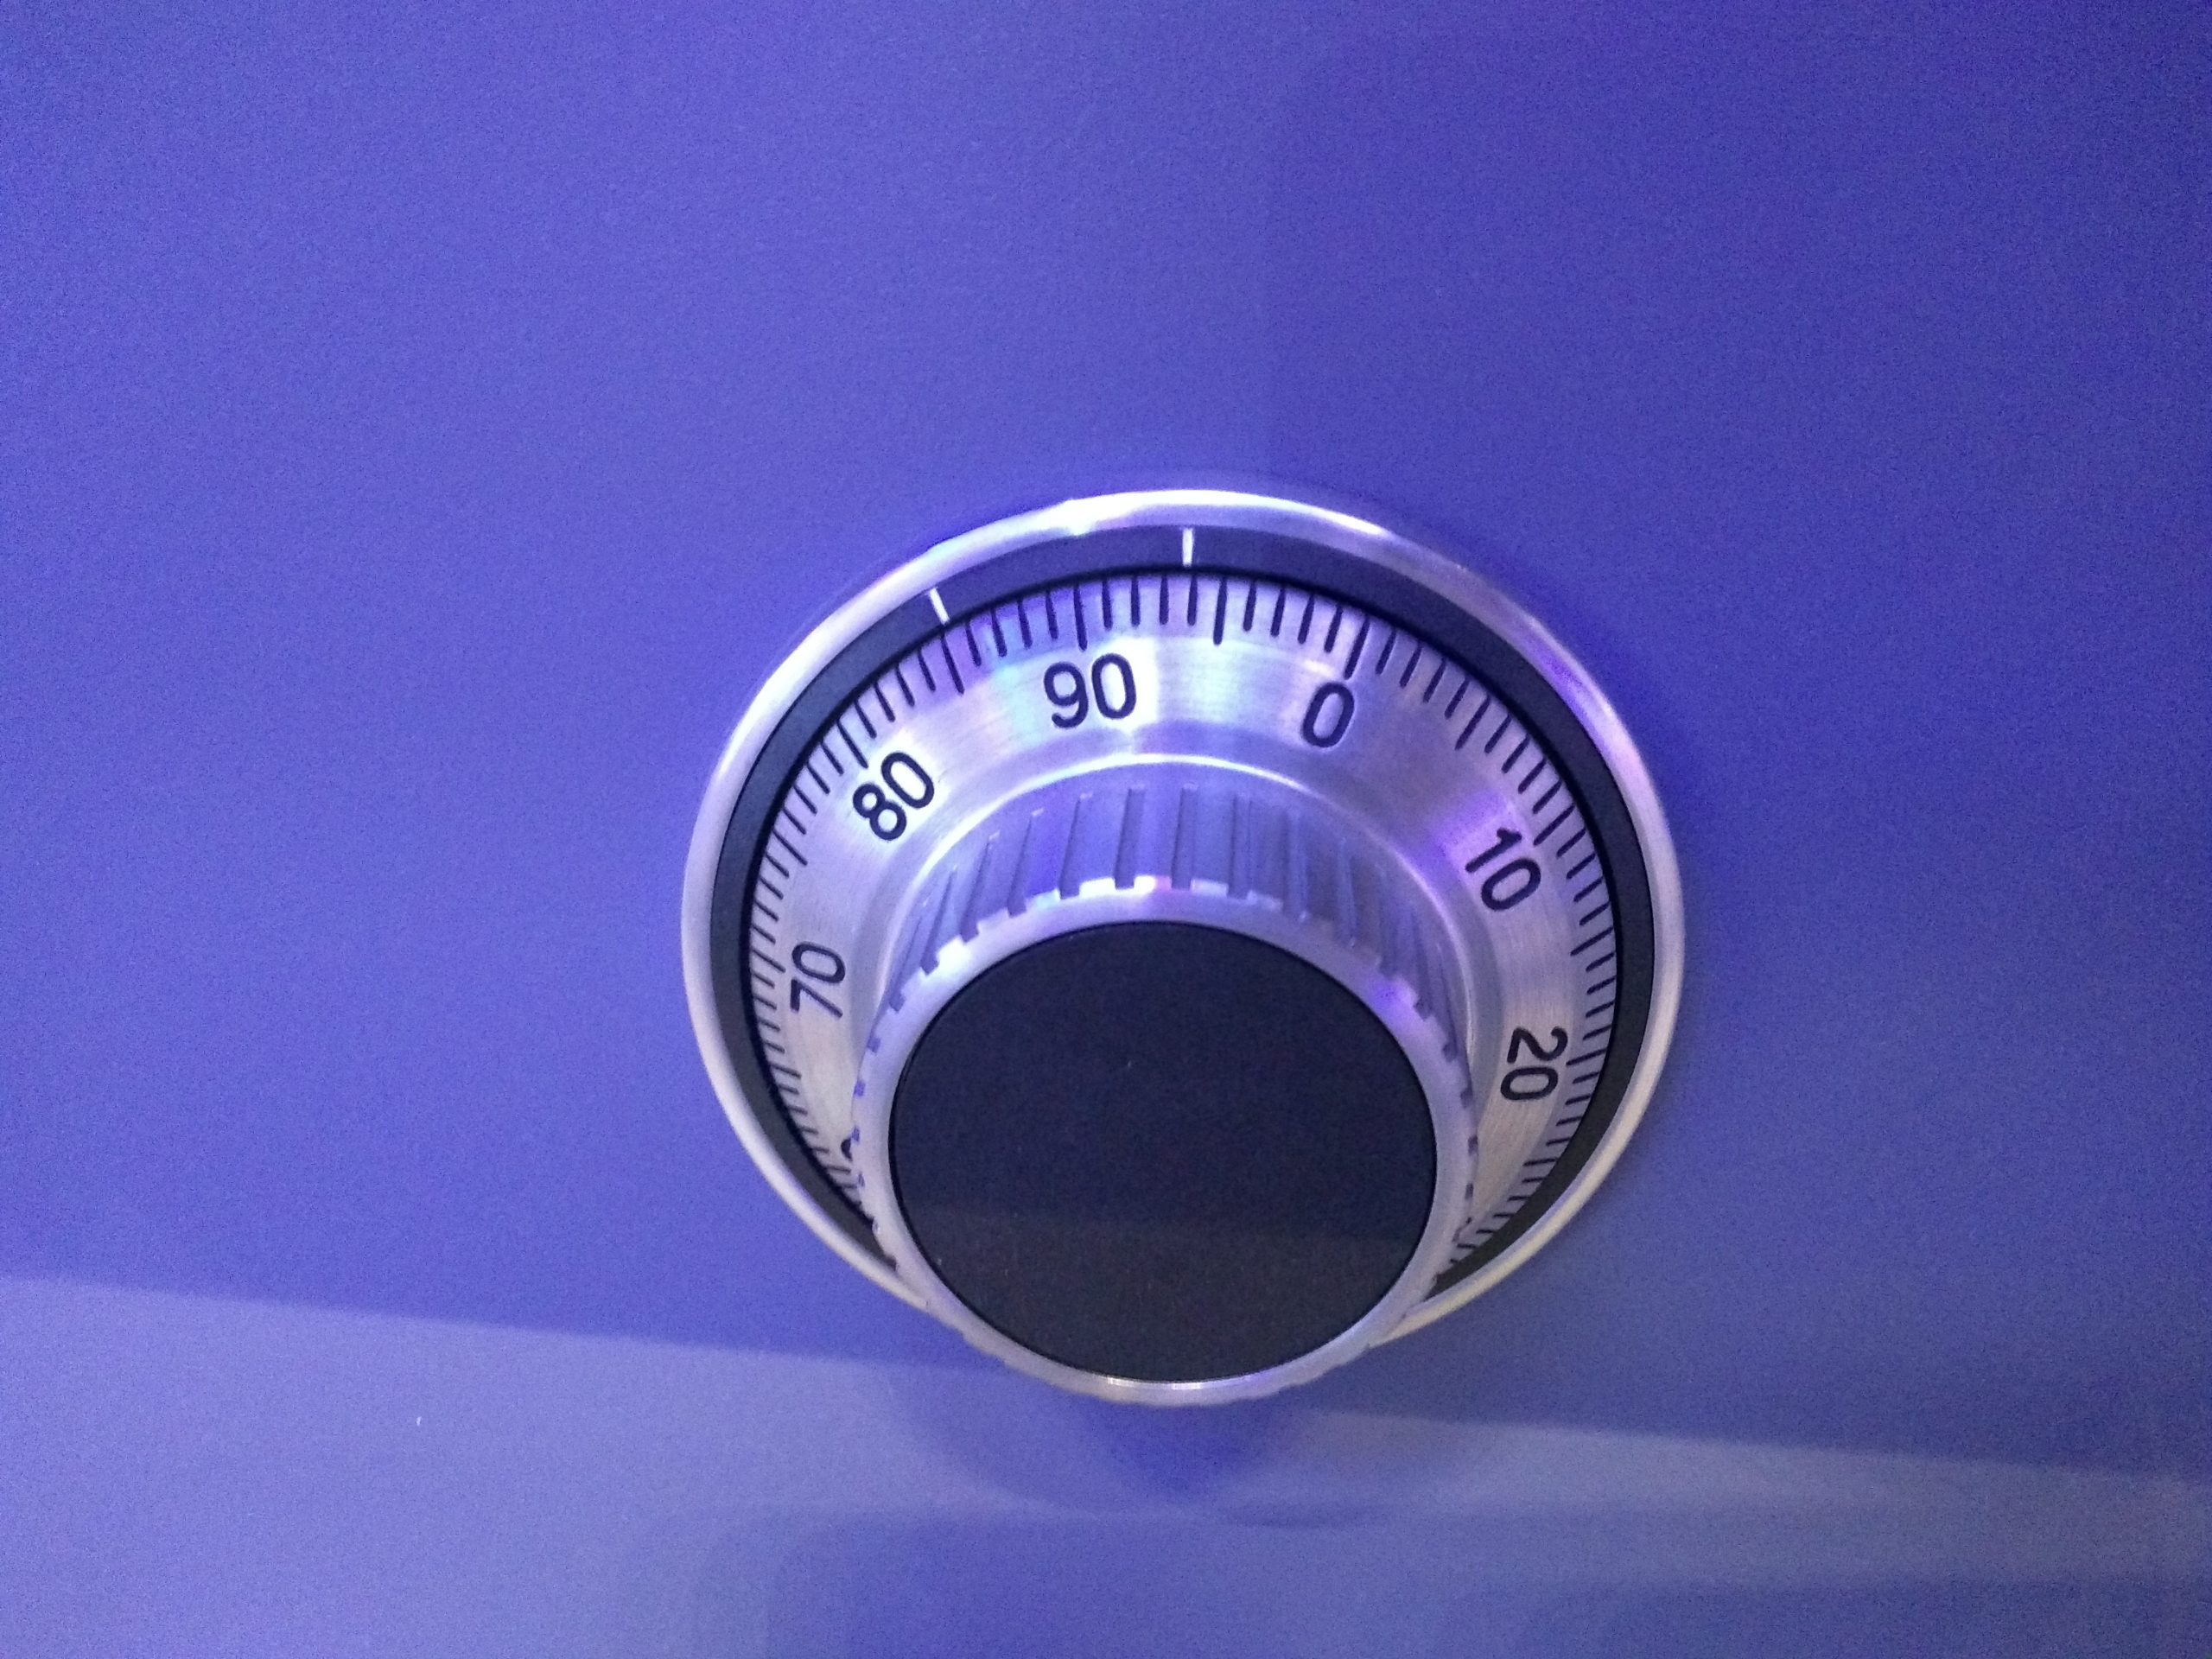
The safe door has two mechanical combination locks of unknown brand. The style reminds us of a La-Guard. It’s most likely a group 2 with three combination wheels. Cracking them is definitely possible, but it’s going to take a few hours.
Again, build to resist destructive attacks, the safe door was build to a high standard and looks well-made.
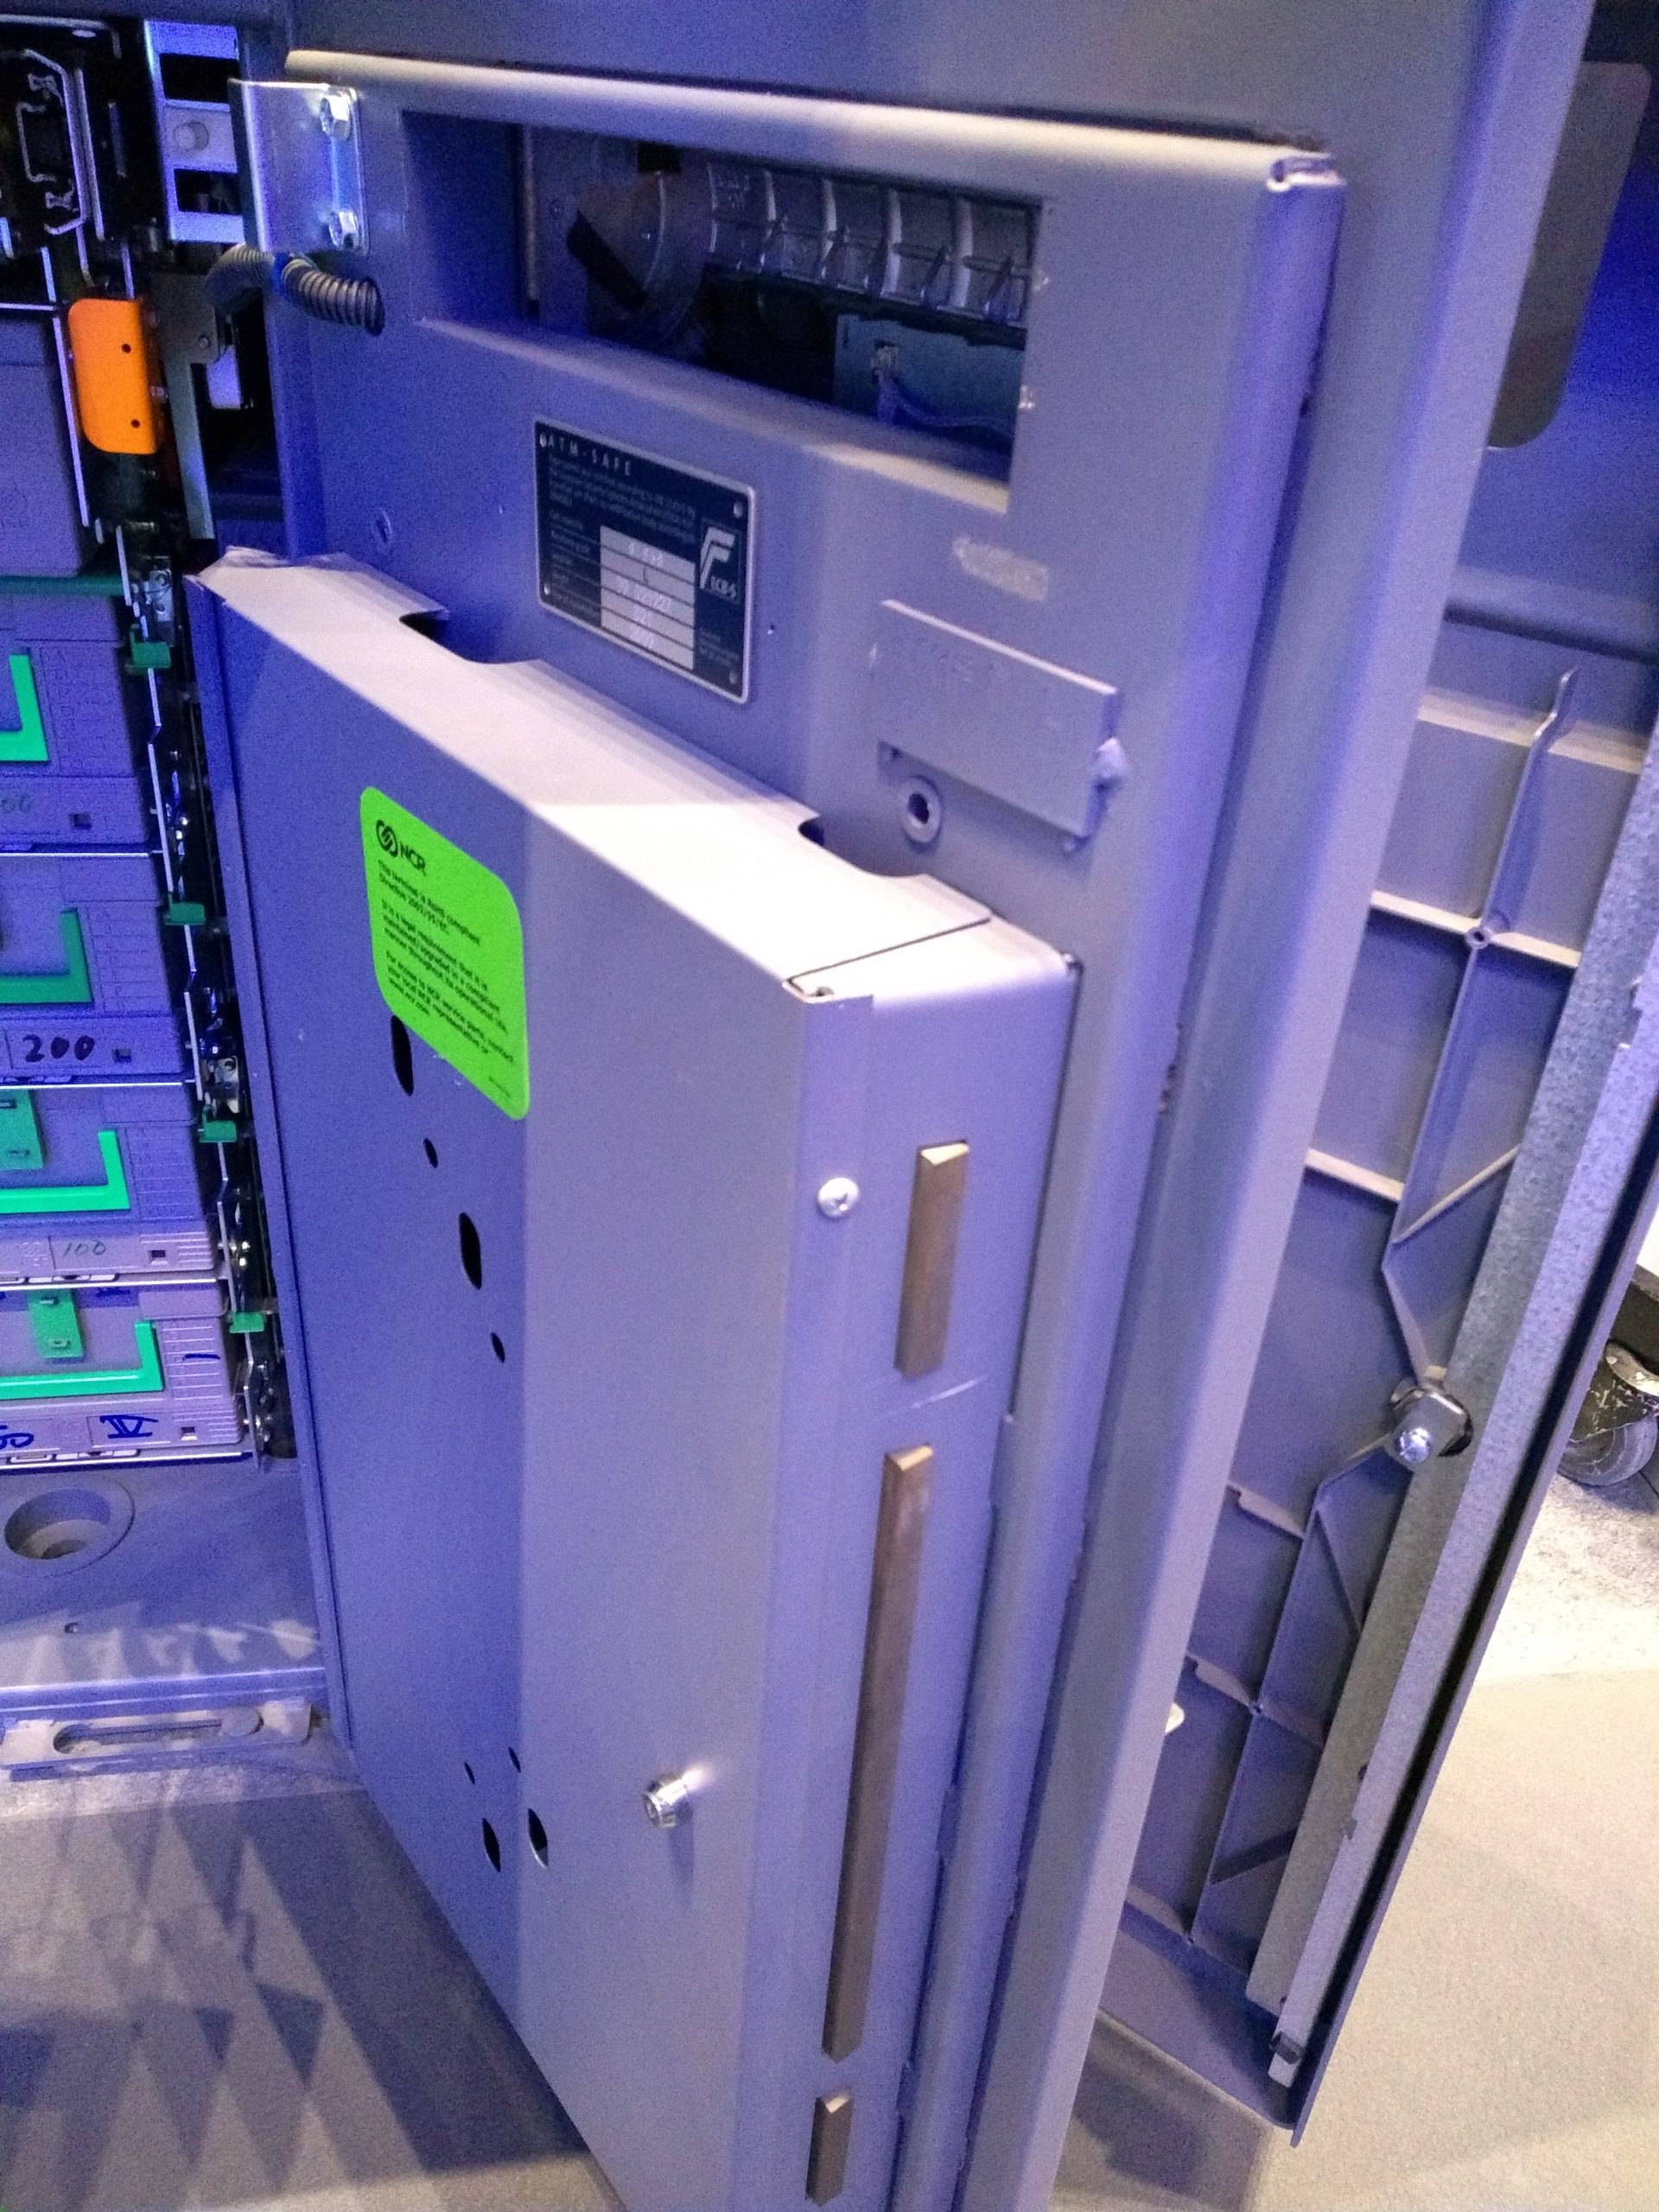
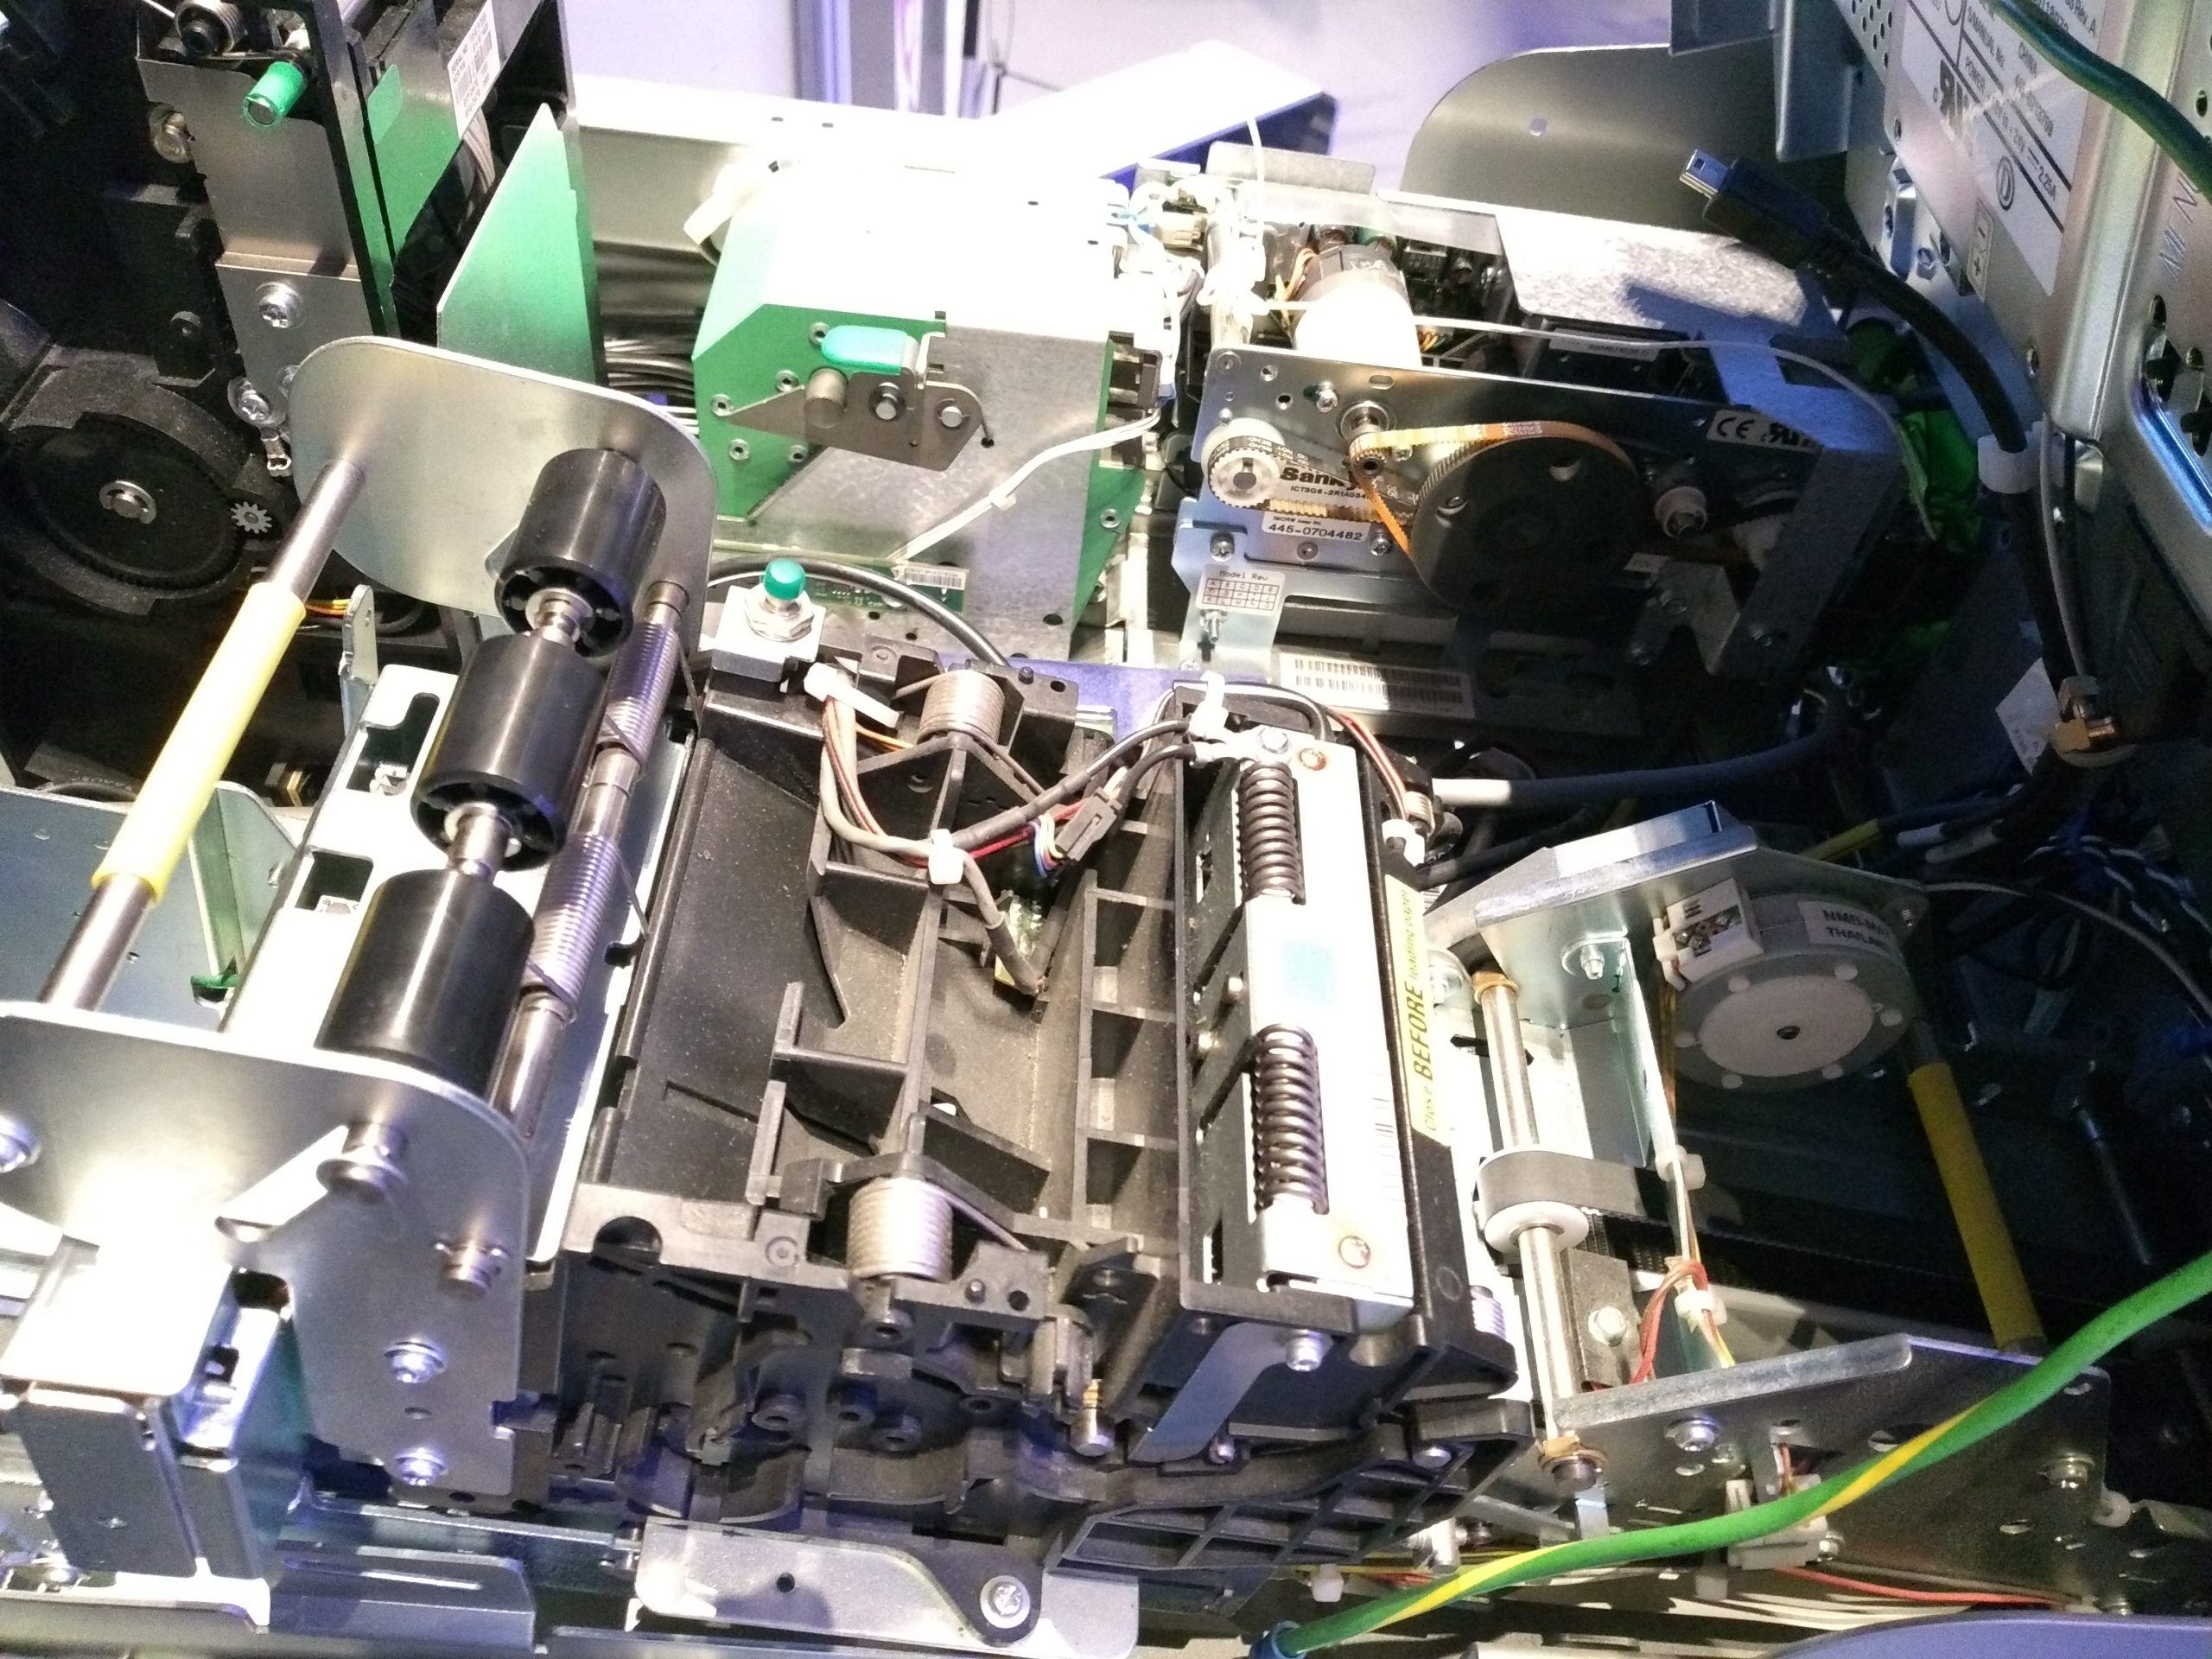
To finish off this post, here are two pictures of the inside of the safe. We can clearly see the money storage boxes and the dispensary unit. While on the last photo, we have an inside view of the mechanical parts behind the display.
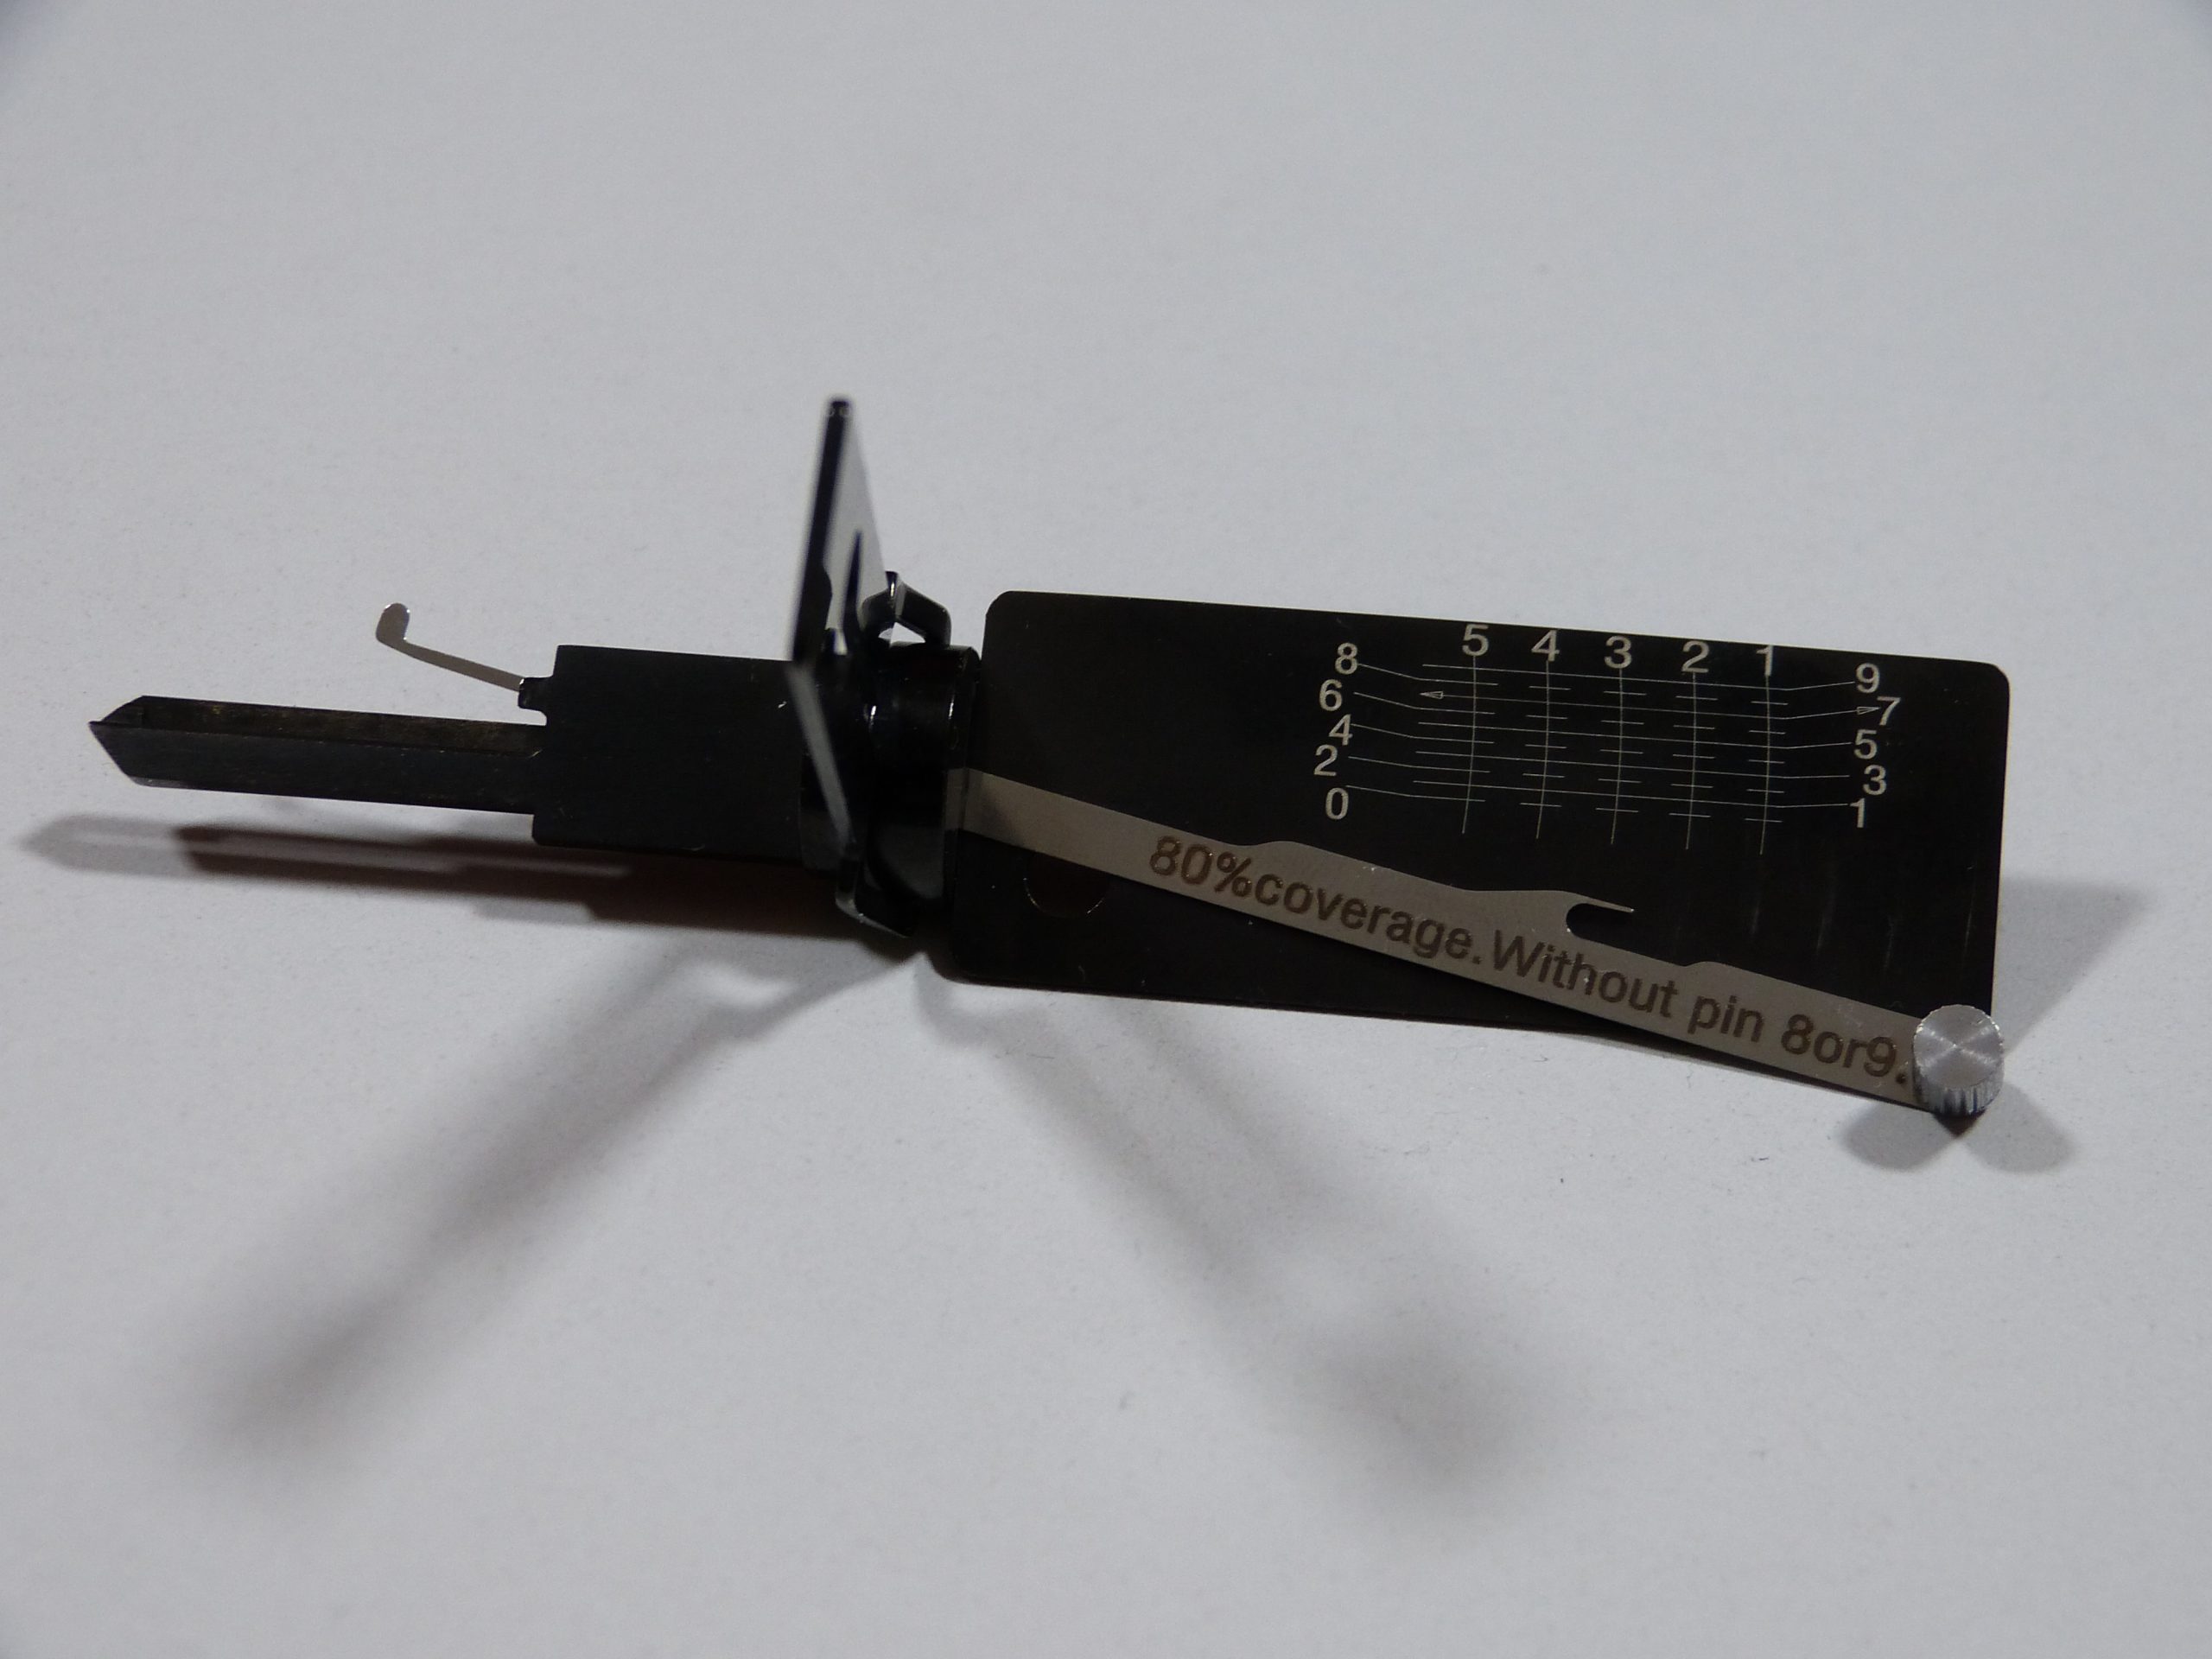
Lishi 2-in-1 have been around for a long time, both for automotive and more recently for pin tumbler locks. Sadly, these tools are quite costly as they are keyway specific. Furthermore, this type of tool can’t be made for some locks as the keyways are too tight. Or so I thought, as of writing there are several 2-in-1 for sale for the paracentric Yale keyway. As I was intrigued, I’ve bought an off brand 2-in1 for CISA. In testing the tool, I’ve found various limitations that might impact the usefulness of this tool.
Let’s start from the beginning, Lishi is the brand name of a series of lockpicking tools designed and made by Zhi Qin Li. The Lishi company split up and Zhi Qin Li still sells his 2-in-1 under the brand Original Lishi, while another company sells them under the brand Genuine Lishi.
Original Lishi sells a variety of tools, the one generally referred to as a Lishi is a 2-in-1 lockpick that both applies a turning force and a tool for picking individual elements. The tool can also be used to decode the lock once the lock is open, and a key can be cut in the field with another of Li’s tools.
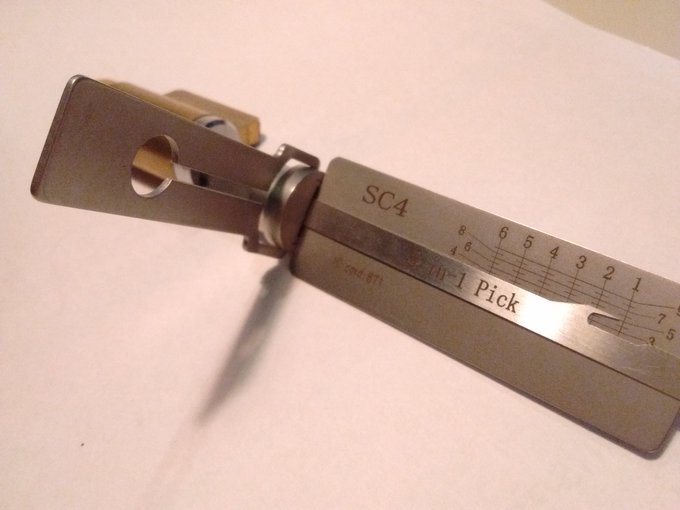
Lishi for the Schlage SC4 keyway.
So, what does a Lishi 2-in-1 lockpick do? The tool consists of two parts; the body that is used as a turning tool and the thin feeler that’s used as a lockpick. This in itself would not be too useful, however, the body has a chart of where the lockpick is in the lock. You move the pointer to the desired element, indicated by the vertical lines, and push down lightly on the pointer. This in turn moves the lockpick, pushing down on the element in the lock. You can feel if the element is binding or not. And just as lockpicking, you go through the lock, pin by pin, and feel for the binders. Then you set each binder and search for the next one, until all elements are set. Click on one, click on three… Open!
From y2k these tools have been available for automotive locks as the combination of open keyways, many wafers, and typically low tolerances work very well for this tool. 2015 was the year 2-in-1 picks became available for pin tumbler lock for the USA market. (Schlage, Kwikset, and Master). Most of these locks have wide keyways, low tolerance, and very few security pins.
I’ve played with a few of these tools, but didn’t find them too useful. I’m not a locksmith, not in the USA. For me, they would be mostly a novelty. But the pick I’m about to show can be a game changer as it targets European locks I’m familiar with.
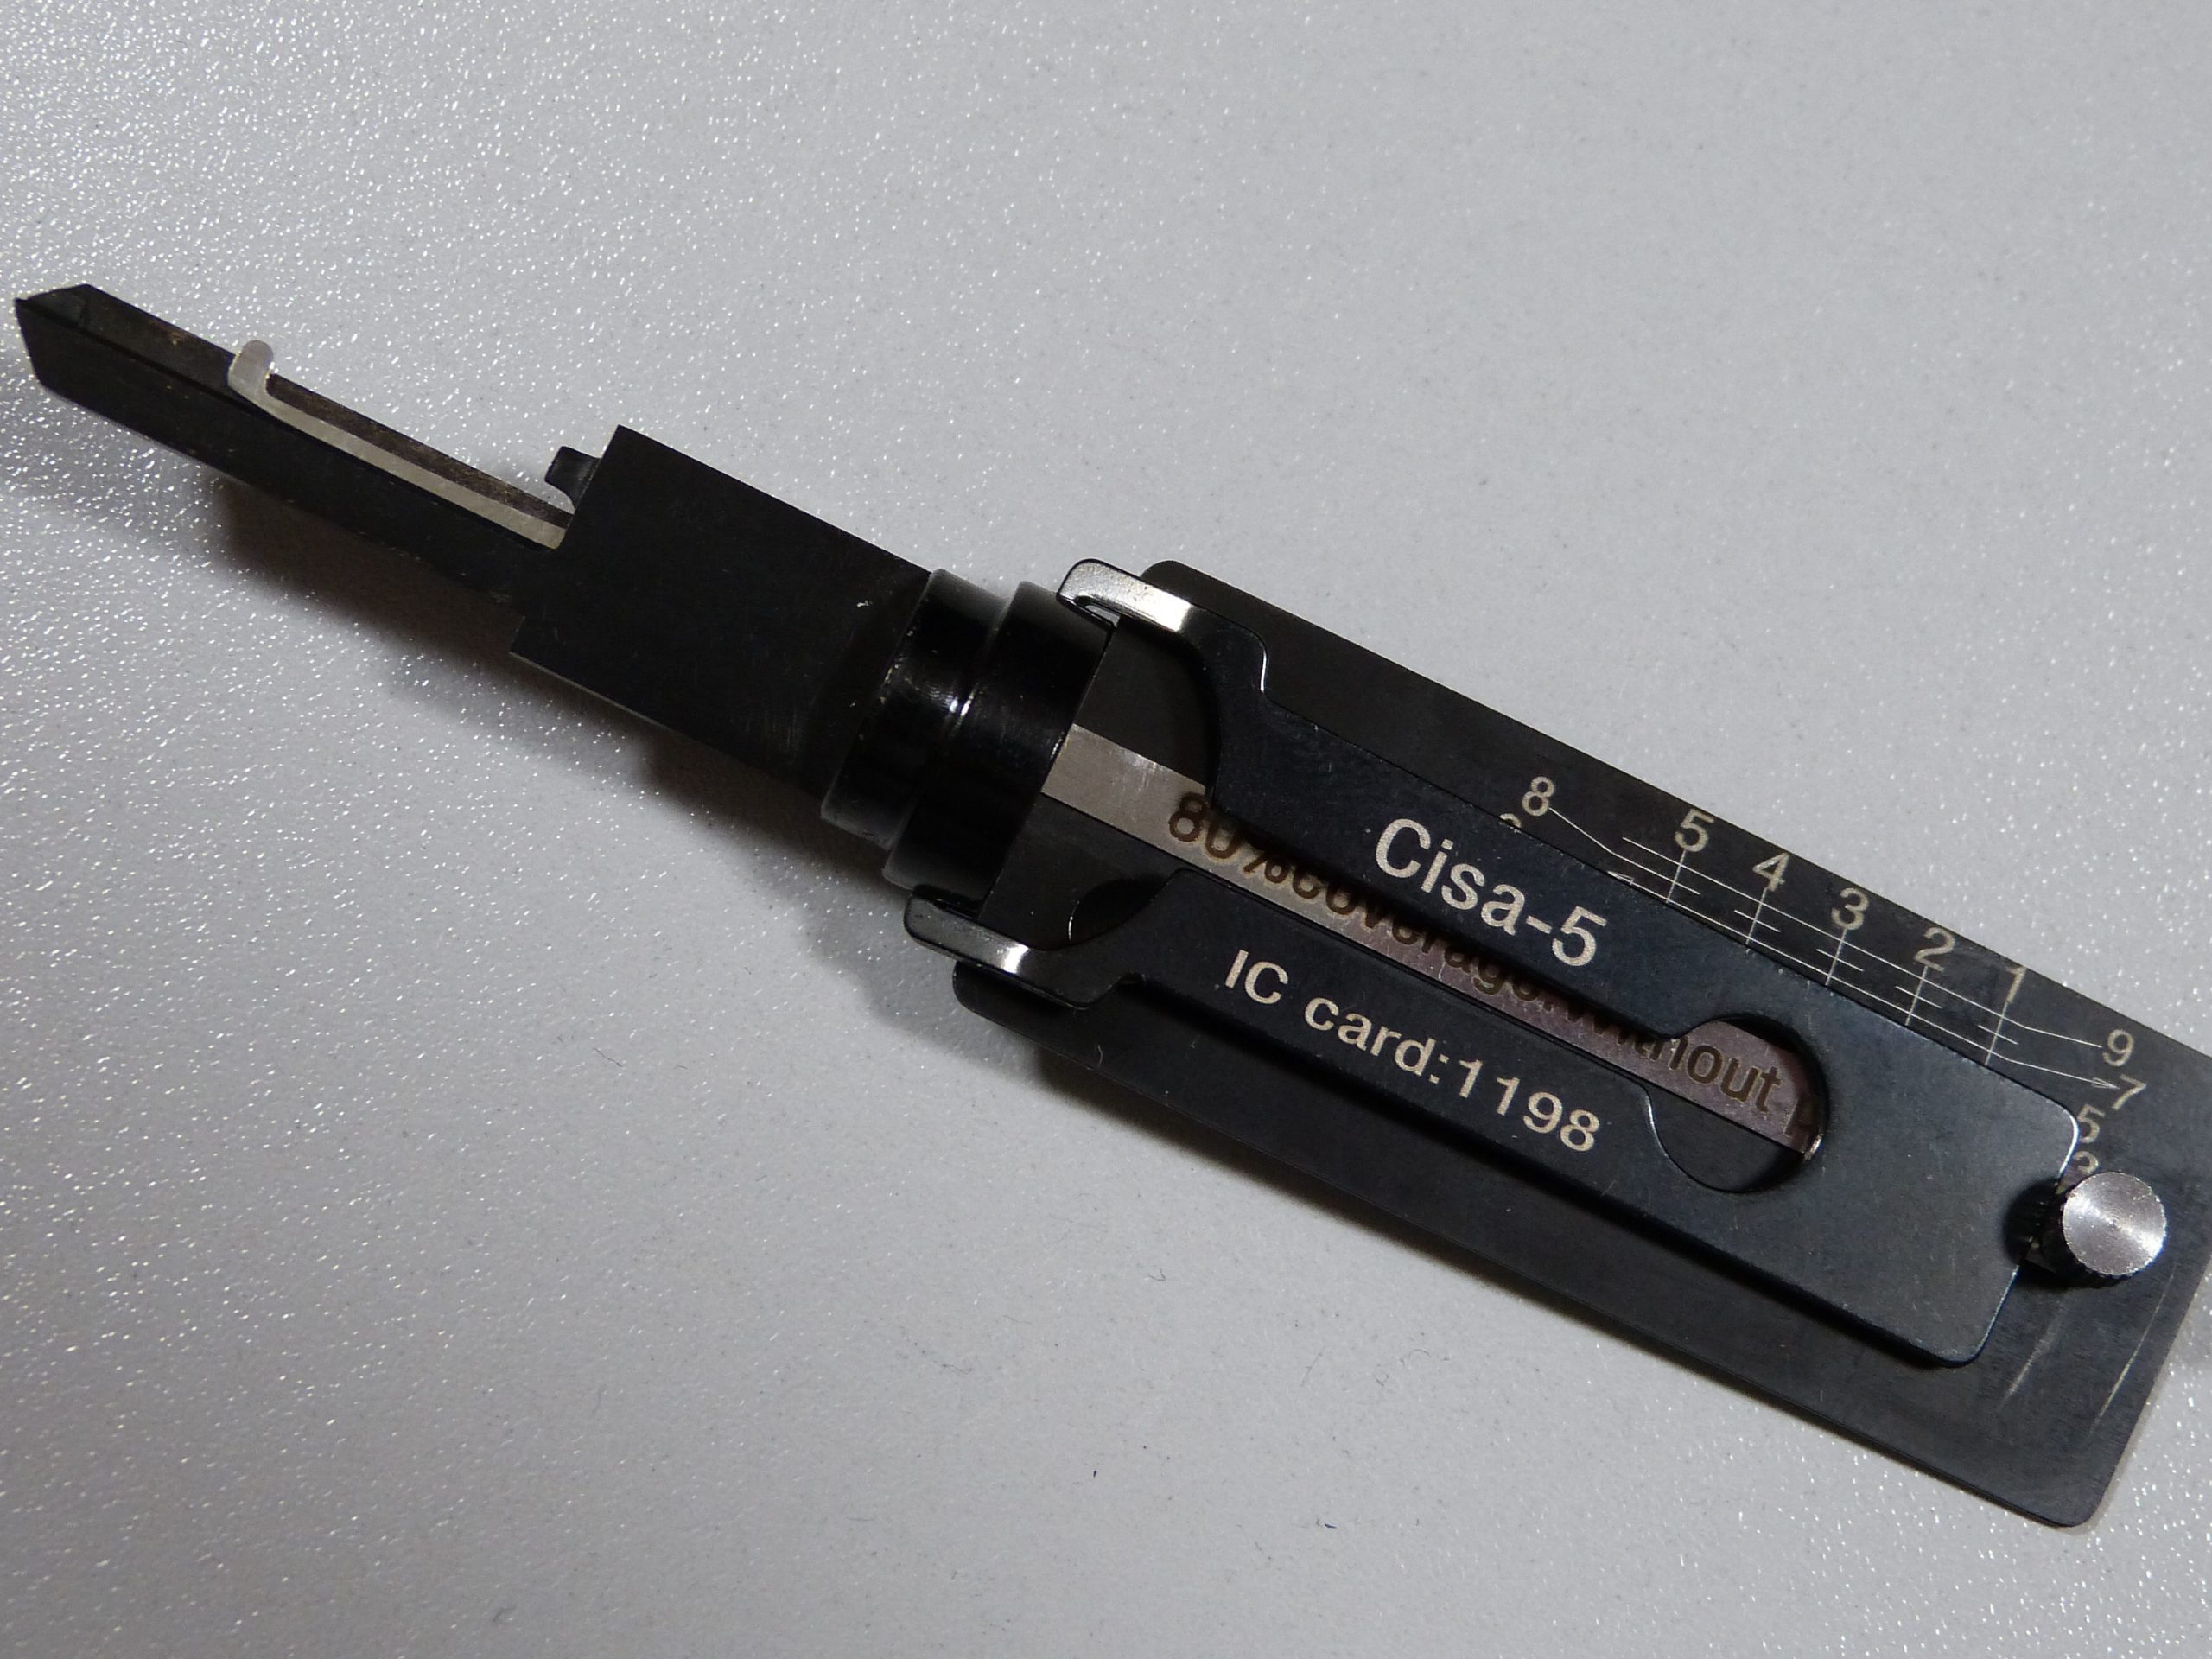
In December, I was notified a seller on AliExpress sells 2-in-1 (not a Lishi!) for the paracentric Yale keyway. The consensus under lockpickers is that this tool could not exist, because the keyway is too tight and has no straight access to the pins. I was curious enough to fork over €50, and bought one for CISA as it’s very close if not identical to the Abus C83, the lock we use for impressioning championships.
The seller is quite open about the tool’s limitations and wrote on the lever “80% coverage. Without pin 8 or 9”. While this sounds like it’ll open 80% of locks, but it doesn’t seem to be the whole story, as we will find out. The biggest concern with a tool that works on a subsection of locks is if the user can detect the tool does not work, instead of user error or lack of skill. I suspect so, but it will be far from easy. In short, a lock will not work with one or more cuts deeper than a 7 and therefore this pin will always be overset and this you can detect.
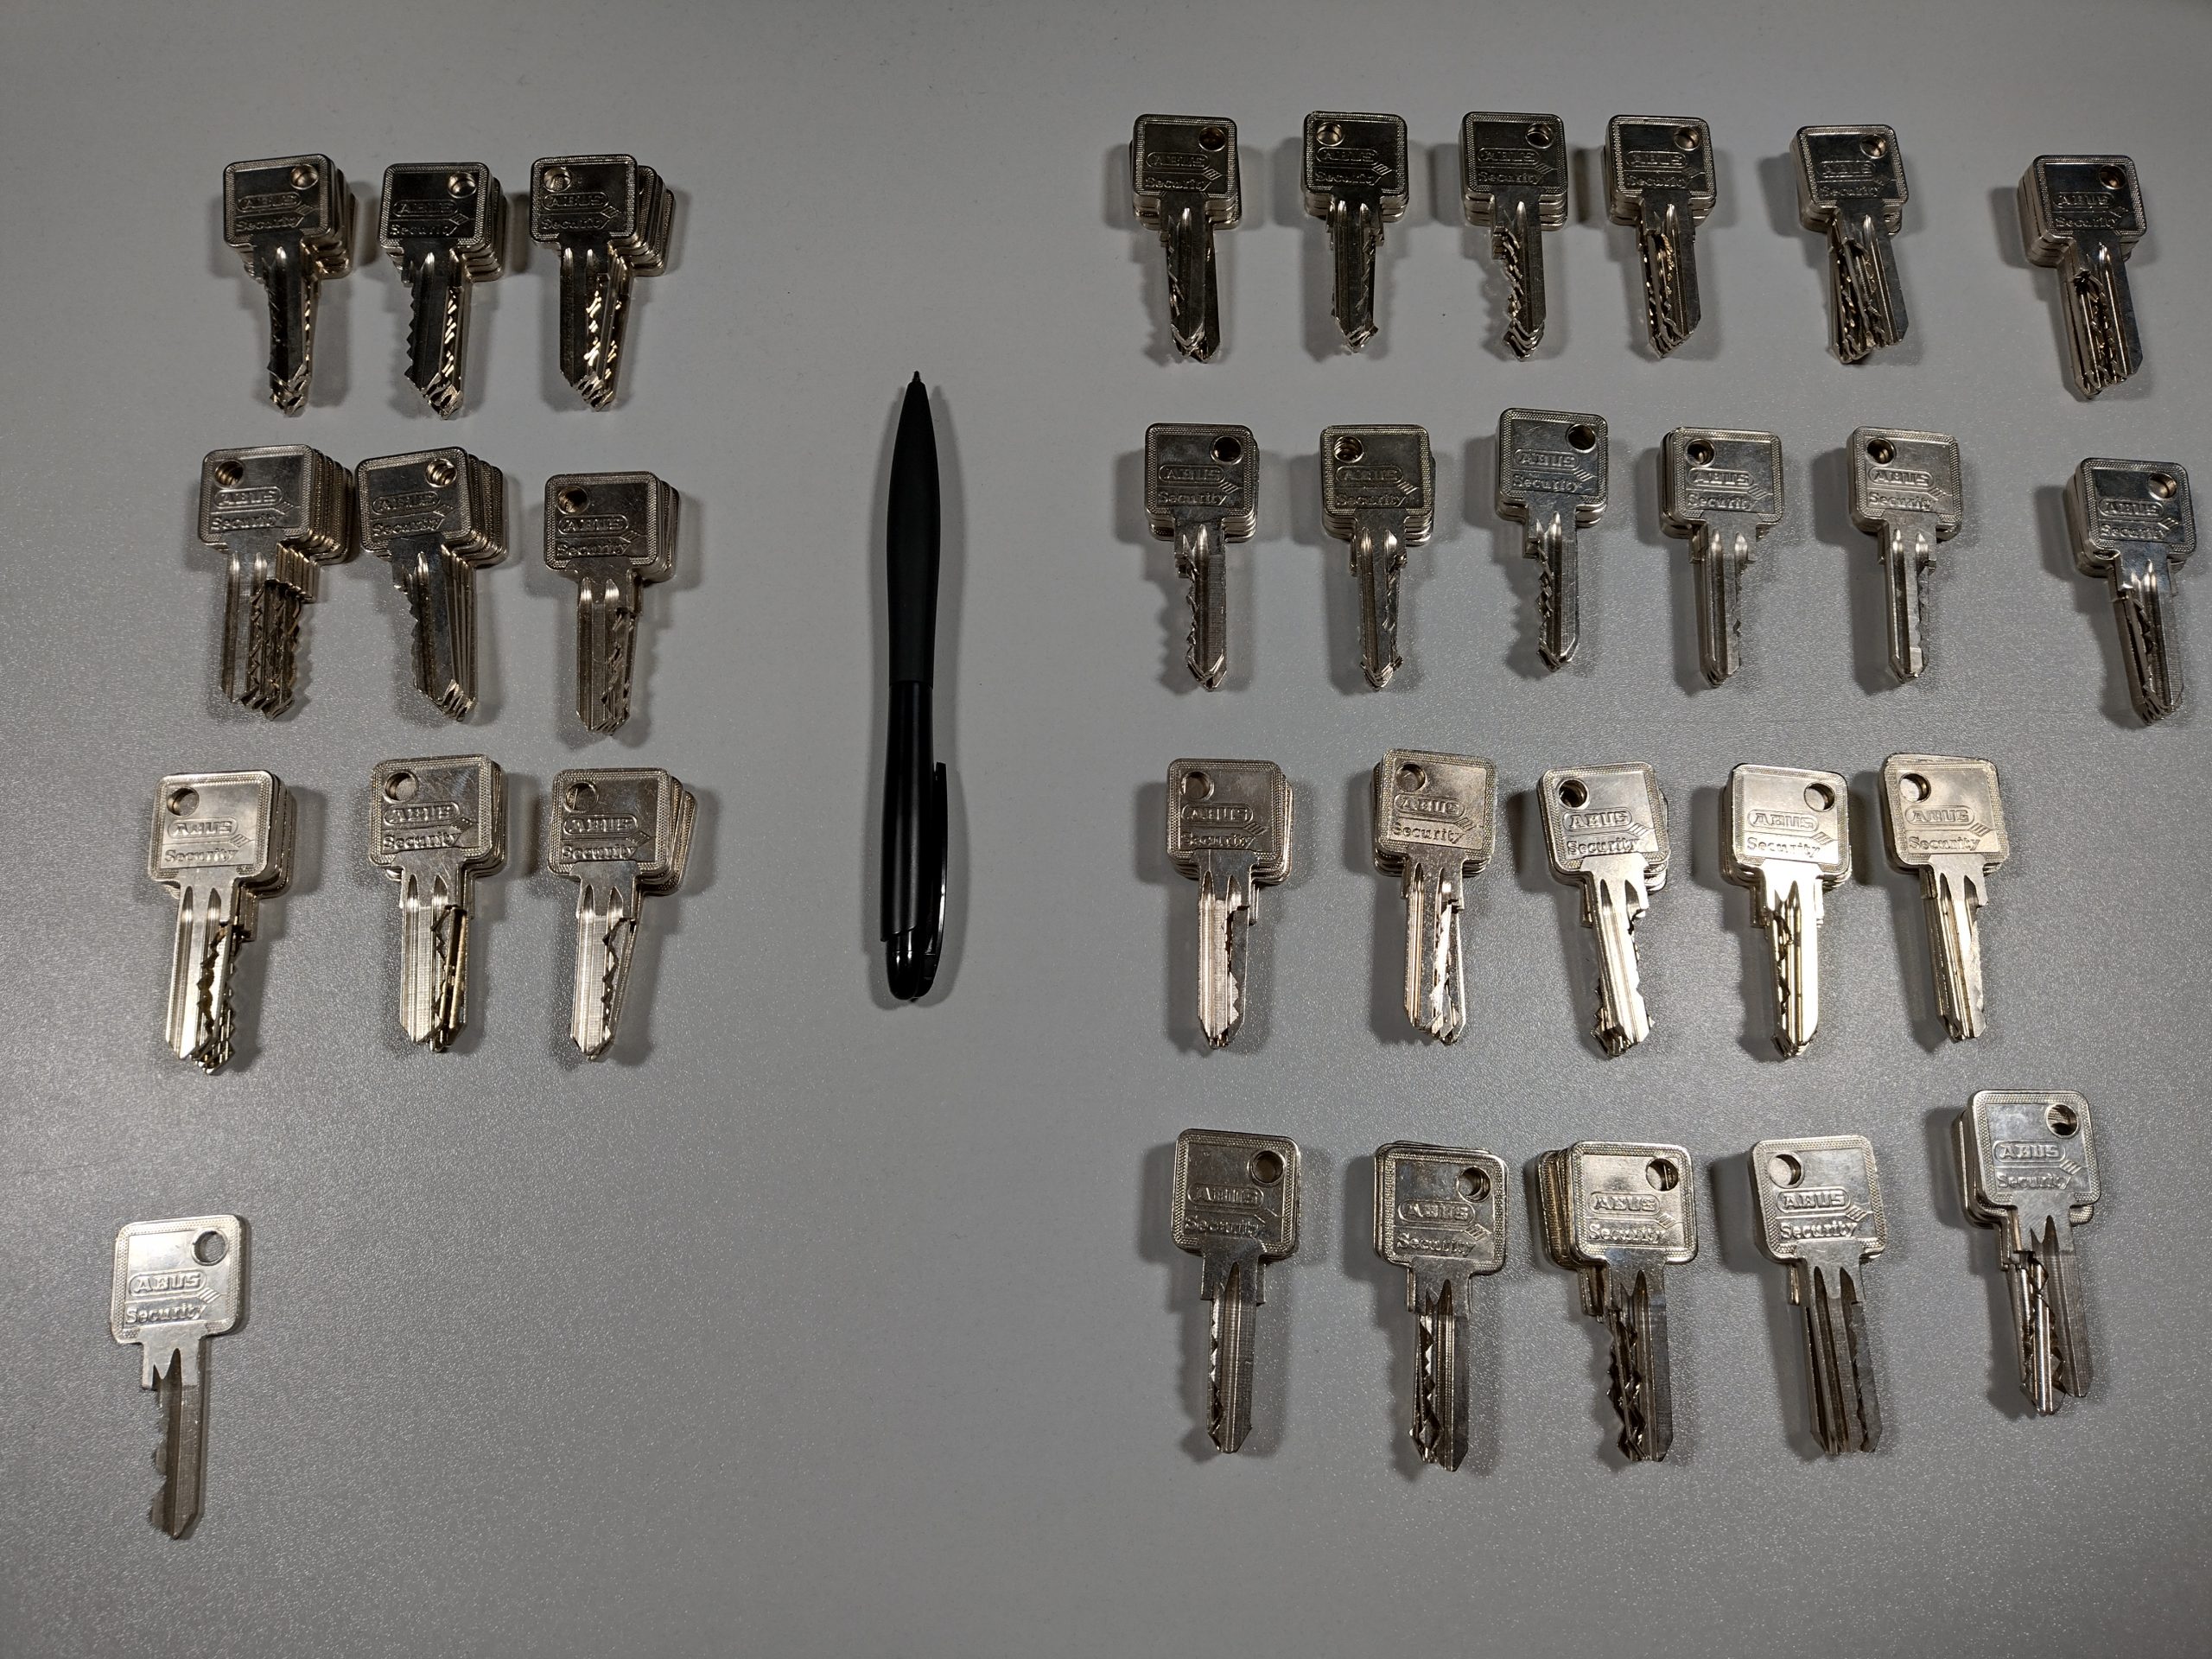
Small sub section of factory cut Abus C83 keys, I’ve a modest collection of them.
As I was curious about the 80% claim, I’ve spent an evening measuring my Abus C83 keys. While these are not CISA, they are close, and I happen to have a modest collection of these keys. 92 out of 283 of the measured keys have no cuts deeper than 5.5mm, the size of the tool. This means the tool will only work on 30% of my Abus C83. This is consistent with a statistics sanity check. For this, we assume every lock has a uniform distribution of cuts, ignoring MACS. This came to be (7/9)^5 = 28.4%.
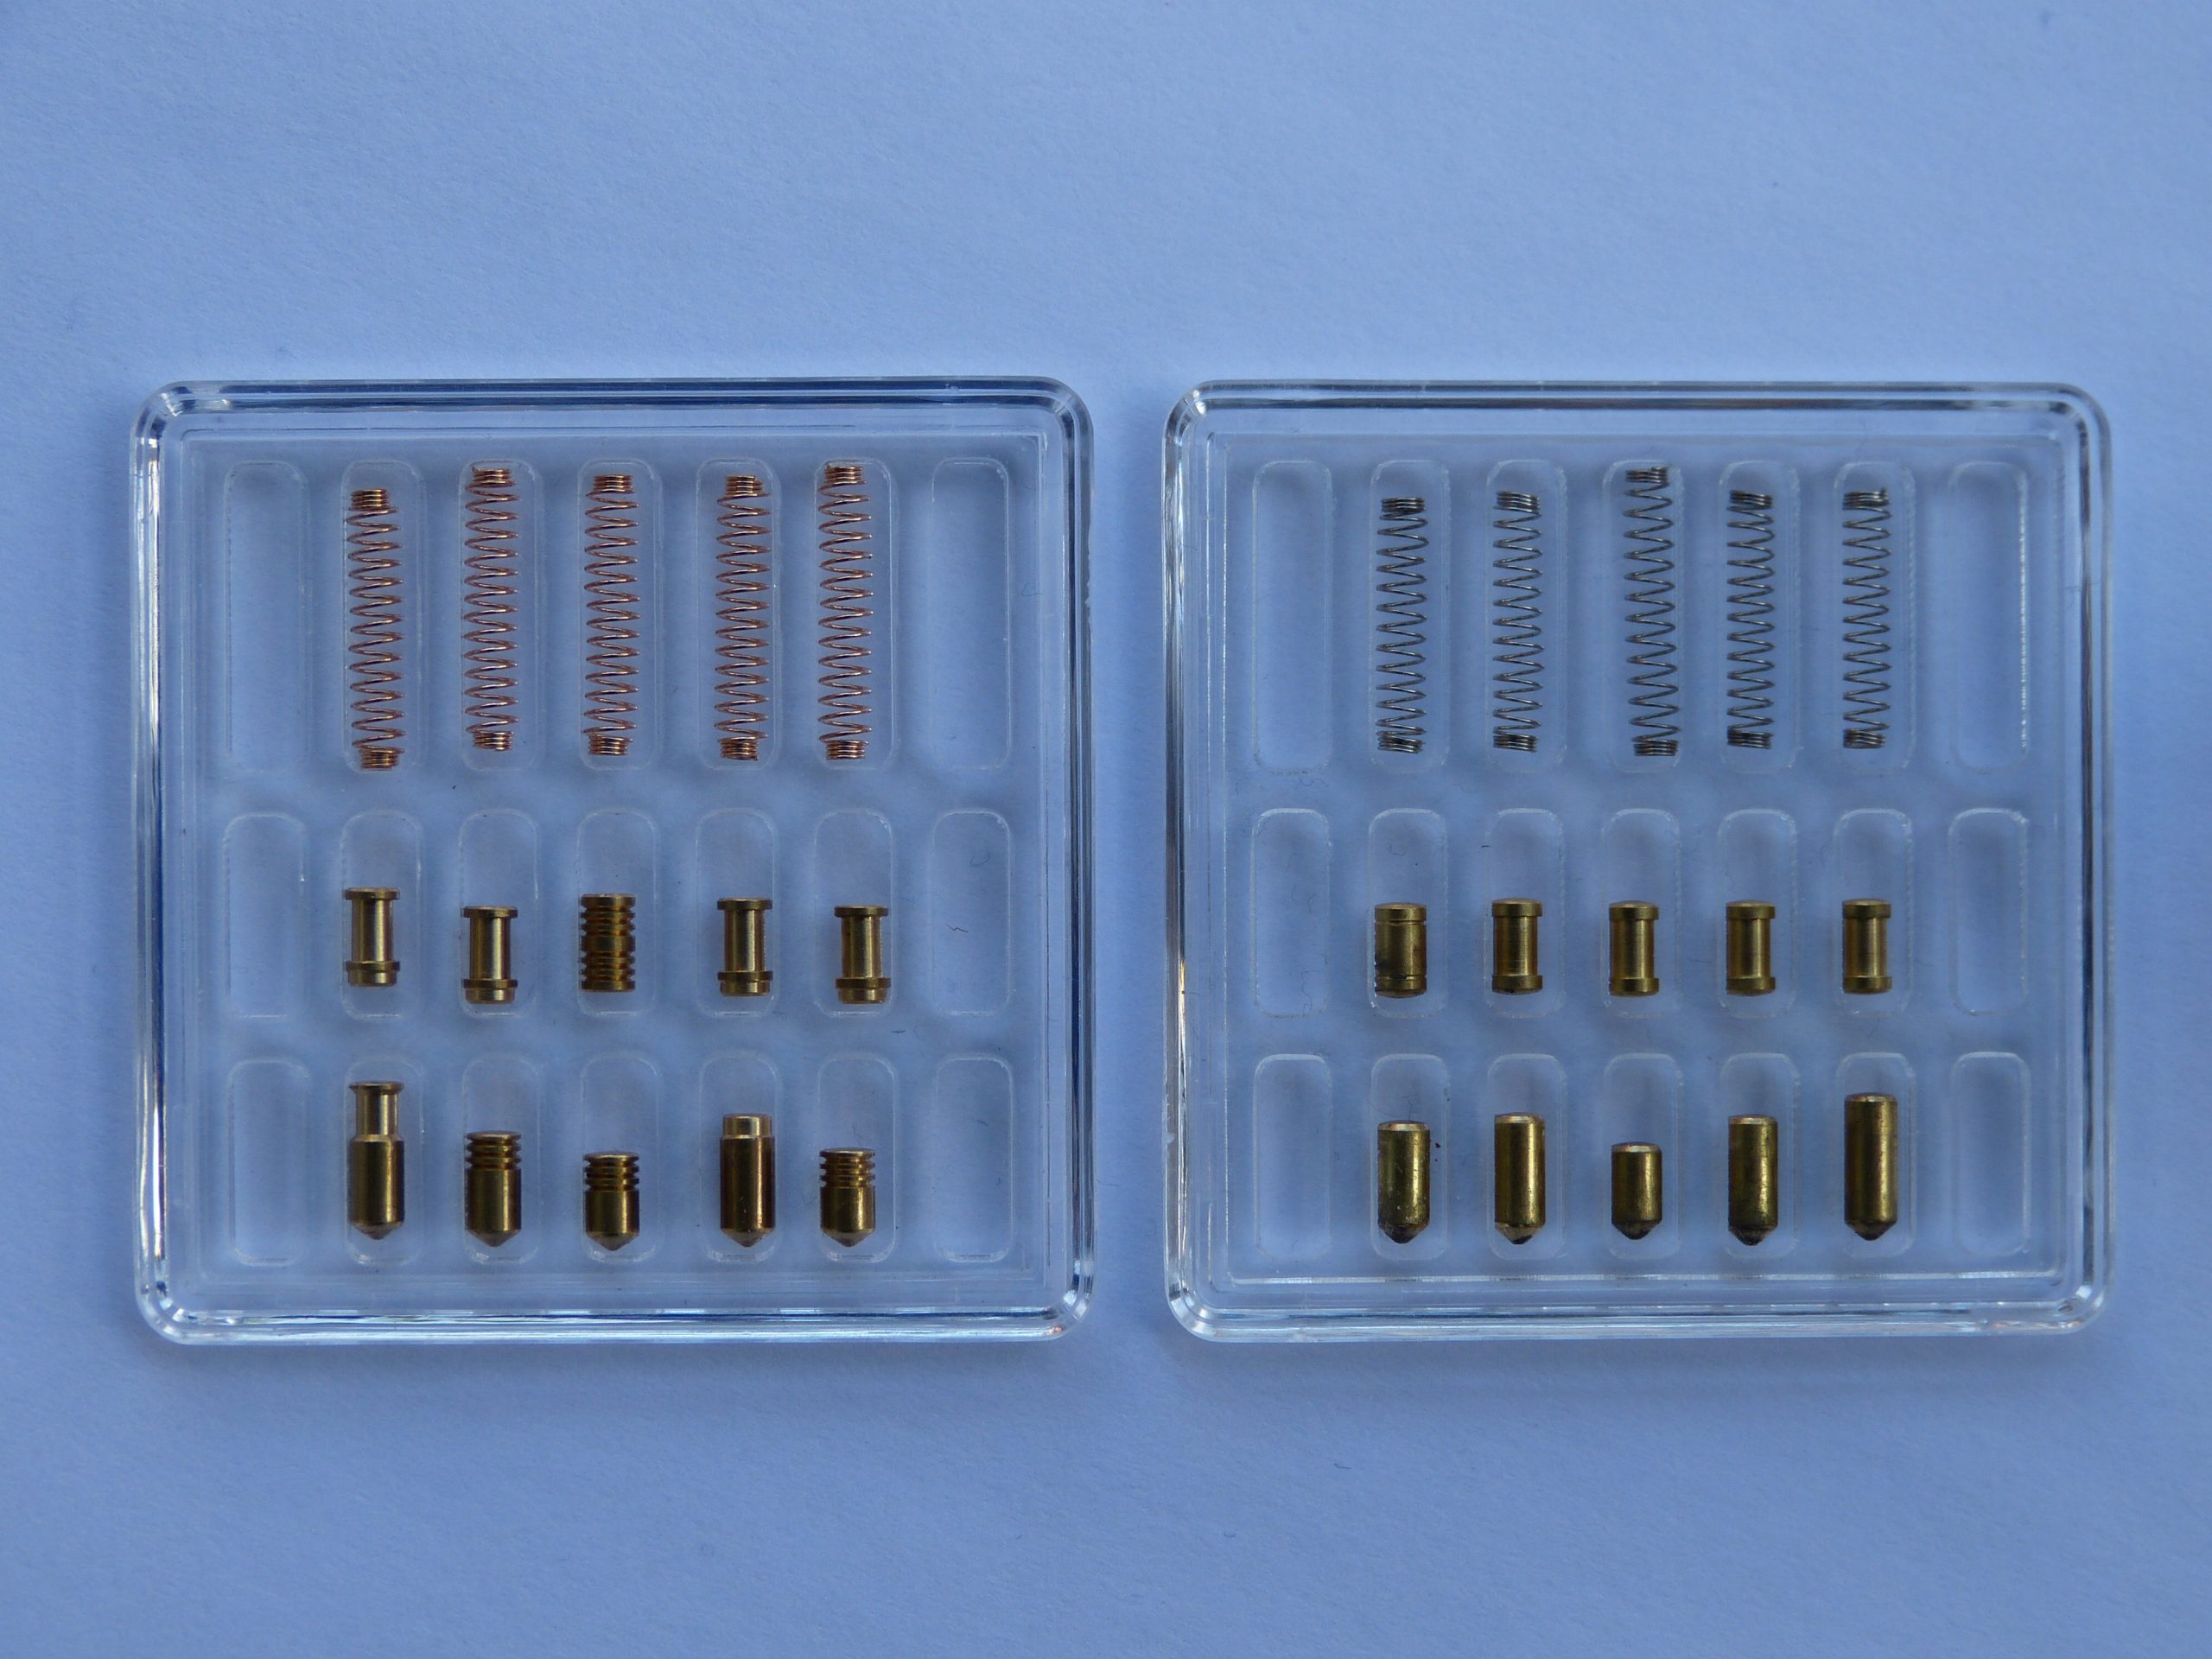
I’m considering this 30% an upper bound, as Abus C83 and CISA aren’t shipped with standard pins. The old locks are shipped with mostly spool pins, and the new ones have serrated, spool, and T-pin key pins and the same for the drivers.
Abus C83 old style vs new style pins.
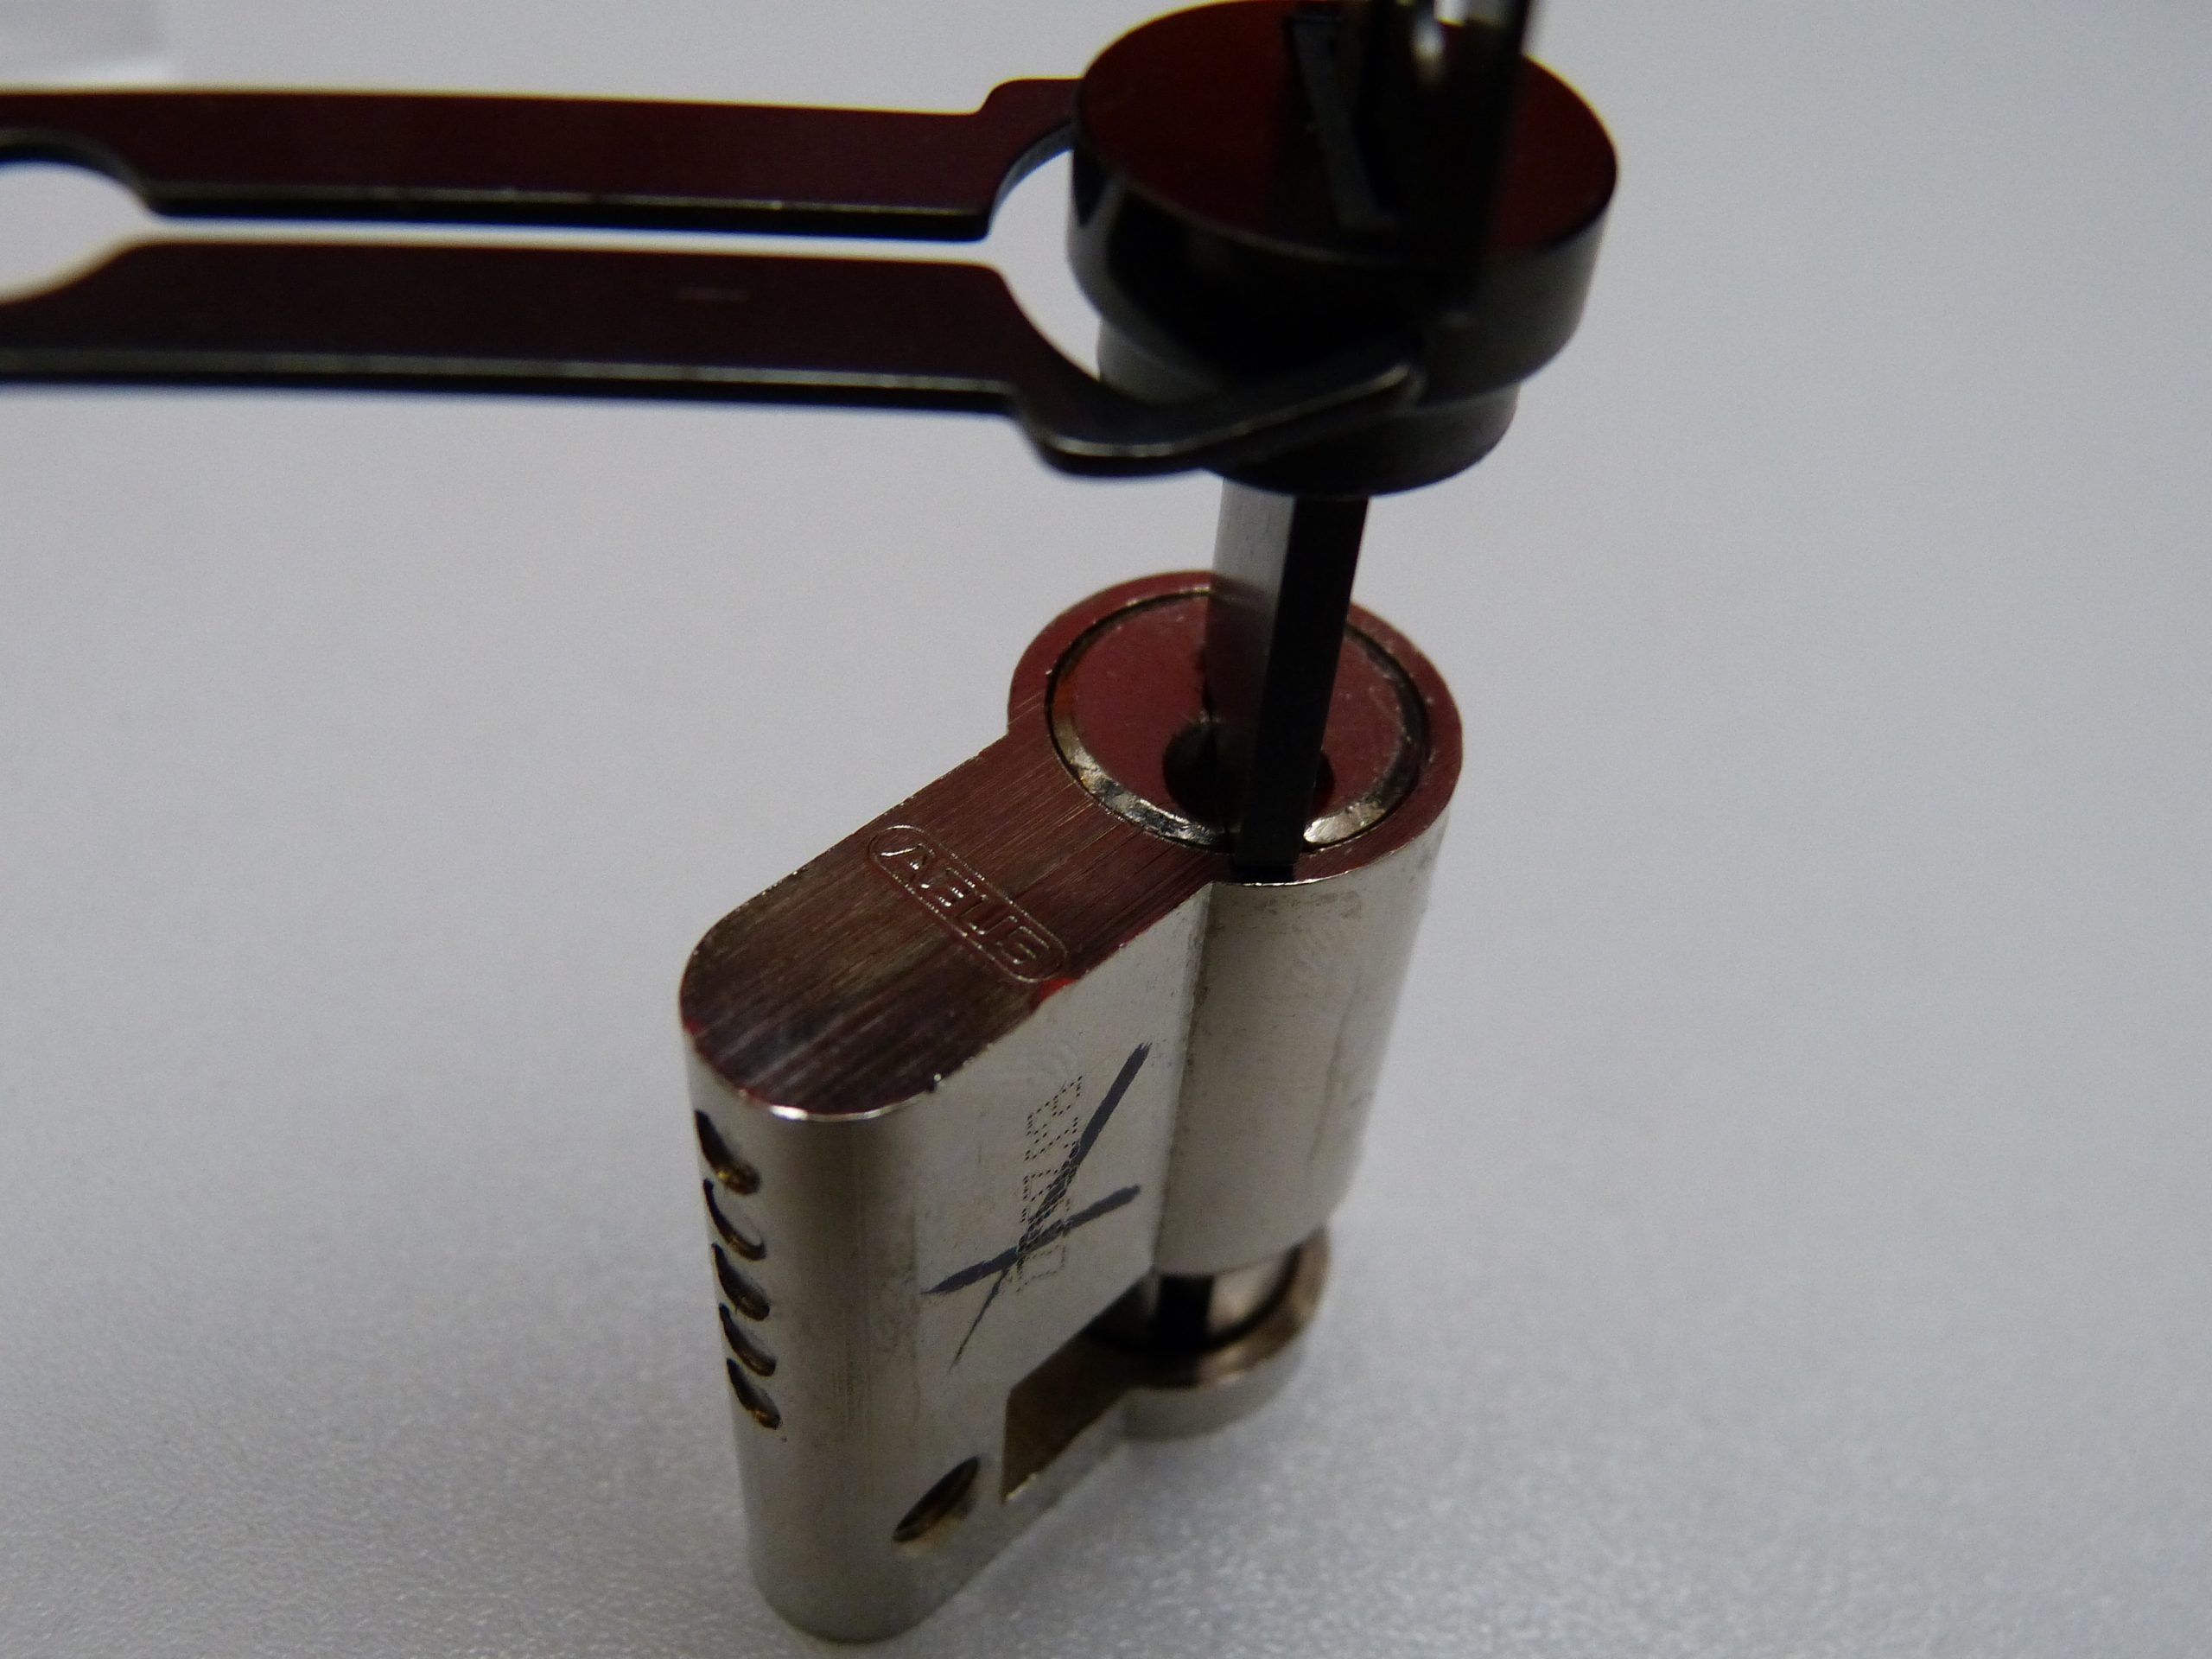
Besides the theoretical usability and security pins, what other flaws would make this tool suboptimal? The picking tip snags while moving from pin to pin. Furthermore, picking in the counterclockwise direction binds the picking tip, and it makes it difficult to differentiate between a binding pin and a binding picking tip.
Randomly pinned lock with standard pins, decoded to 52452.
Let’s wrap it up, this tool is sold at €50 and promises quite a lot. However, theoretical, it will only open 30% of all the locks it was designed for. Furthermore, the limitations of security pins and rotation direction will limit the functionality even more. A practiced lockpicker might be-able to overcome some limitations, or detect the tool will not work. A tool that only opens a very small subset of locks is not a very useful tool, and I can’t recommend it to pick these locks. However, as new pickers always struggle to find the binders, and this tool enables them to actually ‘see’ what they are doing, it could be a game changer for teaching.
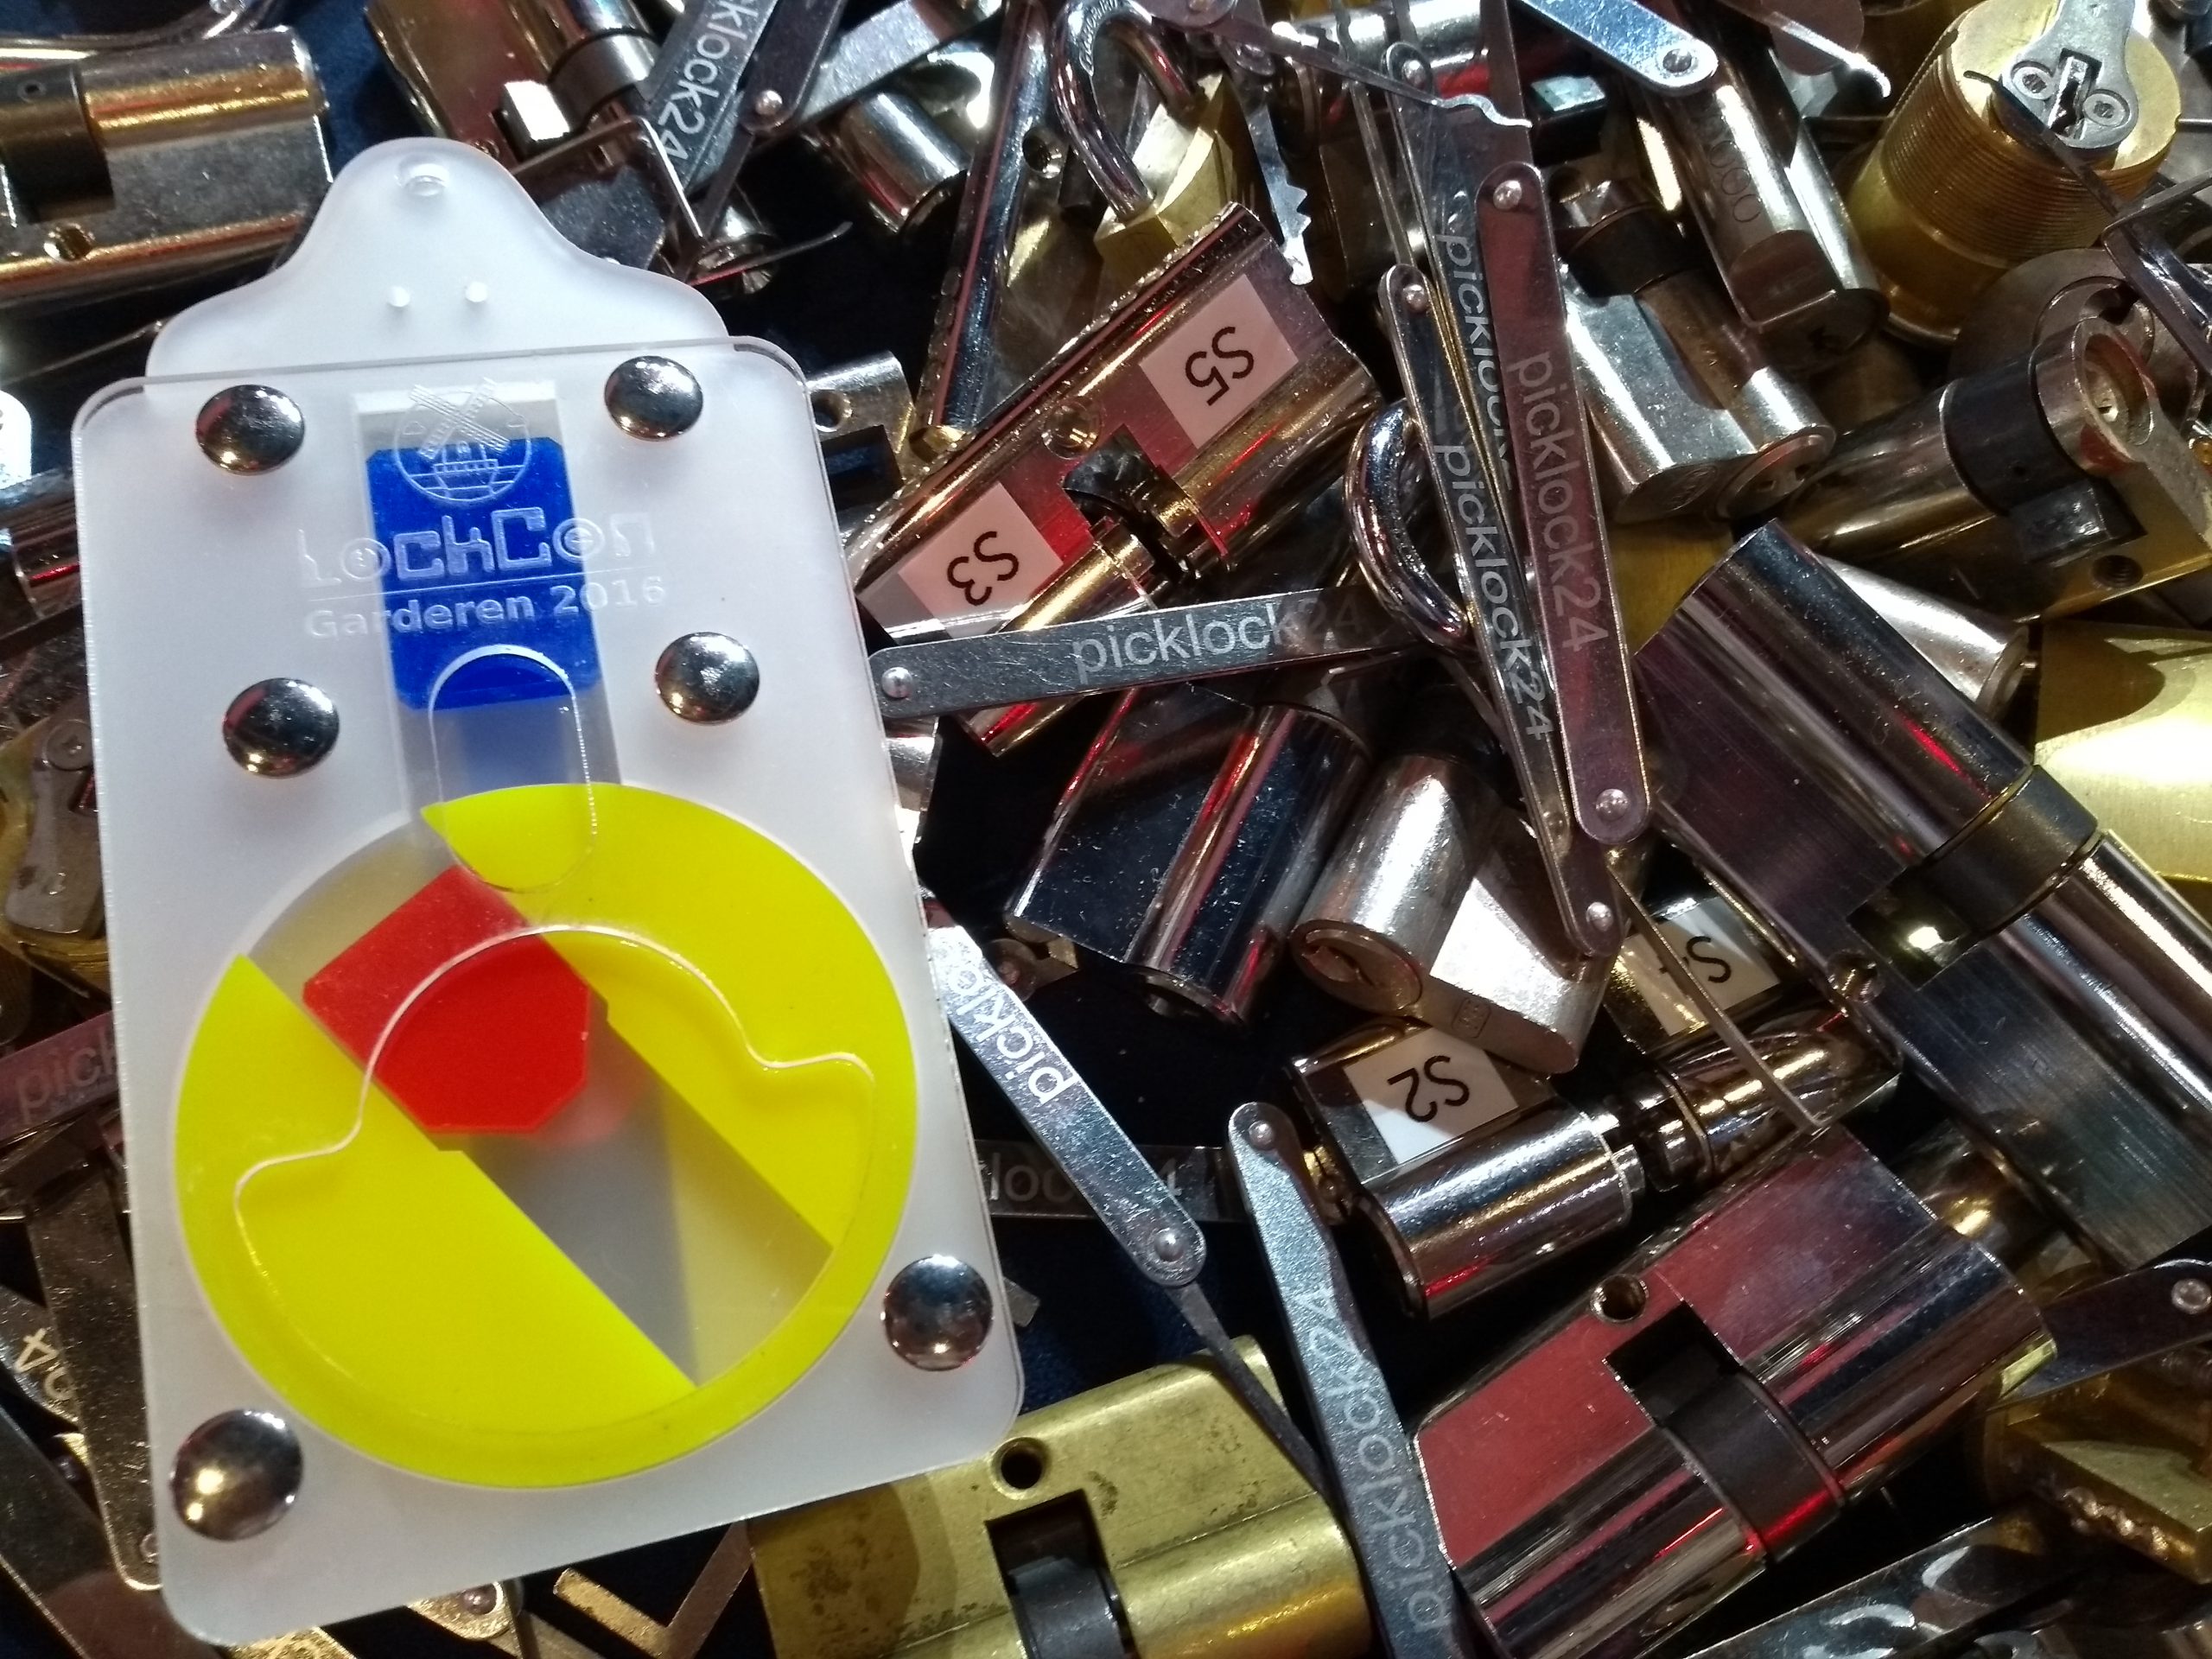
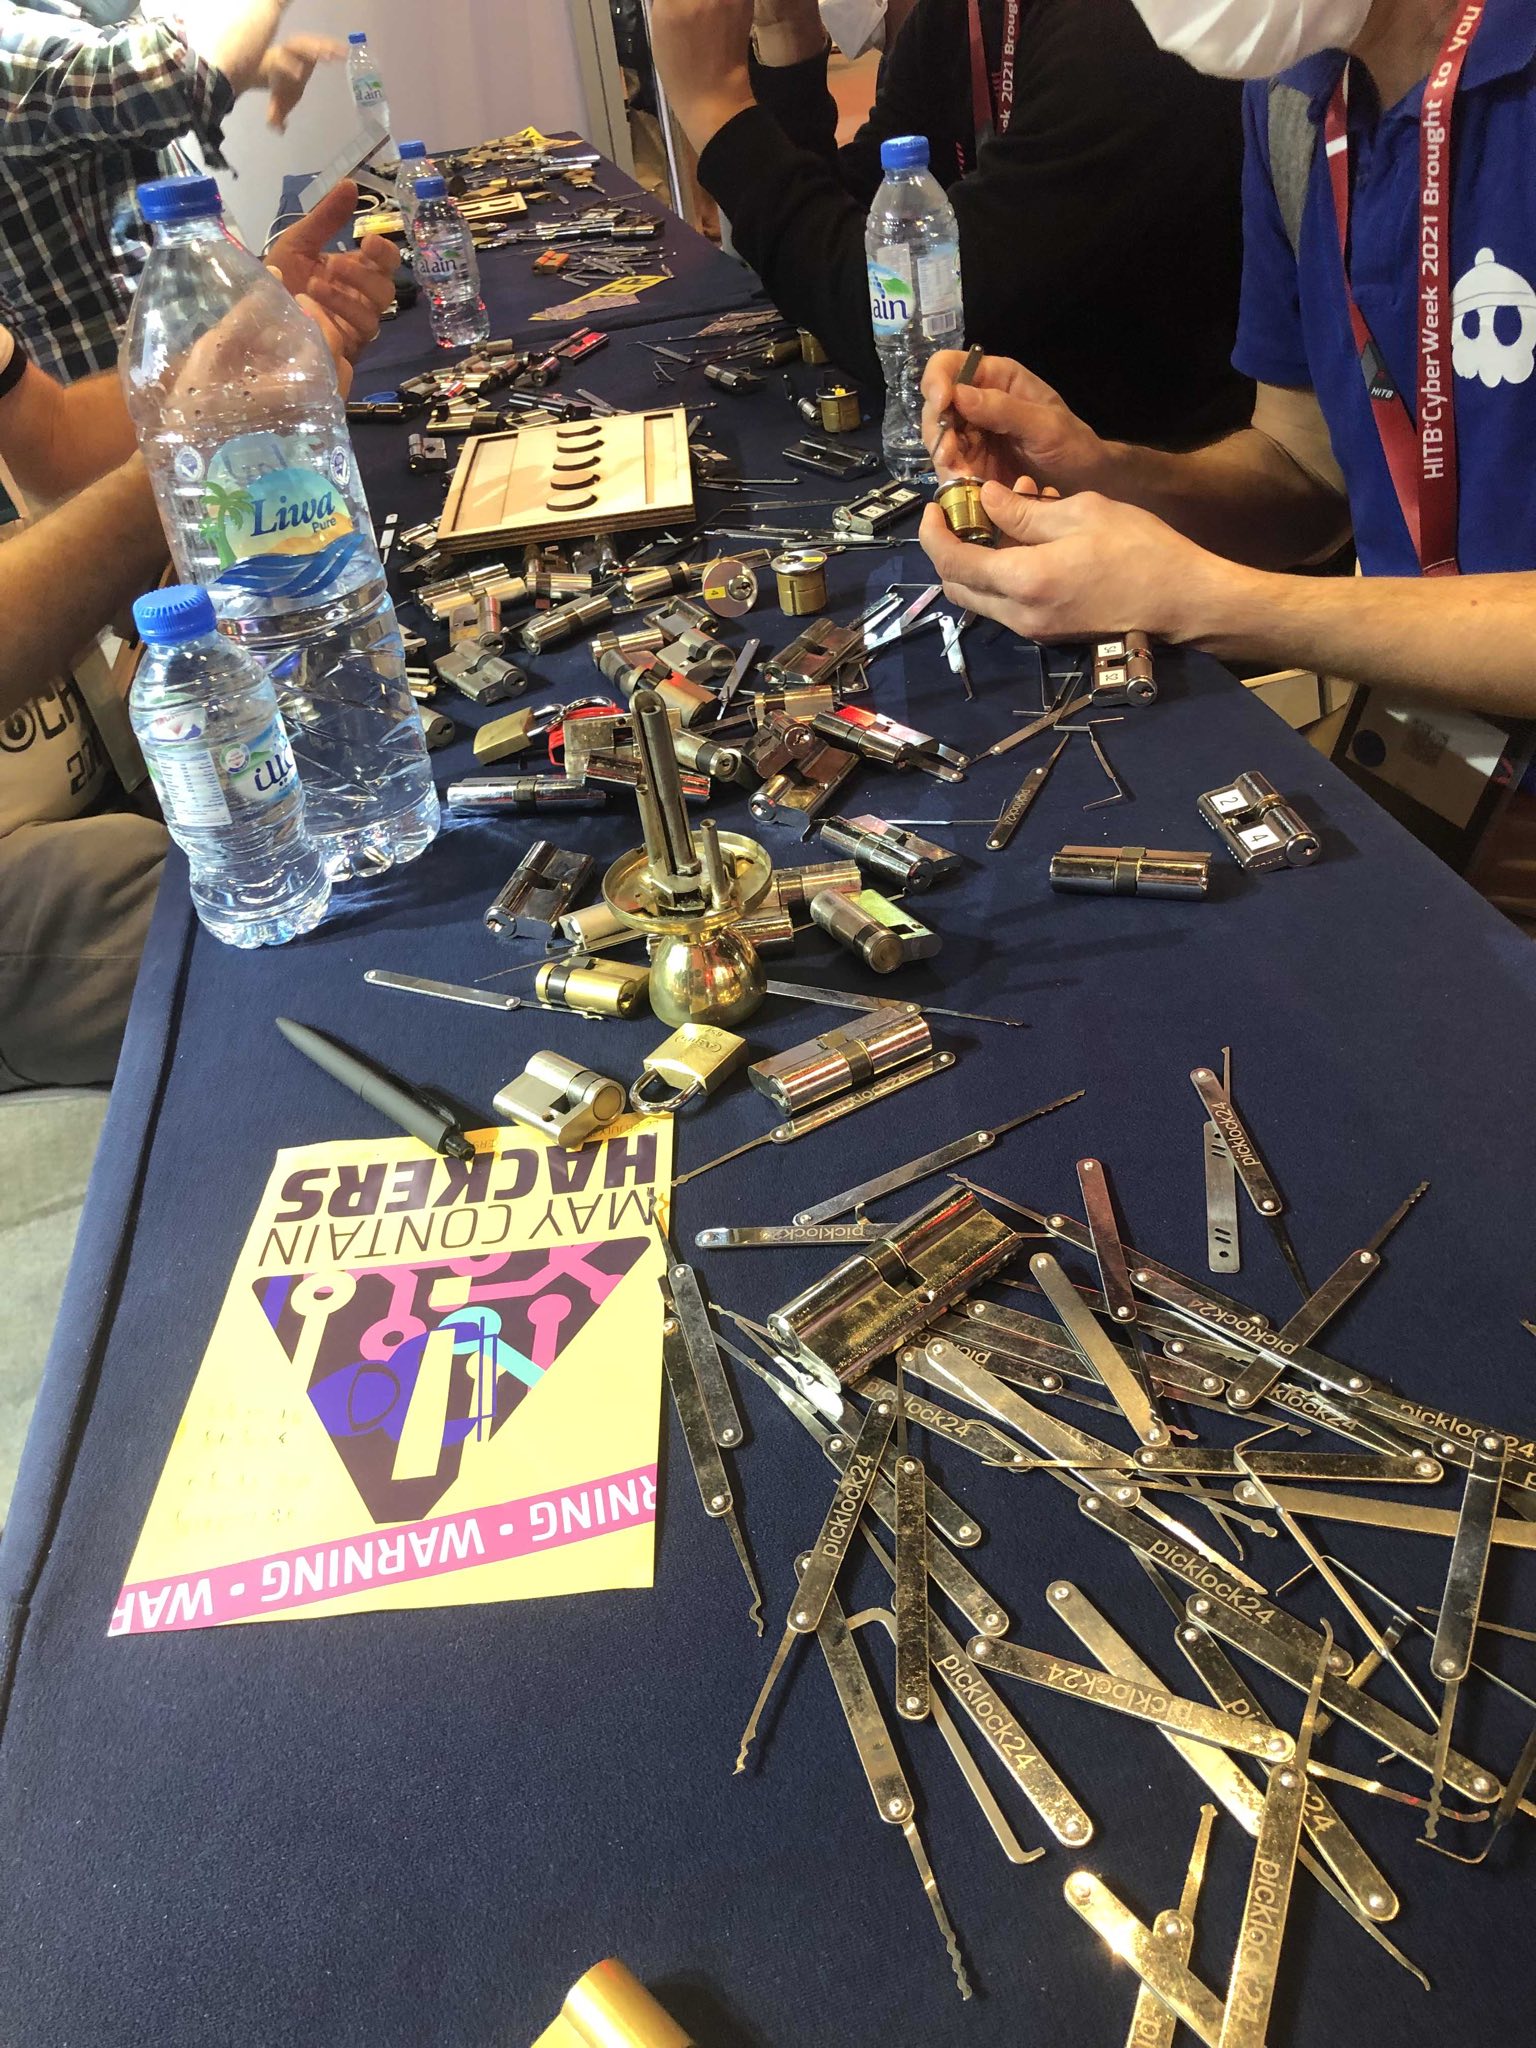
At the end of November, Jos, Walter, Rob, and me (Jan-Willem) went to Abu Dhabi to teach lockpicking at HITB CyberWeek 2021. We brought close to eighty kilograms of gear, including a hundred locks, plenty lockpicks, impressioning gear, safe locks, and more.
Photo of our first trip to Abu Dhabi in 2019
Why fly all the way to the UAE for a lockpicking village? Toool has run many lockpicking villages, some years more than a dozen. When the Hack in the Box conference came to The Netherlands in 2010, Toool was there with a village and ever since we’ve run Lockpicking Villages at HITB Amsterdam. In 2019, we were invited to run the Lockpicking Village at HITB CyberWeek in the United Arabic Emirates. As it was a great success, we accepted the invitation without hesitation when we got it again this year.
Getting to the UAE was fairly straight forward, even with all the measures. We send in our documents, including vaccination history. Travel was slightly terrifying as we required a tested before the flight, and a positive result would cancel the trip. Luckily, all results were negative, and we were allowed to fly. The flight itself was 6h, and we arrived at Abu Dhabi near midnight.
The first day was to relax and recover from the trip. After breakfast, we explored part of the city. It’s hard to convey the scale to which Abu Dhabi is build. The buildings are large and the space between them are usually three lane roads. It doesn’t help that even in November, it was 30 degrees Celsius outside. We found the ATM, grocery store, and the Abu Dhabi National Exhibition Centre, even though it took most of the morning. We spent the rest of the day at the rooftop swimming pool of the hotel and the welcome reception in the evening.
The conference started early the next day. As always, setting up the village was rather quick. We created a few different areas within the village, one focussed on lockpicking, and another on impressioning and safe cracking.
Even through this was my 20th lockpicking village, it never gets boring. I was very excited to try out a few new things. For this trip, I’ve created a large set of progressive locks, with multiple brands, and pin styles. I’ve also brought multiple new slide decks on lockpicking, impressioning, and safe manipulation. Walter brought a variety of combination locks, from a small padlock to a dial safe lock, and we also brought a full impressioning kit, as it’s a great joy to demonstrate the technique.
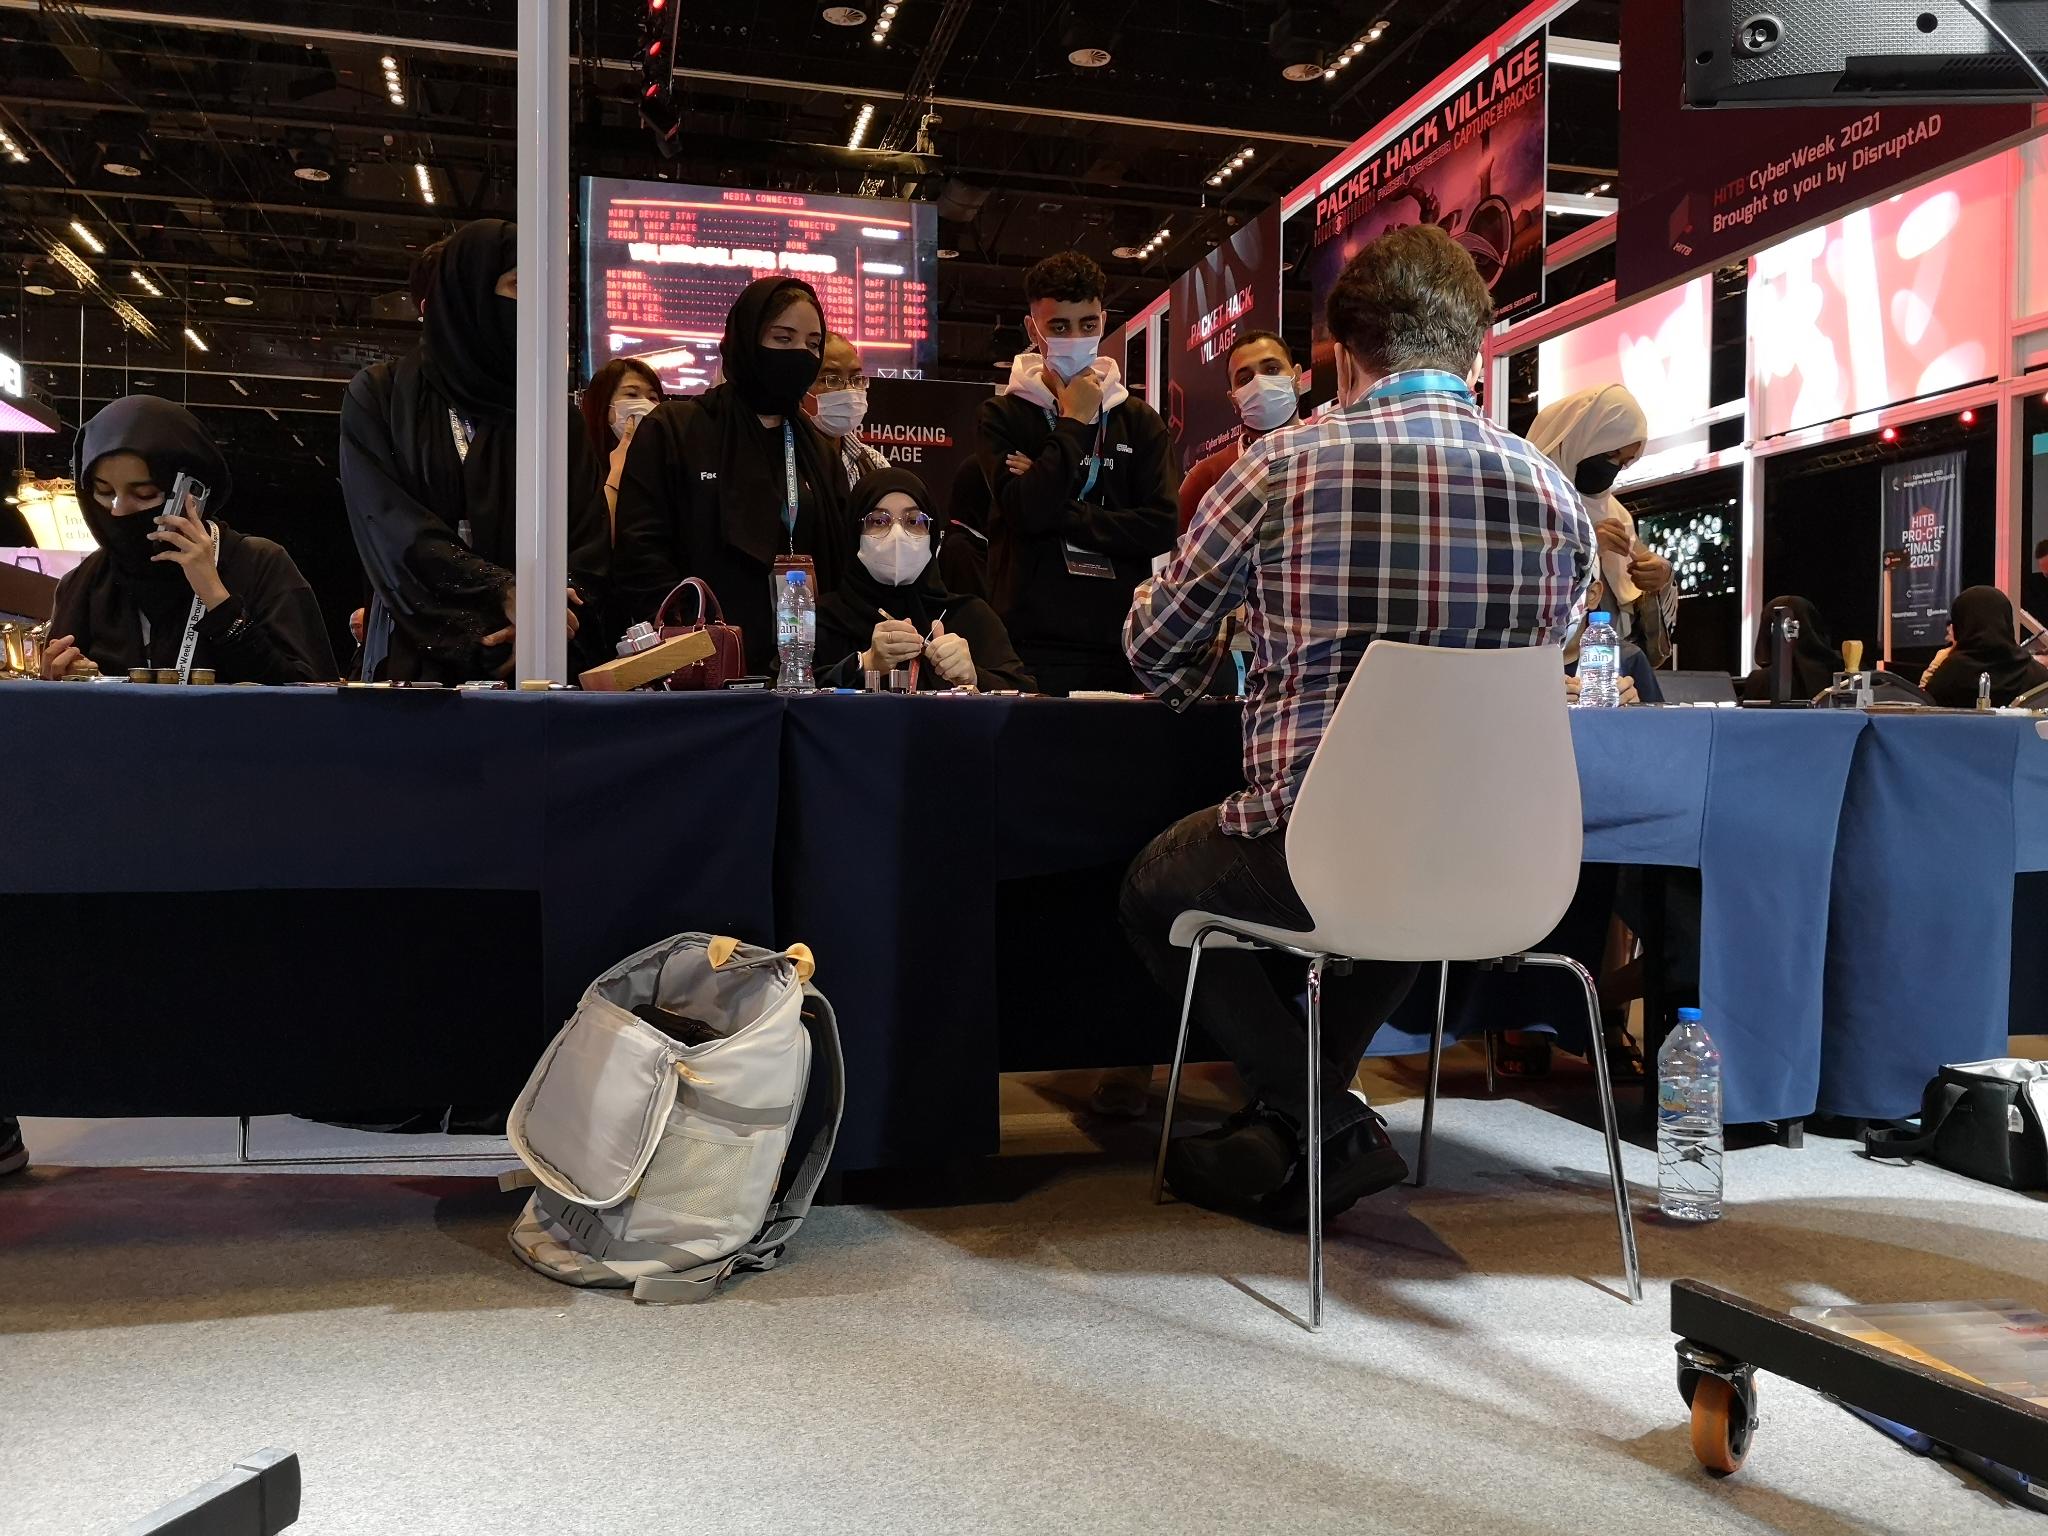
We tried to gather people in small groups as much as possible, as it’s a lot more efficient. From early the first day, the lockpicking village was packed. Some attendees stayed for ten minutes and had a great time by learning the basics. While some stayed for hours and opened ever challenging locks. Most notable were the participants that kept returning to the village throughout the event, it was very clear they got the bug. We have taught between two hundred and three hundred people, and between five and fifteen people at the time.
After we packed our gear at the end of the event. We decided to take another dive in the swimming pool, before heading out to the after party at the Hyatt Capital Gate. I’ve cut the party short as our flight back was early in the morning.
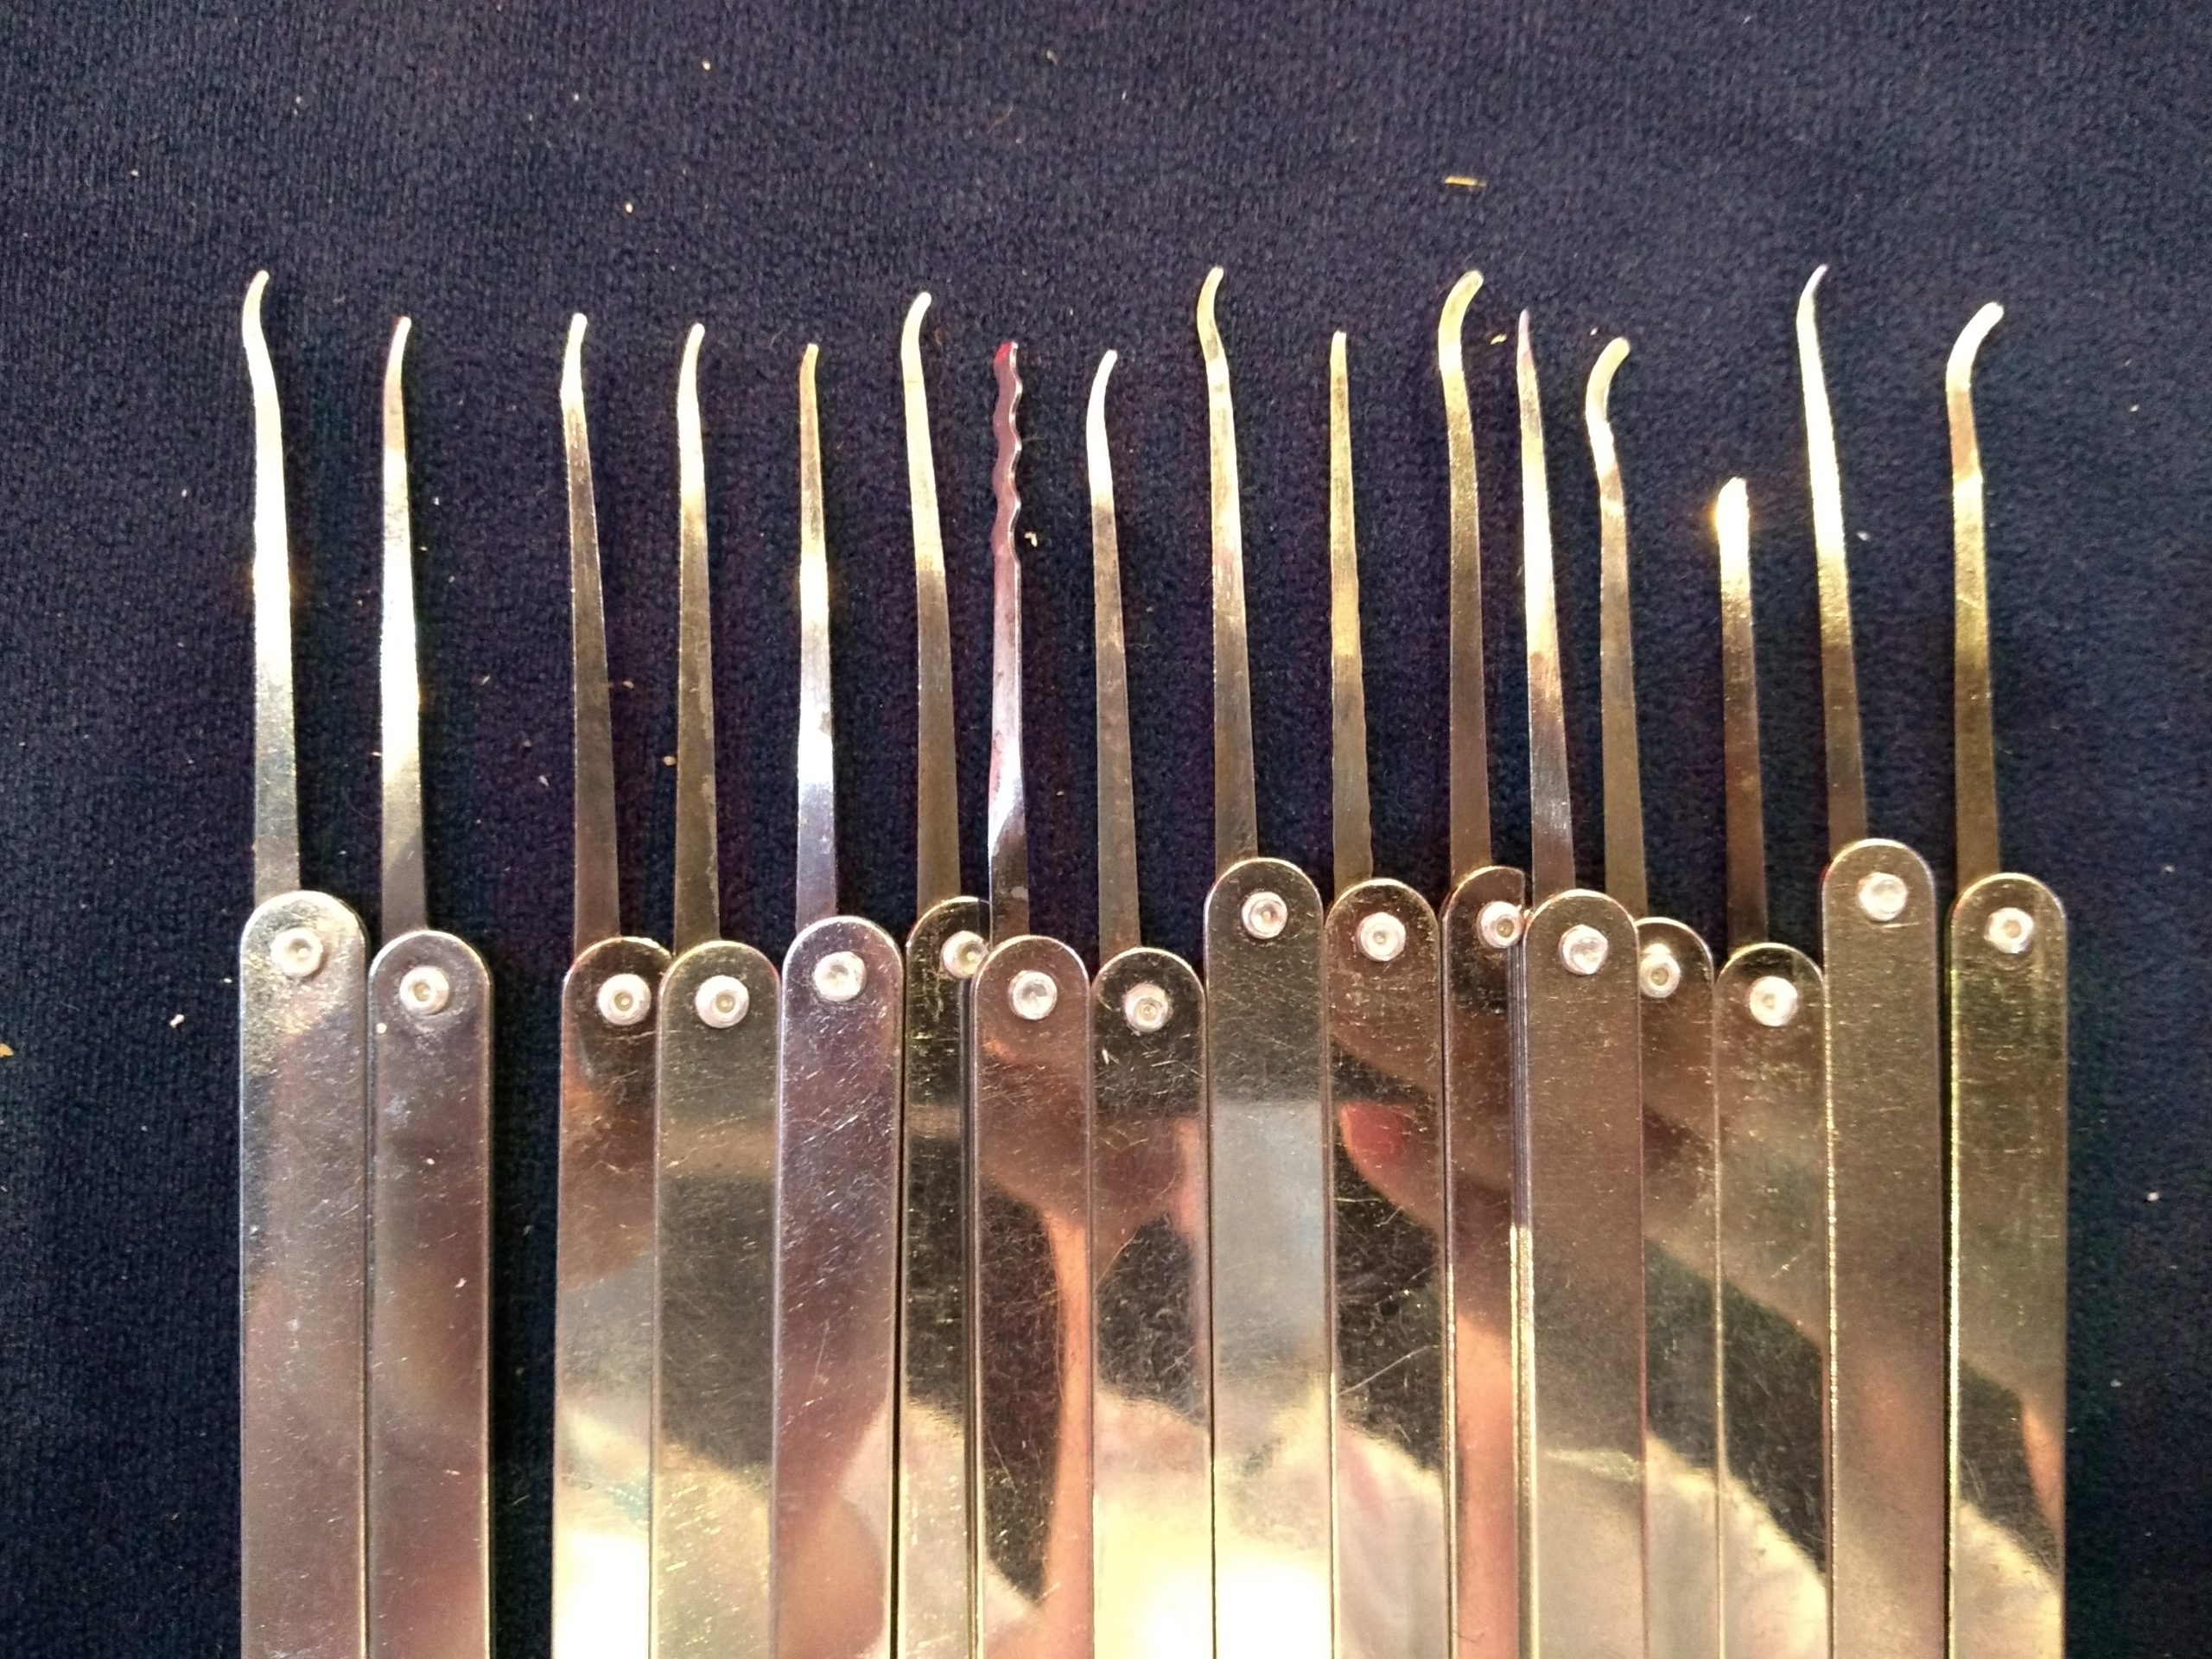
The casualties of this event, insert lock pick and twist.
Wrapping up, we had a great time at the HITB CyberWeek 2021. For the next one, I’m likely to take more days of holiday and do more sightseeing and other activities in Abu Dhabi. Even as a midweek, it was well worth the time.
We would like to thank the HITB crew for inviting us and arranging everything. Furthermore, we had a great time at the event and hope to see you again at HITB Amsterdam.
Mandatory impressioning opens.
Blog by Jan-Willem Markus. Photo CCBY4.0 Toool Blackbag.


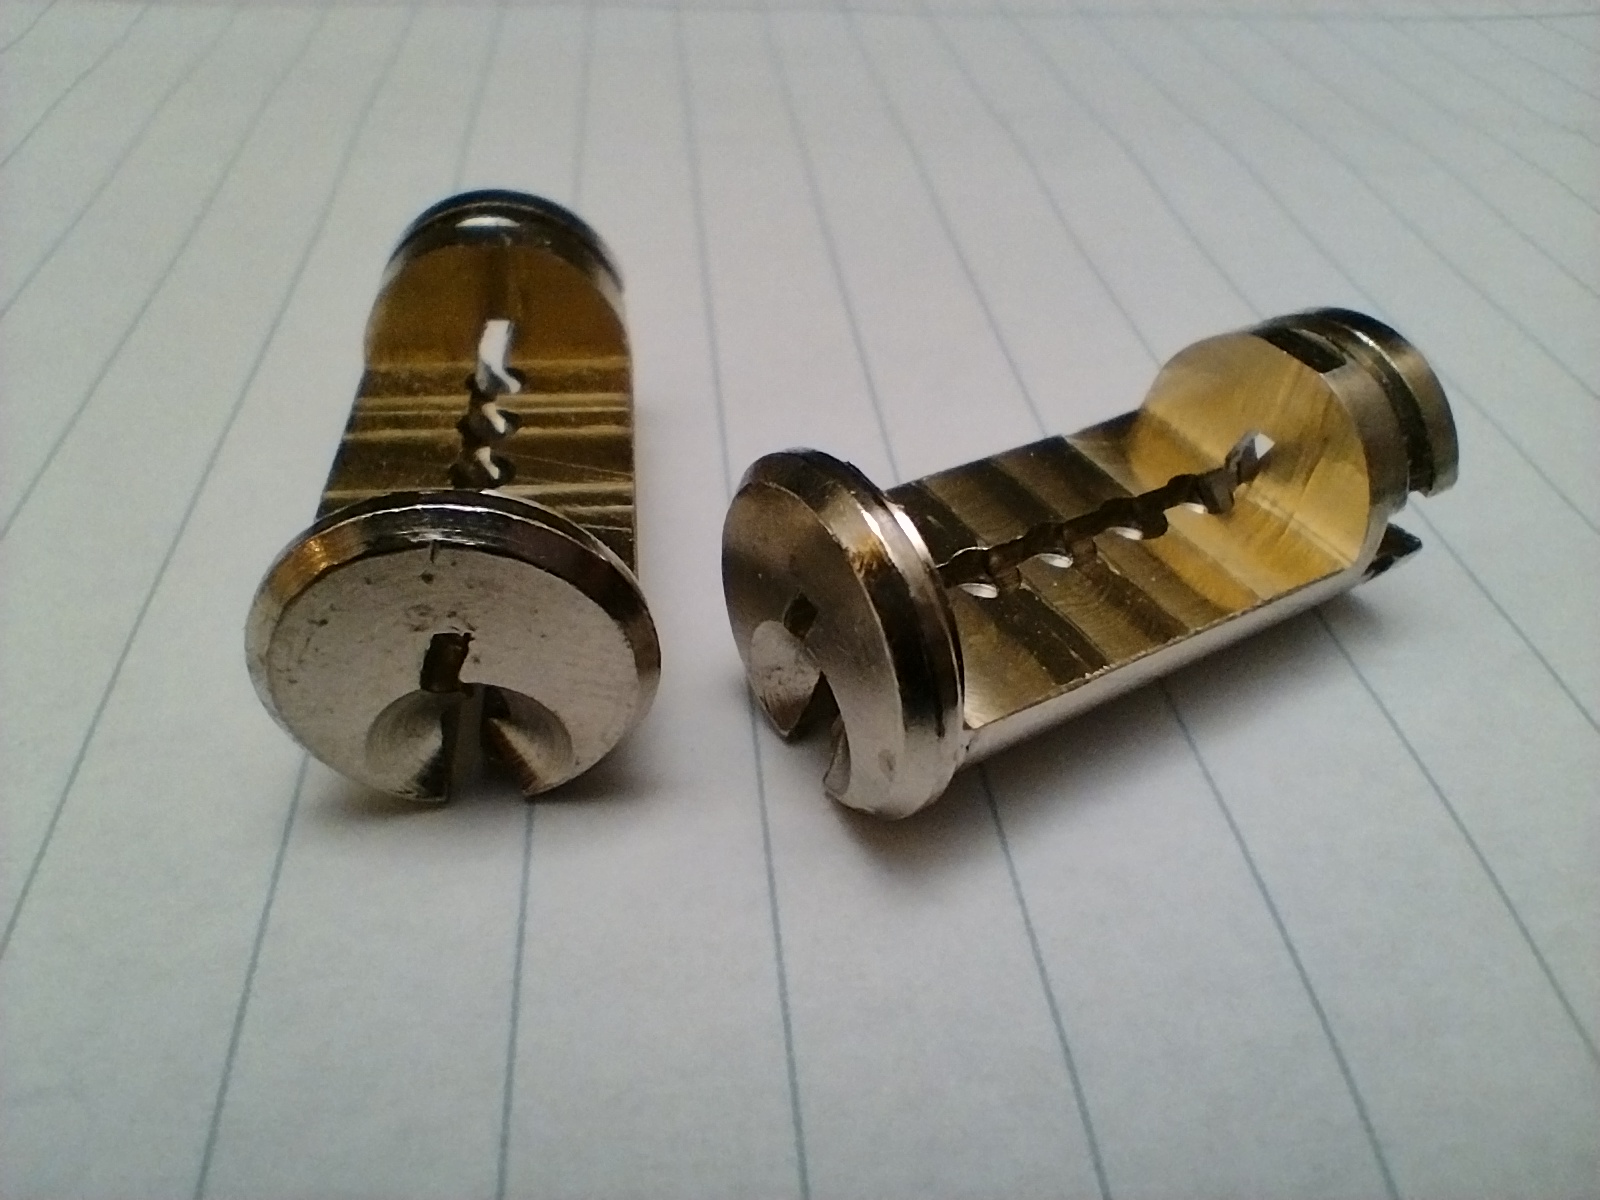
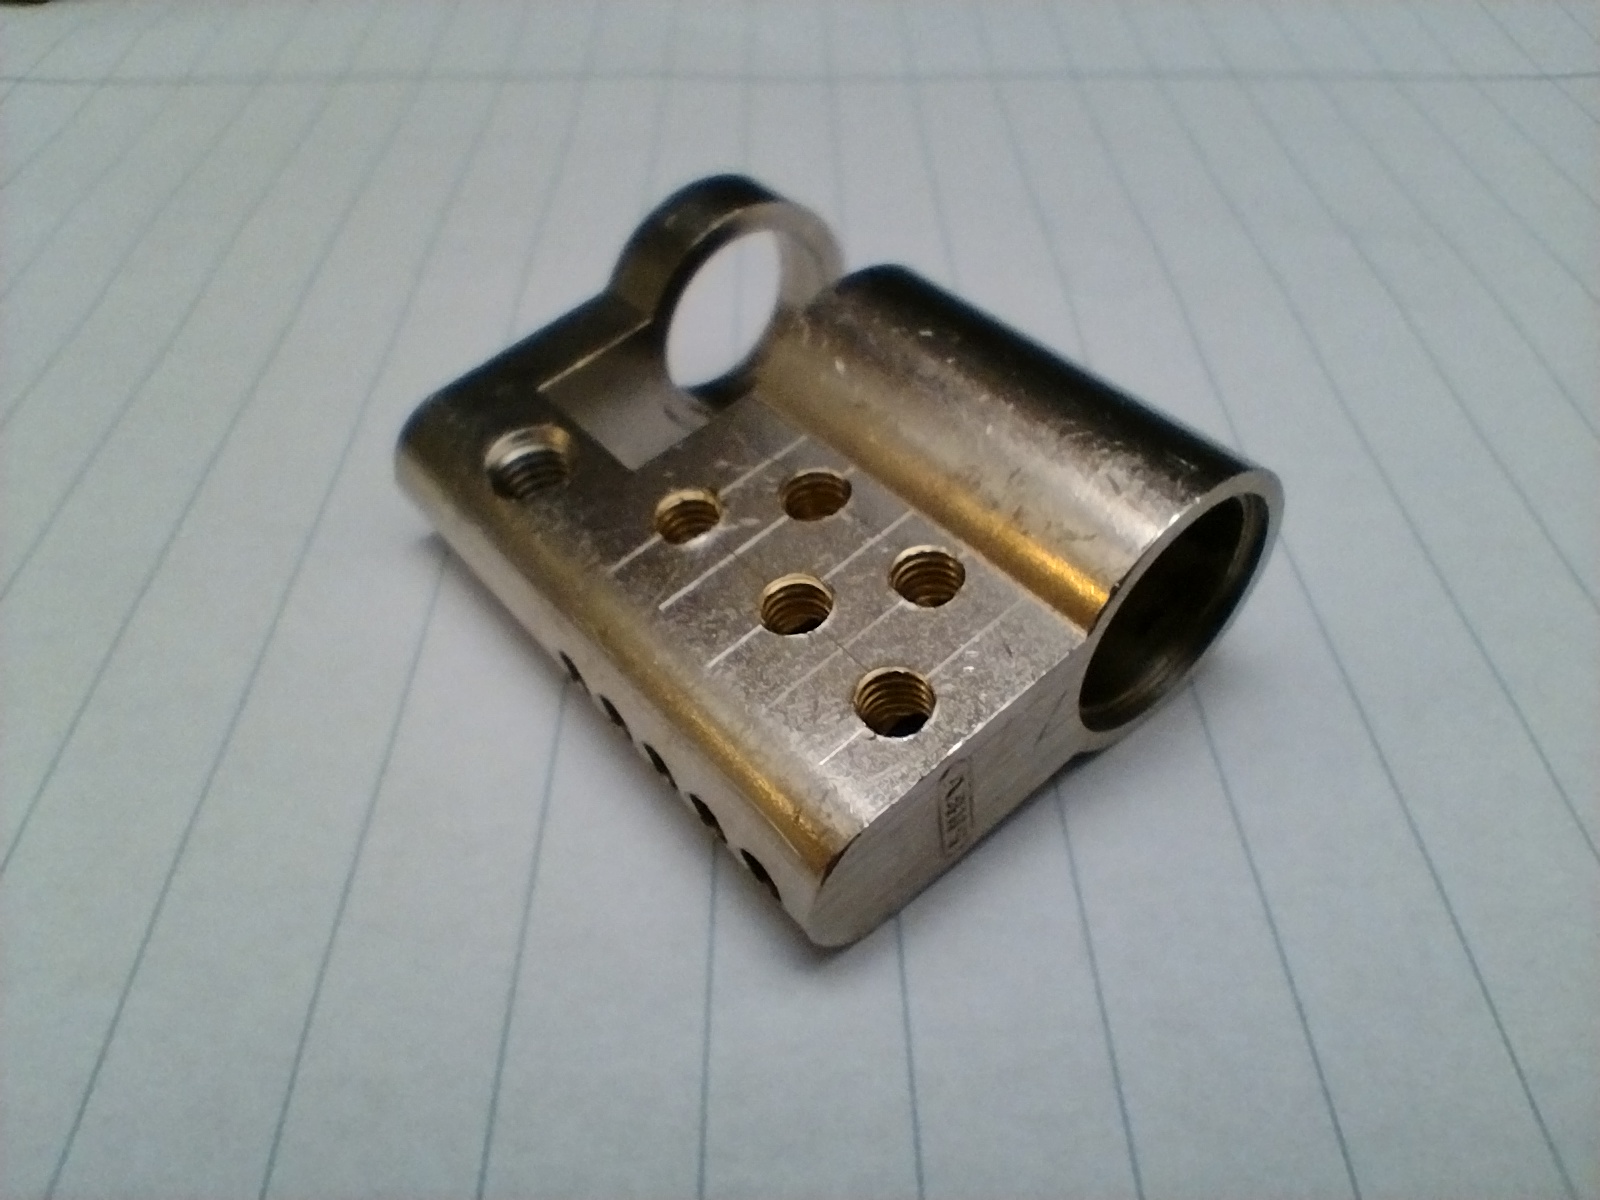
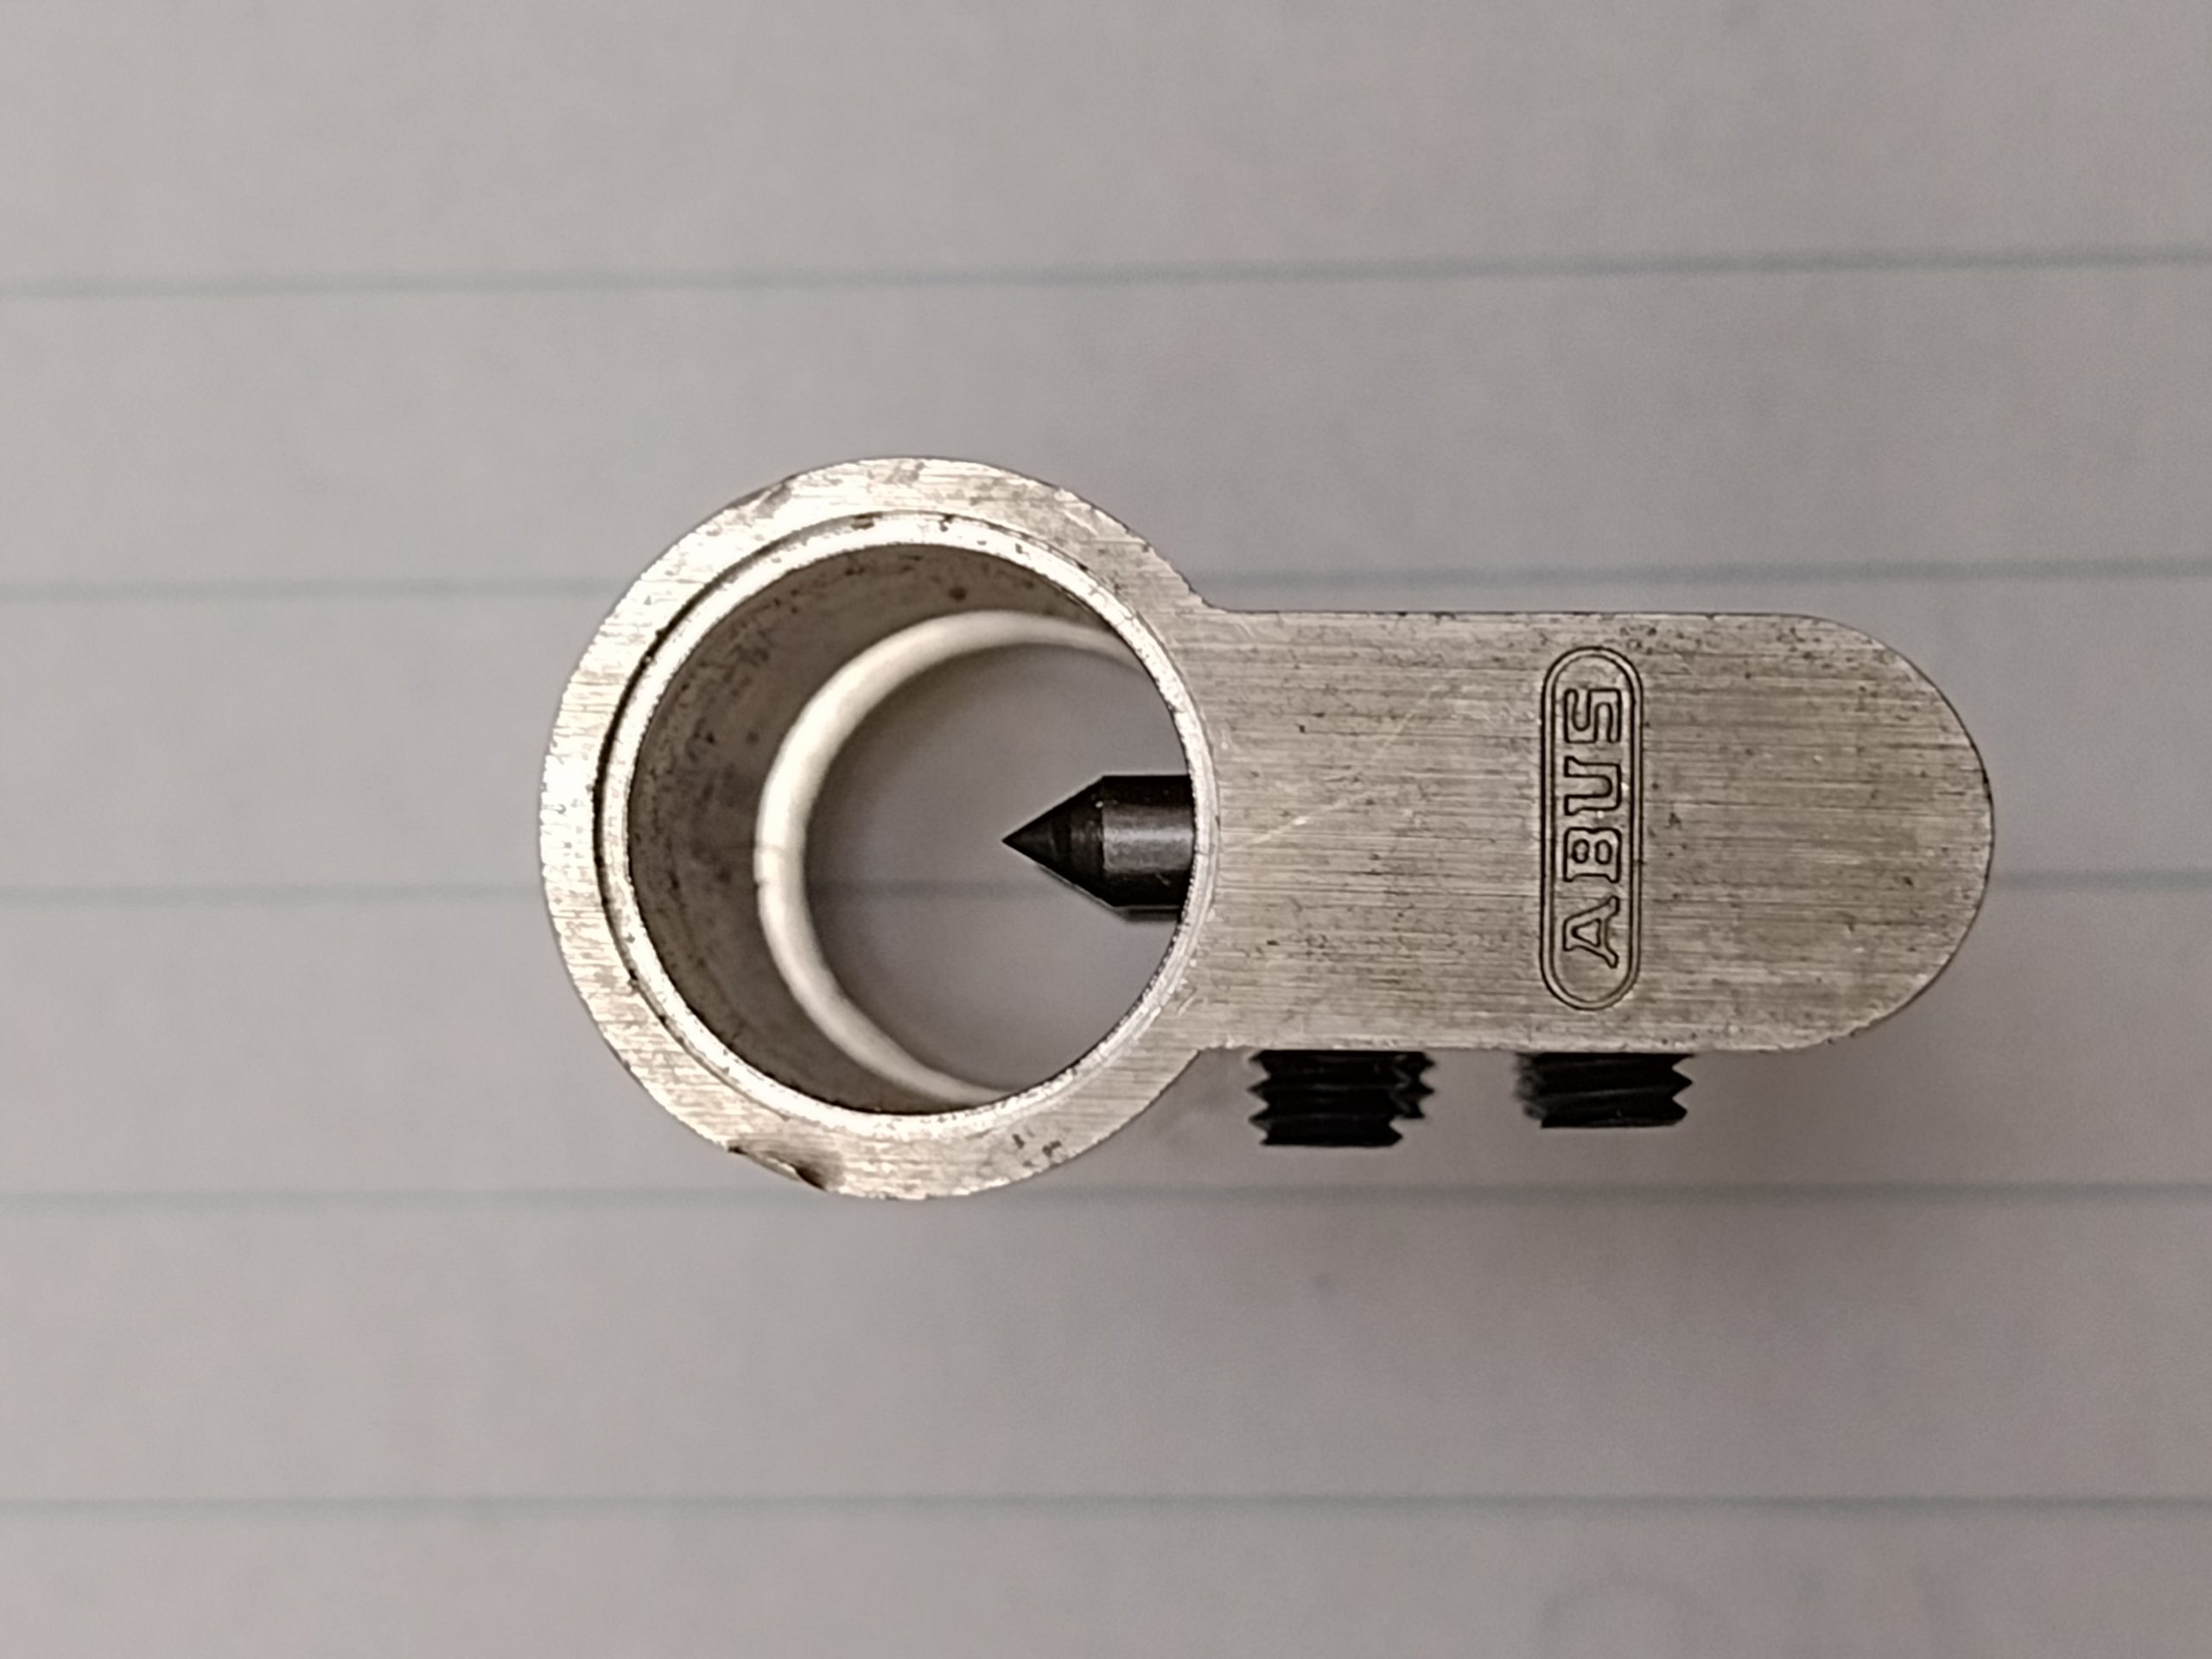
 I’ve only attempted cutting an F3D when I got a couple of broken ones. This was a good idea, because the first 3 attempts were failures.